
Welcome to Shibari 101, your chance to learn the building blocks of Japanese rope bondage! If you missed them, check out shibari’s history, rope basics and safety, and brush up on the foundational single- and double-column ties. Today we’re doing a shibari chest harness tutorial.
In shibari, a chest harness can stand alone or act as a base to secure other ties. This version is simple, but you can get more complicated and decorative with it once you learn it.
Shibari Chest Harness Tutorial
First, position the bight at the center of your bottom’s back, and wrap the rope once around your bottom below the chest and draw the working ends through the bight. Make sure the part that crosses over is in the middle of the back on their spine. The ropes should be snug, but not so snug your bottom can’t breathe.

Bring the working ends back around the front of their body again, going in the opposite direction. If you don’t switch directions the rope won’t stay tight and will fall off the body. When you get back to the center of the back again, pull the working ends up through the loop you just created on the opposite side of where you pulled the rope from — the side with the doubled-over rope. Make sure the ropes are not crossed and line up neatly.
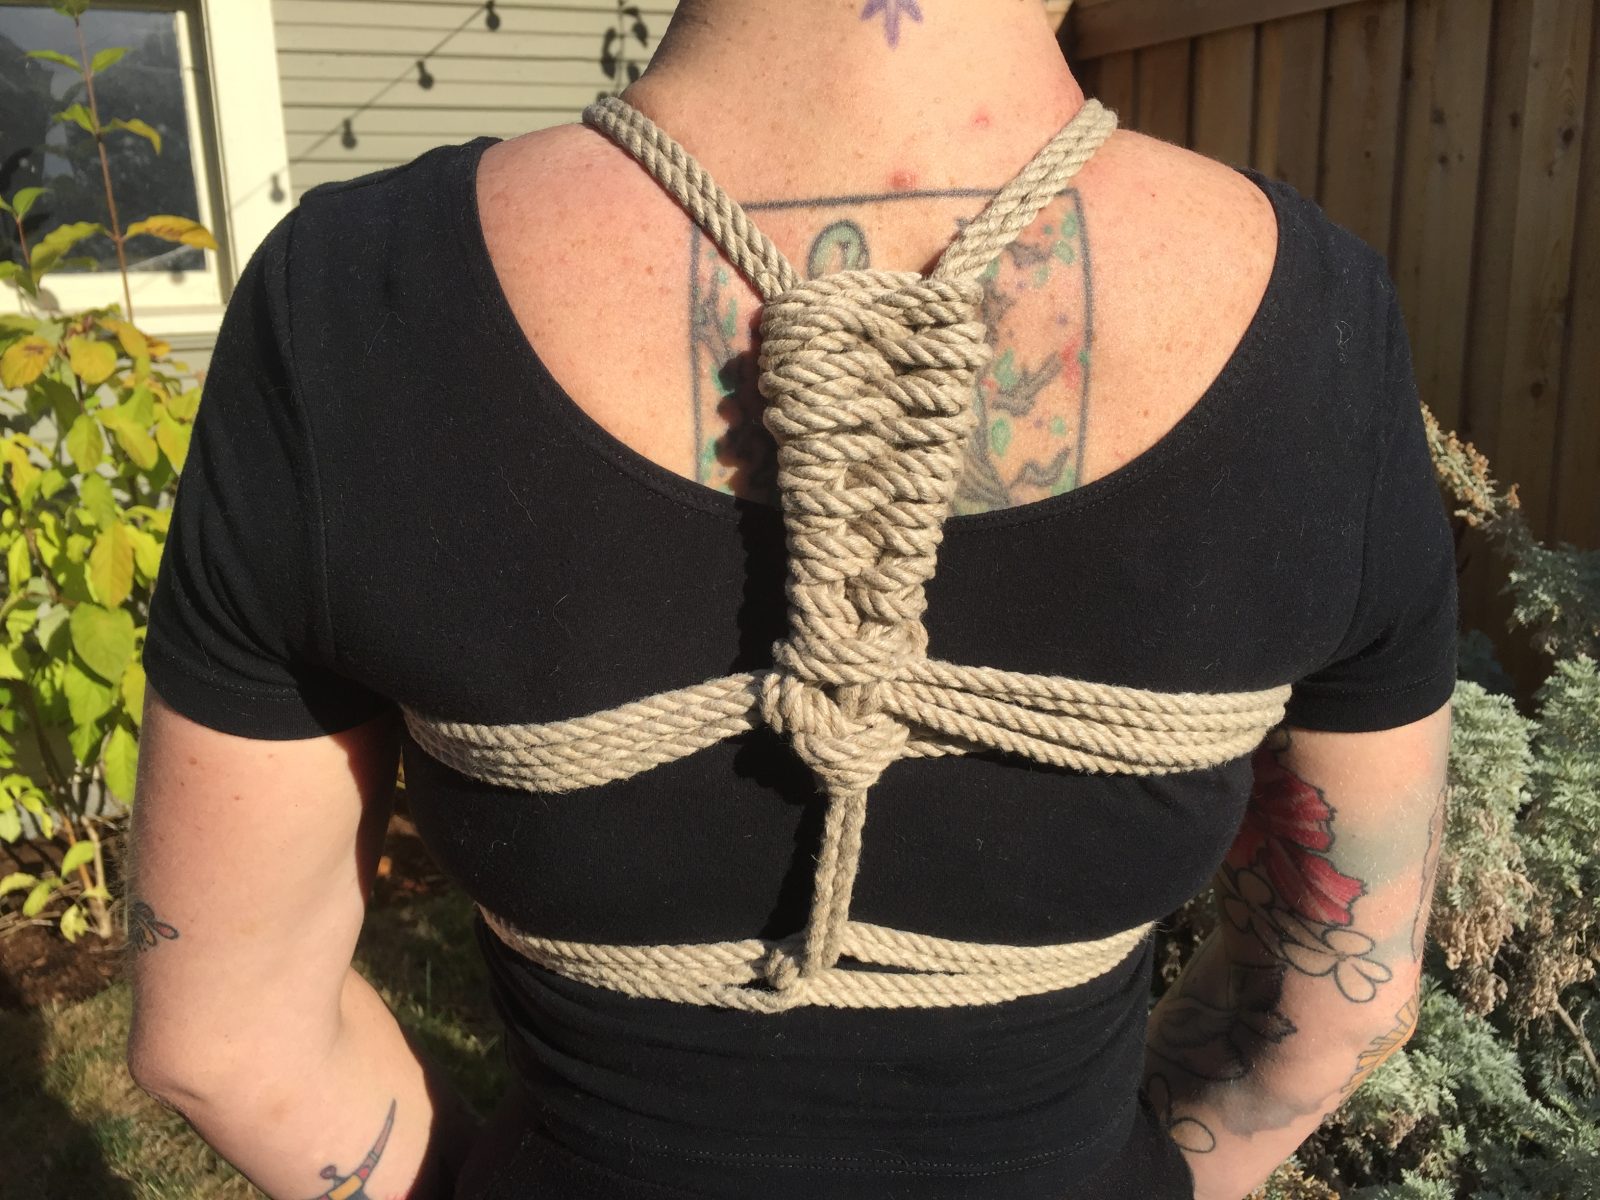
Reverse direction again and bring the working ends around the body one more time, this time above the chest. Wrap the working ends underneath the rope stem (in this case, the section of rope that goes vertical along the spine).
Reverse direction around the body one last time, making sure your ropes are above the previous wrap of ropes and lay flat and neat. Bring the working ends through the loop created by reversing direction — the side with the doubled-over rope.
Take the working ends and bring them over the shoulder to the front of your bottom, and bring them over the top ropes in front then under the bottom ropes. Pinch the bottom ropes together so they don’t lose their shape while you reverse direction with the working ends. Bring them back up and under the second top ropes. You’ll probably need to extend the rope at some point here (see the bottom of the page.) Make sure the knot is in a comfortable place for the bottom. You can move the knot a bit down the first rope if not.
Bring the working ends over the other shoulder and around to the back of your bottom. Pass them over the top right ropes, and up diagonally between the top left ropes and the left shoulder rope, as shown.
Bring the working ends over both shoulder ropes, and under the right top ropes.
Make a half hitch on the stem. A half hitch is made by making a loop in the working ends, bringing the ropes over the stem, behind the stem, and back through the loop. Pull to tighten. You can wrap your excess rope around the stem, and/or weave it up the shoulder ropes in a figure-eight weave, or leave the rope length to tie to an additional arm or leg tie, or tie it to a hardpoint (not for suspension).
Congratulations, you’ve made a basic shibari chest harness!
Extending Shibari Rope
You’ll need to extend rope when you run out. This is one of several ways to do this.
With your second rope, make a loop with your hand by putting your hand inside the bight, grasping the ropes, and pulling the bight over your hand. You’ll have a loop, which is called a lark’s head knot.

Put the first rope’s ends into the lark’s head and tighten. If your ropes have knots at the end, you can bring the lark’s head knot down to the knots and stop here. If you have whipped ends, or you feel like it, continue to the next step.
Make sure the lark’s head is not at the very end of your first rope, and there’s about 5″/12cm of ends left. Bring both sides of the first rope together and roll the knot up.
That’s it!


Comments
I’m loving this series – thank you!
Thanks!!!
Are there any harness designs for anxiety? I’m wanting to learn some for my wife when she starts getting stressed and anxious.
I second Snaelle!
I especially like the gifs that are clear and rarely used in the other online demos of basics! Useful for some on-the-go revision.
Could this harness take some modifications that would help it be weight-bearing?
Yes you can suspend with modifications to a chest harness. I’d add another set of ropes over the shoulder and perhaps some more on the chest or sides for some better distribution of weight, it would hurt a whole lot as is and might do damage to the ribs. I’d google shinju for suspension to get some ideas. Please be careful with suspension if you’re just beginning, and do it with someone who has experience. :)
GOD BLESS YOU, CEE ?
these are the best bdsm knot tying instructions on the internet. they are clearly described and as at least one other comment stated,the gifs are great. thank you!
Thank you so much! This one was so easy I was able to harness myself!
Yoooo, I just did this and I’m so happy with the results! You’re a great educator! Thanks!
About what length of rope is required for the basic chest harness?