

Welcome to the another installment of Make A Thing, where we make handmade gifts for people. Or ourselves. Who doesn’t need something special in their life? Join in on the DIY fun and avoid the unnecessary consumerism of the world (and I promise you’ll save a few dollars while you’re at it).
Header by Rory Midhani

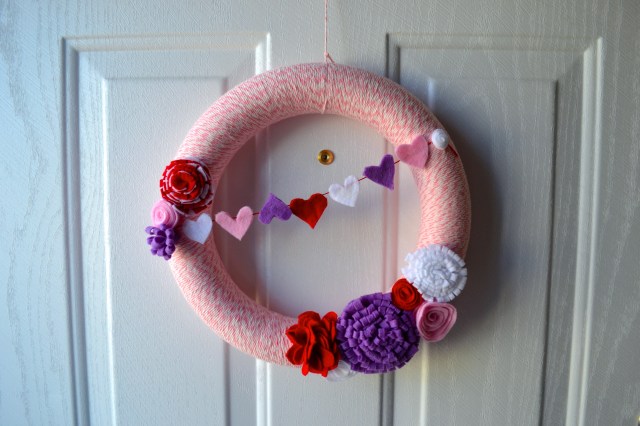
I have a confession. I love yarn wreaths. I think they are adorable. My mom used to make them for different holidays while I was growing up, so it only seemed natural to make my own for Valentine’s Day (I’m a sucker for hearts and pink, judge all you want). If you’re having trouble warming your cold, robotic heart up to the month o’ love, then this might just do the trick.
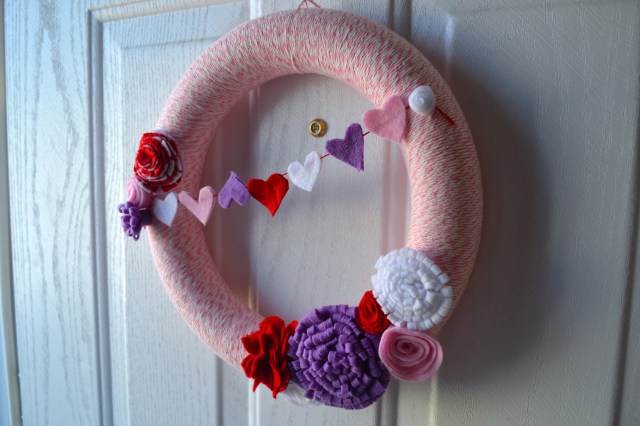
Valentine’s Day Wreath
Supplies Needed: Foam wreath (usually in the floral section of the craft store), yarn in a color of your choice, felt, hot glue, embroidery floss or twine
Level of Difficulty: Listening to “Two Way Street” by Kimbra on repeat for an hour while you’re wrapping the damn yarn and burning yourself with hot glue. So not bad, if you ask me.
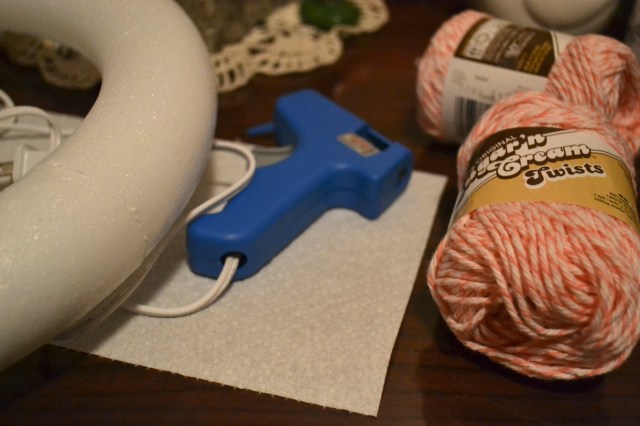
1. Wrap that yarn. Hot glue the end to the top of your wreath, and then start encircling. Just keep on keepin’ on with this, because once you finish this part you’ll be almost done. Routinely tighten the yarn around the wreath by twisting it. You can do more than one layer, but after I finished one, I gave zero fucks and left it.
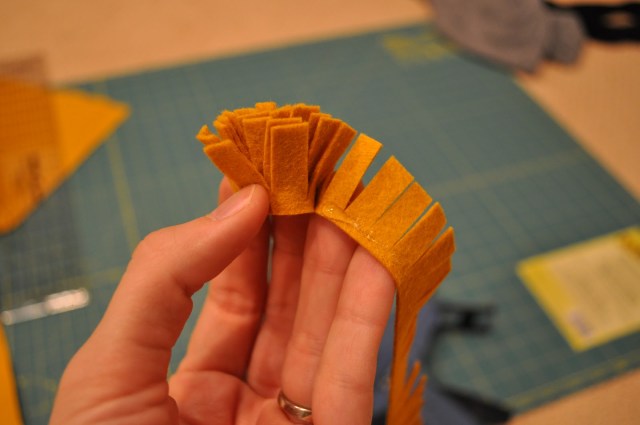
2. Is your wreath all wrapped and you can’t see any of the wreath underneath? Good! Now we get to make flowers. I made four types of flowers. I’ve officially named them “circly”, “poofy”, “poofy-esque” and “UGH” (respectively).
Circly
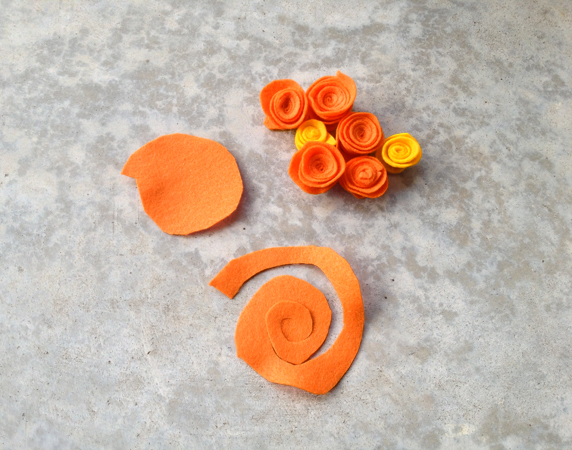
Here’s the best tutorial for circly flowers.
Poofy

Here’s the tutorial I used for the poofy ones.
Poofy-esque
I used two layers of different colored felt in my poofy-esque flower using this tutorial.
UGH
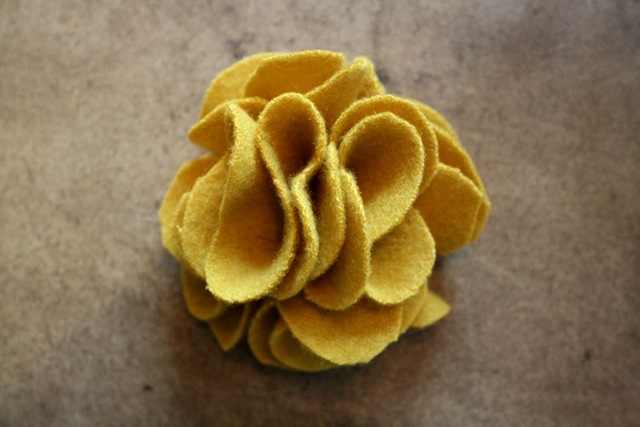
And here’s the UGH ones. They were tedious and took the most time. Why do you think there’s only one of these on my wreath? Here’s the tutorial I used.
3. Make a few of each flower, or a million of just one type. Be sure to make two tiny ones to hide your embroidery floss for the next step. Arrange them on your wreath as you see fit, but wait to glue them on until you get the heart-string on.
4. Cut out an even number of the same sized hearts (tiny pennant flags would be really cute, too) from your felt. Sandwich the embroidery floss in between two hearts and glue them together. Make sure you glue the string towards the top of your heart or they will flip over. Or maybe you’re a badass and you don’t care if your hearts flip over. You do you.
5. Glue the string onto your wreath, choosing whether to put it on straight or at an angle. I liked the angled look, personally. You can trim the string and hide it with tiny flowers or you can leave it long and wrap it around the wreath.
6. Glue your flowers on in bunches.
7. Hang it up! I used an adhesive hook and a long piece of yarn for mine, but ribbon instead of yarn looks adorbs, too.
8. Enjoy all of your friends being super impressed with how domestic you’ve gotten (in a good way, feminists!).
Next week I have a Mardi Gras surprise for you! Let’s all be excited!


Comments
This is super adorbs!
Yarn wreaths are awesome and all, but MARDI GRAS. I can’t focus now, I love it so much and had totally forgot about it this year. Time to get my beads on for the next 2 weeks.
WANT
This is really cool and it looks really well-made! It would make a really great gift, too. I’m sure it would tug at someone’s… heart strings :P
You win.
Yup. Seconded. You win.
god this is so cute! i want to make eleventeen poufy flowers and put them on a headband and wear it all the time.
This would be soooo perfect for a valentines gift!!! But it still leaves me to figure out how to ship it to her anonymously… Dang it.
Oh, this is so adorable. I also like/appreciate the fact that I just learned how to make things that look impressive/cute on their own as well as together.
Another notch on my crafty lesbian belt.
Hey! This is rad and super cute and lots of fun…. BUT…. Any chance of a valentines make-a-thing that my slightly butch-of-center ladyfriend might appreciate?
I want to wear this around my neck, like a horse that just won the Kentucky Derby.