

Welcome to the another installment of Make A Thing, where we make handmade gifts for people. Or ourselves. Who doesn’t need something special in their life? Join in on the DIY fun and avoid the unnecessary consumerism of the world (and I promise you’ll save a few dollars while you’re at it).
Header by Rory Midhani

I’ve promised you easy stencils in basically every column of Make A Thing and finally, here I am making good on that promise. Seriously, if you haven’t stenciled with contact paper, you don’t even know how good your life is going to be once you try this out.
Stenciled Glasses
Supplies Needed: Clear contact paper, exacto knife, paint (Martha’s frosted glass paint was perfect for this project because I wanted it to have an etched look), dauber or brush, painter’s tape (optional), dry erase marker (optional), oven
Level of difficulty: You need some fine motor skills for this one, but it shouldn’t be too bad unless you pick the world’s most difficult design.
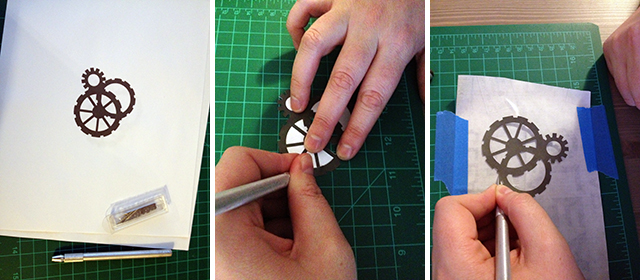
1. Find what you’d like to make into a stencil. I chose gears because I am making drinking glasses for my brother and he’s into that. I’m also making him infused rum to put into his new glasses, but that’s another story. I commissioned my artistic partner to make this in Photoshop from some brushes she downloaded on the interwebs. I recommend a pretty simple design, even this one was slightly tricky. Print out your stencil-stencil.
2. You can trace your stencil directly onto the contact paper or you can cut it out. I found it easier to cut out, but you do you. Cut out your stencil-stencil (we’ll call it that for now) with an exacto knife. Patience. Deep breaths. Don’t cut yourself.
3. Put your cut out stencil-stencil onto your contact paper and cut around it, but don’t go crazy. I was careful not to make too large of cuts because I was making two versions from the same stencil, one with negative space where the design was and one with only the design.
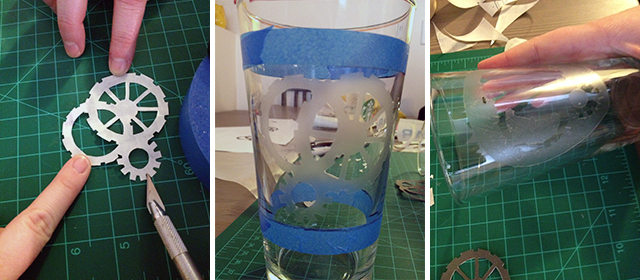
4. Once you’ve carefully cut out your stencil, decide where on your glass you’d like to put it. If you’re doing the negative space version, draw yourself an area at least 1 inch from the lip of the glass to put your paint. Zeller is a genius who found the trick of spinning the glass on the microwave plate to draw really straight lines so we’d know where to put the painter’s tape to section off an area.
5. Stick your contact paper onto the glass. Thankfully, contact paper is really forgiving, so if you need to pick it up and reposition a few times, don’t worry. Reference any original pictures you have of the design if you need to place tiny pieces inside of the stencil. Smooth out any tiny bubbles you find. Be really, really meticulous about the bubbles or you’ll get leakage and no one likes leakage.
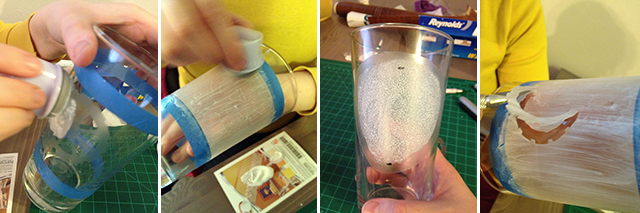
6. Dip your dauber in the paint and start dabbing. I dabbed the small design and painted the negative space design just for kicks. I like the dabbing better, personally.
7. Use your exacto knife to gently lift off the contact paper while the paint is still wet.
Pro tip: Glass paint is really forgiving. I used q-tips and toothpicks to clean up the edges of mine where there were leaks or smudges. You can even wipe off the entire design if you don’t like it.
8. Let it dry an hour, then follow the instructions on your paint for baking. Most likely you’ll need to place your glass or mug into a cool oven to get to the temperature slowly so you don’t have shattered glass all over.
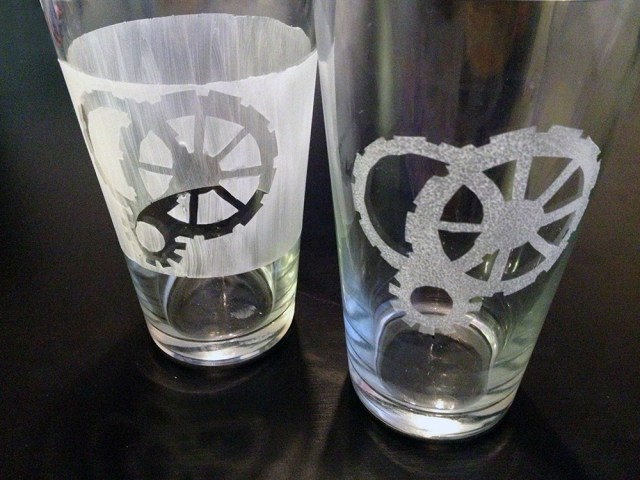
9. Wash your glasses really well before using, then sit back and admire your handy work. Just kidding, you should put some booze in there to fully enjoy your new glasses.
Contact paper stencils work best on hard surfaces, like glass or porcelain. However, for fabric it has the tendency to bleed a bit. You can also use this trick in tandem with the screen printing using an embroidery hoop tutorial I put up last week. It’s easier for more intricate designs where mod podge just isn’t going to cut it. Instead of mod podge, cut out your stencil on the contact paper and put it on the tights. You can even re-use your stencils if you wash them and let them dry sticky side up. I found this cool tutorial for using scotch tape to stencil on fabric that I’ve been wanting to try out, too.
Happy stencilling!


Comments
THIS IS AMAZING
I’m excited to try this. I’ve done lots of stenciling on fabric, but not glass. With fabric, freezer paper works really well for a stencil. the back side is waxy, so once you cut out the stencil you iron it on to the fabric. You can peel it up once the paint has dried and there is no residue.
I learned the hard way that wax paper and freezer paper are two totally different things, and my ego hasn’t given me a second chance on that project yet! But I’ll give it a go someday!
Also, you can actually etch the glass with this super amazing glass eroding cream called Armour Etch. I picked up a bottle one day at Michael’s and made Keith Haring stencils from contact paper to etch a glass baking dish for my girlfriend’s birthday (cooking and Keith Haring=her two favorite things).
Bonus: Armour Etch is available on Amazon soooo Autostraddle kickback, waddup.
Is it really scary or easy to use? Because it seemed really legit and I was nervous of eroding my fingers off or something.
Its almost too easy. I wore cheapo latex glove and slathered it on using a popsicle stick. I want to etch all glass things now.
Not scary at all. I would recommend wearing gloves, just to be safe, but I’ve etched tons of stuff and it’s the easiest and coolest gift idea.
Well ventilated room, because ew chemicals. But I love it, it’s fantastic stuff. Good thing is you don’t have to worry about it coming off in the dishwasher like you might with paint.
It is extremely expensive, at least for me, since I have to get it from os because it’s pretty much illegal in Australia so shops won’t sell it.
I have big plans when I finally get my craft gear out of storage. Big plans.
YUSSS
fun!
Sarah, we need to have a crafty night. I think you should invite Kiyomi and I over for a sleepover and we can make shrinky-dinks and we can talk about how cute Zeller and Leigh are. I’ll bring snacks.
YES. We’ll braid your hair and have a pillow fight while our crafts are drying.
I’m so glad we’re on the same page.
I’m glad you said we’ll braid Torre’s hair since neither of us have hair. Also can I just watch the pillow the fight?
If you aren’t going to let me do your hair you have to let me do your make up. Them’s the rules. I didn’t make them up.
And this is why I would move to Colorado.
Dear Hansen.
I’m convinced you’re a witch. Because this is magic. Hogwarts, here we come!
Love,
Ali