
Welcome to yet another crafty installment of Make A Thing, where we make handmade gifts for people. Or ourselves. Or our cats. Who doesn’t need something special in their life? Join in on the DIY fun and avoid the unnecessary consumerism of the world (and I promise you’ll save a few dollars while you’re at it).
Header by Rory Midhani

It’s my mom’s birthday! So I made her a card. I come from a long lineage of hilarious people who give irreverent cards on birthdays, and I thought it might be nice to give my mom a card that doesn’t have a joke about her age and/or her cat lady status (which is severe, tbh). When I handed it over at her birthday party Sunday night, my family passed it around, confused about how you could sew on paper.
Do you guys realize how easy it is to embroider paper? Like pretty much just as easy as it is to sew on fabric. It’s just so much more impressive.
Embroidered Cards
Supplies Needed:
+ Thick paper (cardstock is preferable, but I used watercolor paper just fine)
+ Safety pin/tack/something pokey
+ Embroidery floss in whatever color you like
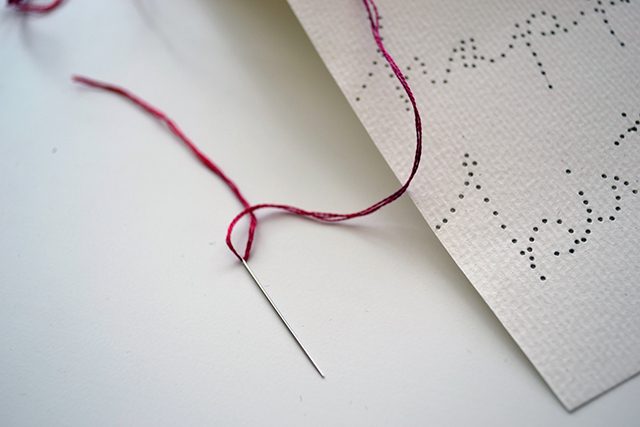
+ Sewing needle
+ Pencil
+ Eraser
+ Scissors
Level of Difficulty: Easier than figuring out how to spell the names of your favorite Game of Thrones characters.
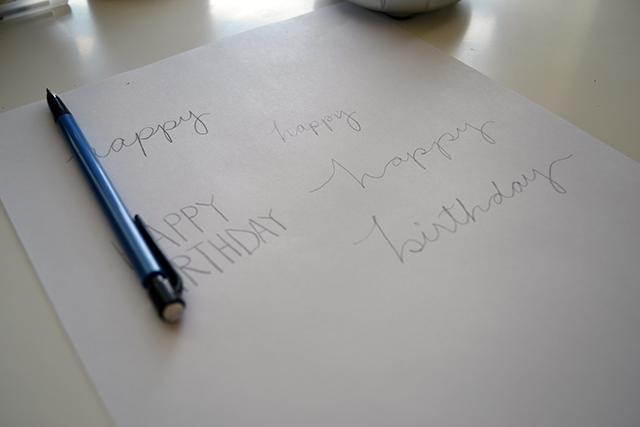
1. Practice drawing or writing what you’d like on a separate piece of paper. Believe me, this may seem pedantic, but you want your card as pretty as can be and that won’t happen with tons of eraser marks. As you can see, I chose the incredibly clever birthday phrase “Happy Birthday.” I know, I’m gettin’ crazy on this one.
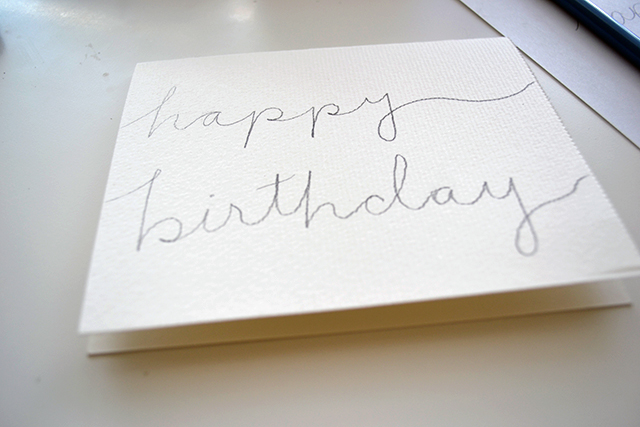
2. Trace, draw or write whatever design you’d like onto the front of your card. Do this lightly! You have to erase it in a few steps.
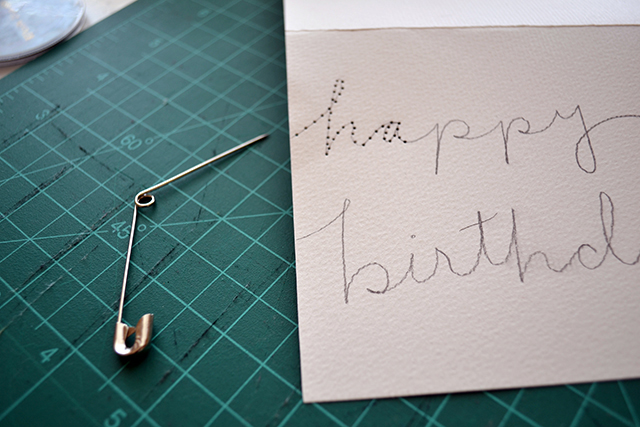
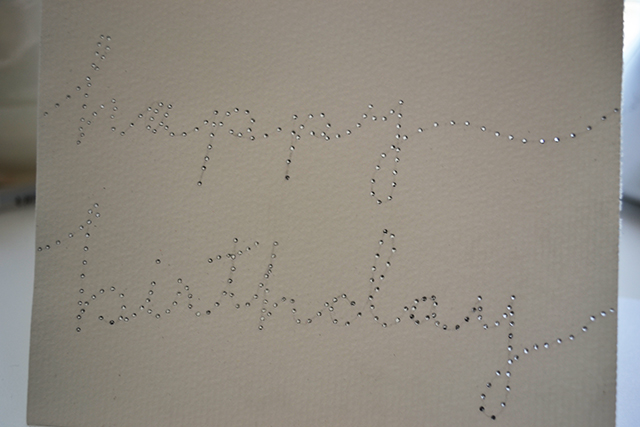
3. Now we’re going to make holes to thread our embroidery floss through. We have to make the holes because if we just tried to sew without them, it’d probably rip our paper. Make holes wherever you’d like the stitches to go, adjusting for how long or far apart you’d like your stitches. I decided to use a very simple stitch for my letters but maybe you’re feeling confident and fancy.
Here’s what my design looked like with all of the stitch holes.
4. Erase all of your pencil lines. Honestly, you could probably stop here and still have a beautiful card. Just clean out the eraser gunk from the holes first.

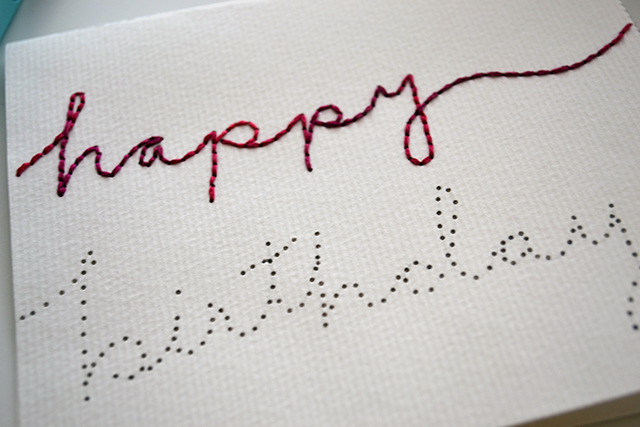
5. Thread your needle. Time to start stitching! Don’t bother tying a knot at the end of your string, just pull your floss through and leave an inch or so tail to tuck under your other stitches. It’ll stay, don’t worry. Also, I wanted a thinner, more delicate line, and so I parted my six-string floss in half to make it three-string floss.
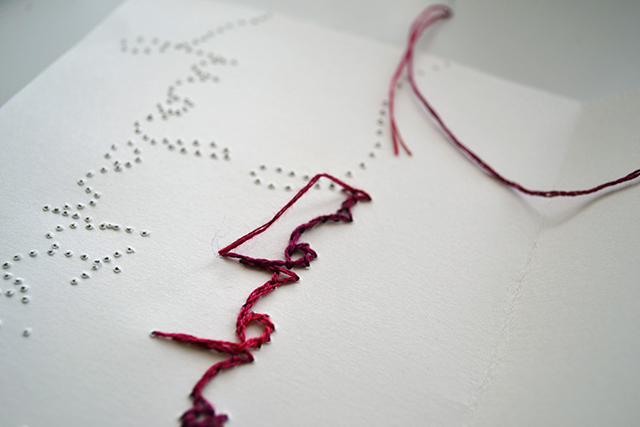
6. Keep on stitching. When you finish your thread, just weave it back through your other stitches.
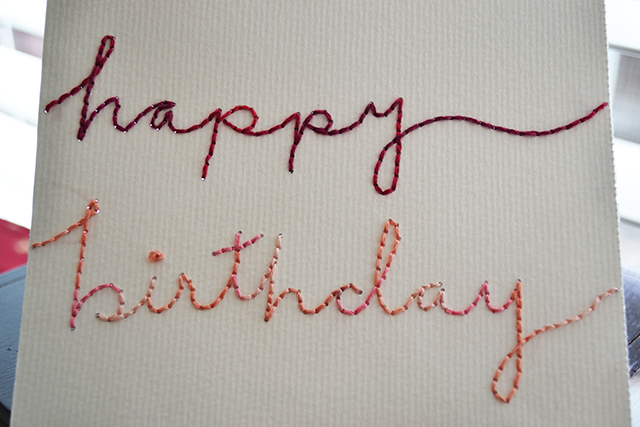
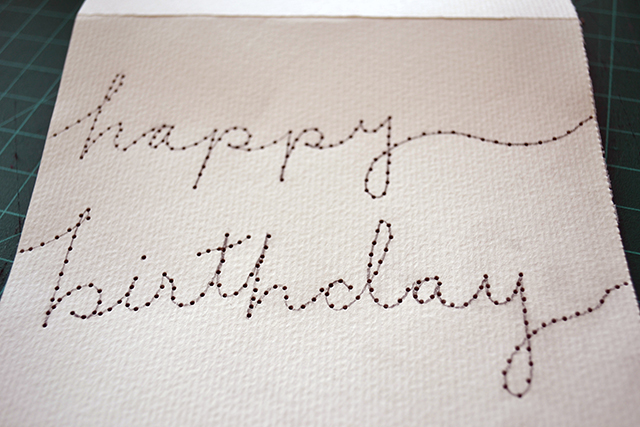
And here’s what it will look like when it’s done. For the tittle over the i in birthday, I used a french knot. You can dab a tiny bit of mod podge or glue on the ends of your thread to ensure staying power, but I didn’t bother. Optionally, you can also cut another piece of paper to glue onto the backside of this so the wrong side of your embroidery doesn’t show, but I got really lazy decided it looked charming.
Now go on and watch how impressed people will be with your handiwork. It’ll be our little secret on how easy it actually was to make.


Comments
So pretty!!
Yup, totally making this for some upcoming birthdays. Oh what the heck, I’m going to make it for some unbirthdays too.
Simply because…
“You get a card! You get a card! You get a card! You all get a card!”
This is nice and I think pretty easy to do even for a not-so-crafty person like me, I want to try it!!! Thanks Hansen! ^_^
Tittle!
I just learned a new punctuation word, thanks.
It’s my favorite new word that I learned this week.
Not gonna lie, I have no fucking clue how to embroider so the sixth photo is confusing me.
Oh no! Honestly, it’s just like sewing. Not all embroidery stitches are that easy, don’t get me wrong, but all I did was a simple back stitch, starting in the second hole and working back into the first, then third to second, fourth to third, and so on.
My back stitch mantra (because I am that crafty): Two holes forward, one hole back.
And I love sending out cards, so this might be something I actually make time to try.
This is such an easier mantra. Kristen, remember this mantra.
hansen, this is soooo pretty!
This totally reminds me of sewing cards from my childhood! Anyone else have these? http://4.bp.blogspot.com/_o16Tr4G9eEo/TMzL8xaEdKI/AAAAAAAAAM0/qlArDgUaNnM/s1600/finished_sewing_cards.jpg They were awesome, and you could do ALL KINDS of crazy stitches with them. They made my 4-year-old self feel like some kind of sewing genius. A few years later, I was hand-sewing Barbie outfits. That was pretty much the end of my sewing endeavors (save for some truly hideous, ill-fitting boxer shorts in middle school home ec, and the occasional repair to a ripped seam or loose button). But anyway, I’ve been looking for a good excuse to buy embroidery floss for years, and I think making these cards is a pretty good excuse.
i can attest to the way easier than it looks business! my craft skills are fair to middlin but middle school through college was a time of closeted embroidery madness. a lot of embroidered canvas shoes during that time.
if you really Love someone or have the energy of a closeted 17 year old give shoes AND [at least] the first 9 pages of Where the Wild Things Are sewn onto some shorts in not red thread and put some letters in red to spell out a secret message. p.s. the shiny rayon thread vs. the canvas sneaks will lead to more cursing but will look pretty good, if you don’t mind the constant re-insertion.
oh my god I love this! so cute!
Um, super cool. Guess I should go find some embroidery floss? I get confused in craft stores. Maybe I should buy it online.
This makes me so happy that it’s a thing and it’ll look so awesome, but also sad that I have to wait until July – none of my friends have birthdays until then! I may have to make some “Happy Friday” cards, or something…