

Welcome to the gazillionth installment of Make A Thing, where we make handmade gifts for people. Or ourselves. Or our cats. Mostly our cats.
Header by Rory Midhani
This week was one of my best friend’s birthday! We bought some bff4eva rings (probably going to turn our fingers green in two days) and ate Greek food to celebrate, then continued celebrations on an entirely different day to eat pie. You might say this is pretty successful. Except, at our pie meetup, we realized we both forget our new bff4eva rings! Epic fail. I made her these pretty jewelry dishes to keep her ring safe and sound and in her thoughts always.
This could be a really nice gift for your femme ladyfriend who always complains about losing her earrings at your place when the cat knocks them off the nightstand at 3am. Alternatively, skip the glitter and draw a fun geometric pattern on them to hold your boifriend’s tie clip and cufflinks.
Super Easy and Fast and Sparkly Jewelry Dishes
Supplies Needed:
+ Fimo/Sculpey/Clay
+ Oven
+ Paintbrush
+ Mod podge
+ Glitter (Martha Stewart glitter is really pretty and nice and no, surprisingly, she’s not paying me to say this)
+ Optional, oh-you-fancy touch: Clear spray paint
Level of Difficulty: Easier than flipping through the sticky pie list at a sketchy diner. Seriously, why was that so sticky? Groooosssssss.
Now, there are two ways you can do this. You can either shape the little bowls using another bowl you have, or bust out your best third grade art class impression and make a pinch pot.
Make sure you condition your clay by breaking it apart and rolling it in your hands. This cuts down on cracking and air bubbles and softens it to make it easier to work with.
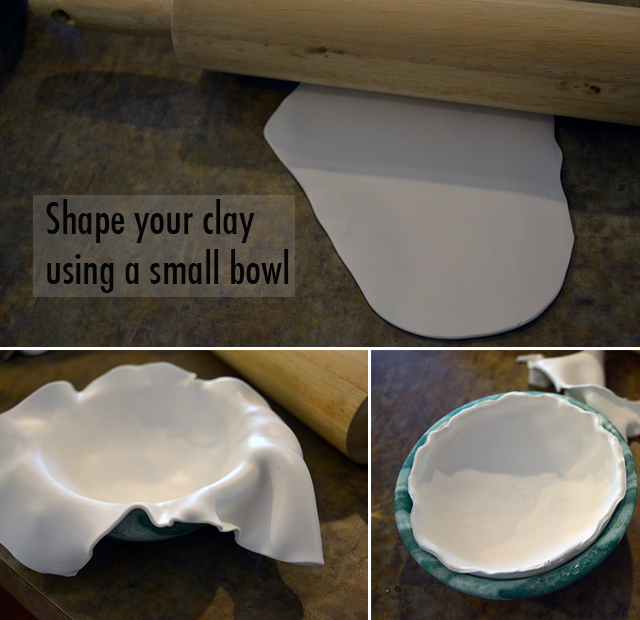
Option one: for a floppier, more organic shape. I recommend rolling your clay out thicker for this version, because the thinner the clay, the less it’ll hold it’s shape.
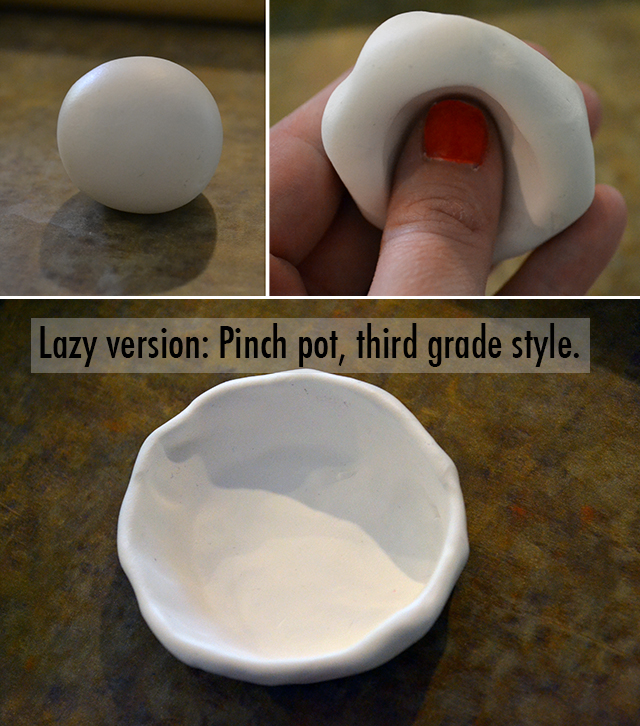
Option two: for the truly lazy. You can see which option I went with.
Bake it at 230° for 30 minutes if you’re using Fimo soft, which is what the cool kids are using these days, obviously. Read your instructions. Always read the instructions.
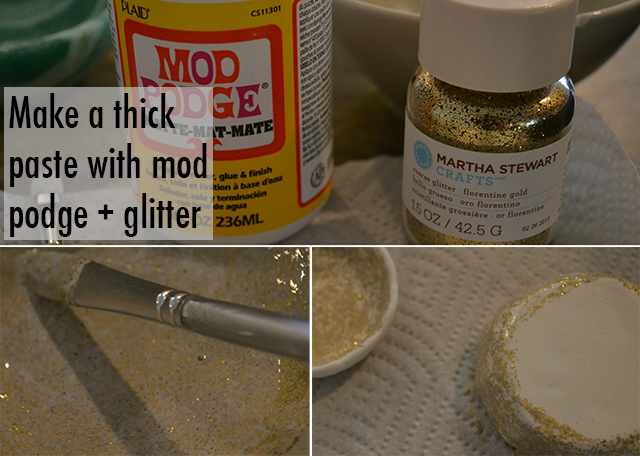
The thicker the paste, the less coats you’ll have to do, but the longer this will take to dry. I let mine dry overnight. However, I really hate glitter on me or on surfaces that aren’t meant to be sparkly, so I waited for the million coats of glitter and mod podge to dry, then sealed it with a clear coat of spray paint. I like the added gloss factor. To be honest, the mod podge and glitter mixture isn’t likely to come off, but I just don’t have much trust in glitter after one-too-many times of being led astray.
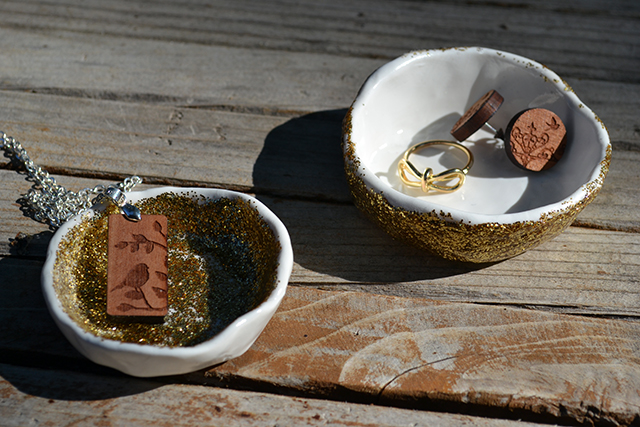
See our bff4eva bow rings? Best $6 I’ve ever spent.


Comments
Sooo pretty!!! Golden glitter makes me feel like a giant fairy boi :)
These are so cute! I can’t wait to make some.
This is too cute… gonna try this with my daughter, she’s gonna love it!
Yes! I have a dish very similar to this that a charming girlfriend once made me for my bedside jewelry detritus, and I DO love it, thank you.
I too have been led astray by glitter in the past. As much as I love its seductive sparkle, I think it may be the ultimate crafty femme fatale.
My best guy friend’s birthday is coming up and we always get each other strange-yet-funny-but-also-useful gifts. I think someone might be getting a rainbow glitter stash holder…
love this!!!! I am trying to be crafty once per week and I think this will be next week’s project!!!