

The holiday season is quickly approaching so you know what that means… decor! gifts! homey things!
Putting aside all the stress that these next few months will bring, I want to invite you to join me in utilizing this time to make things for other people with lots of love. Even if gift-giving isn’t your love language, making little crafts can be a “productive” way to decompress. We’ve made bracelets together, but I’ve been itching to take my crafting skills up a notch!
Deep in the caves of the pandemic, I picked up candle making. I can’t remember what exactly sparked this new interest, but I remember being extremely let down by my lack of success with resin. Maybe this was my redemption craft? The good news for you and me is that candle making is much easier than resin, and it makes very personal, thoughtful, and inexpensive gifts for the loved ones in your life.
I’m going to walk you through making your own classic wax candles, but I’m also going to show you a method I’ve become fixated on (truly, I’ve had many dreams and sleepless nights over this) via TikTok: The floating vase candle. Most importantly, we’re going to avoid making generic candles and I’ll offer some simple ways to make your candles unique to the person you’re gifting them to.
First up Is the Really Simple, Suburban Mom TikTok Vase Candle!
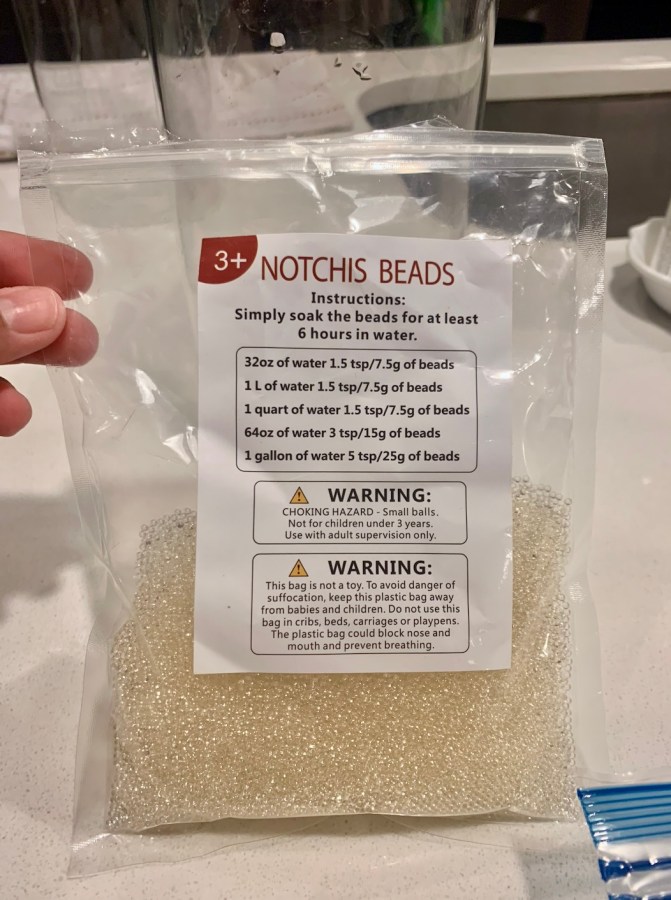
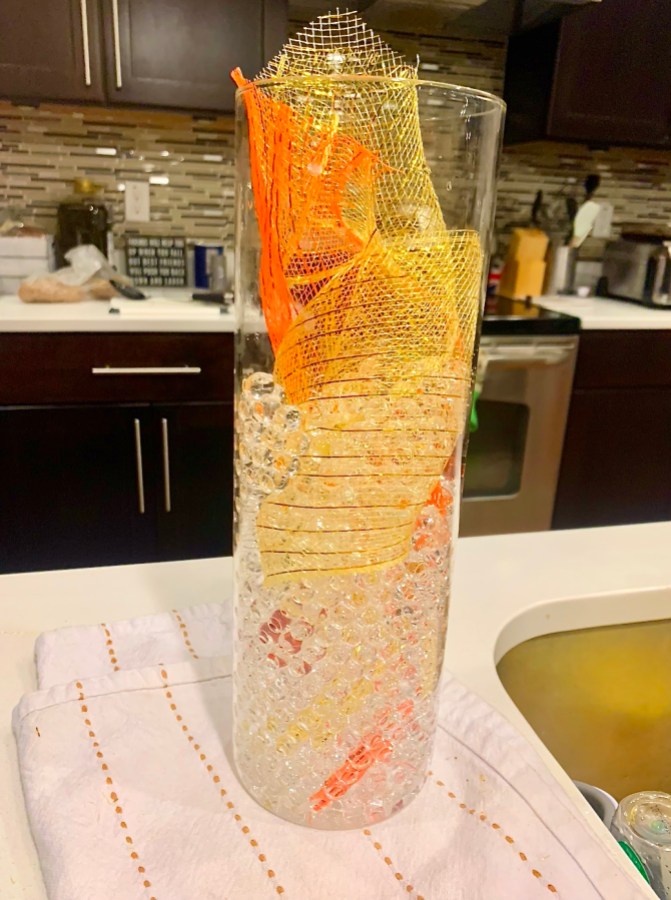
You’ll want some type of transparent vase. I used this tall, glass vase I found on Amazon, but you could really use anything you find in the thrift store as long as it’s completely see-through. You’ll also need some small floating candles, transparent water beads, and any small decorations of your choosing.
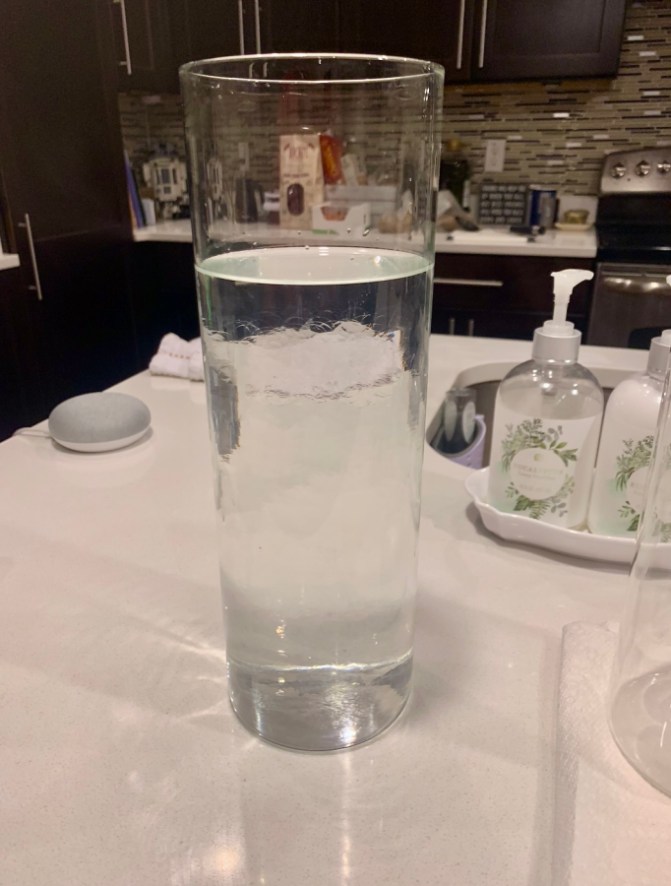
Before you can assemble your floating candle, you’ll need to soak a few teaspoons of the minuscule water beads in water for at least six hours. For my vase, I scooped in about three teaspoons of little beads, filled it about ¾ up with water, and let it sit while I went to work. When I came back it looked like this!
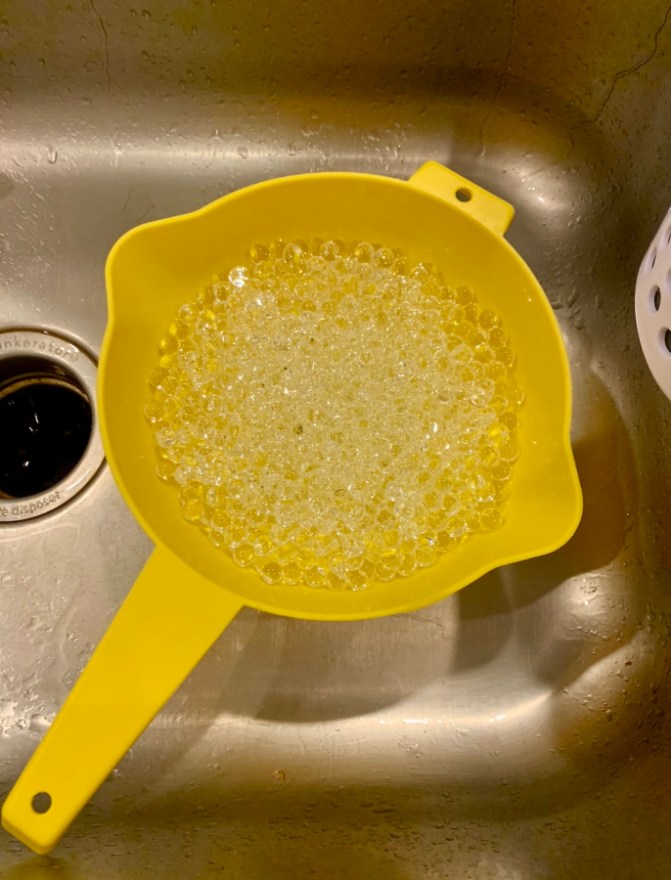
Once you’re ready to assemble, drain the beads in a strainer so you can place your decorations step-by-step. I decided to get some fall-colored ribbons and pumpkin charms to spread throughout my vase.

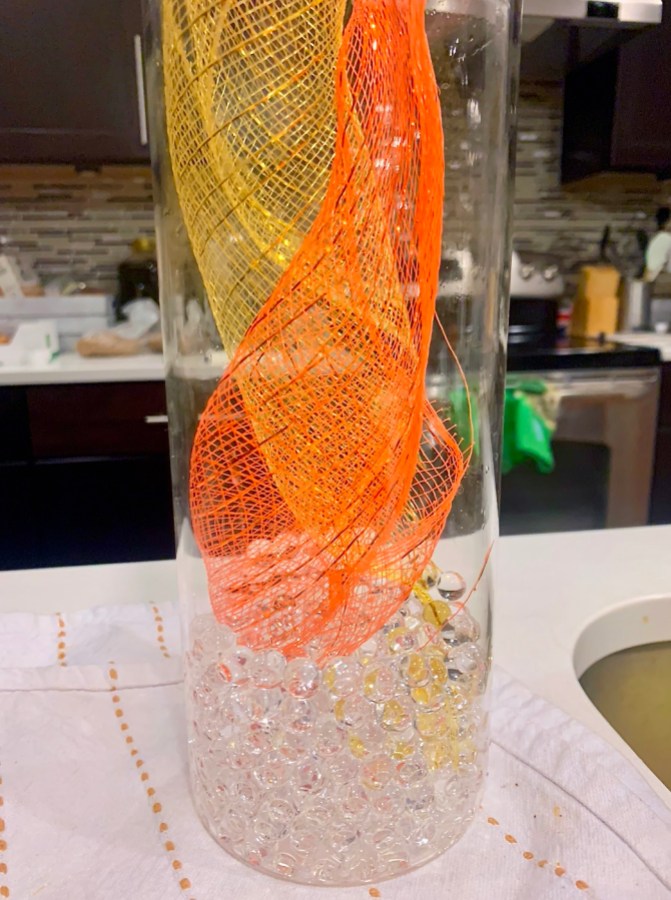
So, I started by pouring in a base layer of beads. Then, I cut the ribbon, stuck it in the bottom with a charm, and filled up the base with more beads. You can repeat this with any of the little trinkets you want to put in the vase. The beads hold the items in place, which will eventually give off the floating effect.
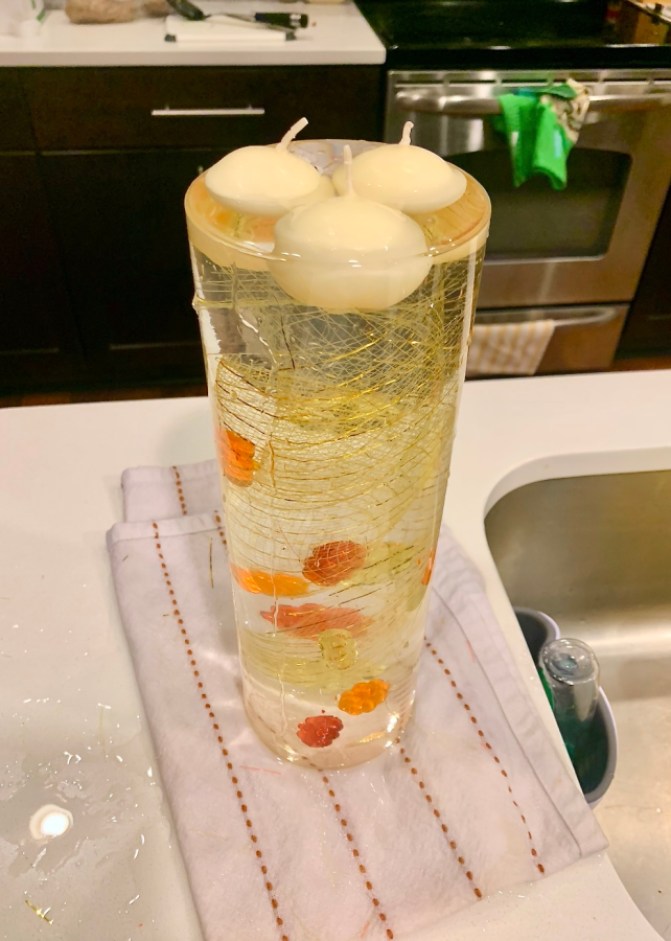
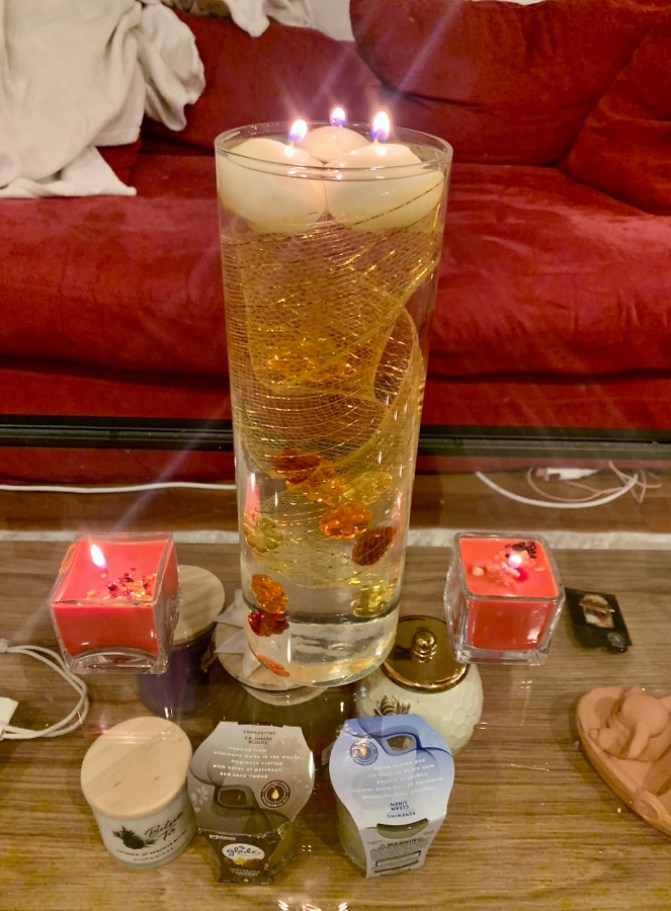
Once you’ve filled the vase with all your decorations and beads, fill the vase up with water and place the floating candles on top. Look at that! You now have a decorative candle that can change with every season. I am planning to personalize a few of these and give them as gifts!
Now, a More Traditional Candle!
This is a bit more involved, but I promise not impossible.
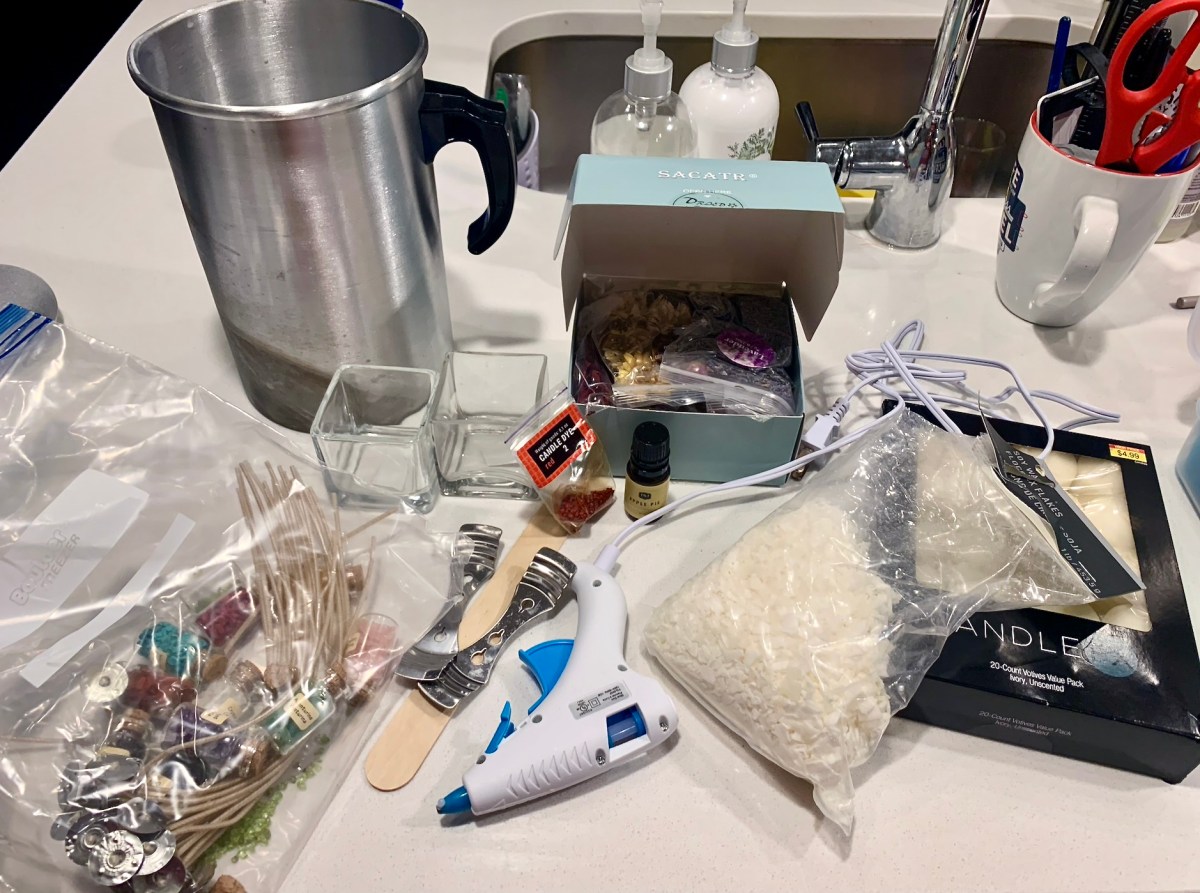
To create a basic candle you’ll need:
- wax (or other candles like tea lights)
- wicks
- a hot glue gun
- popsicle sticks
- something to hold the candle in
- a metal contraption to heat up the wax like a pan or double boiler.
I’ve added more colors, scents, and decorations, but we’ll get to that in the next step.
This process moves pretty fast so you’ll want to do most of the prep work before you get the wax melting.
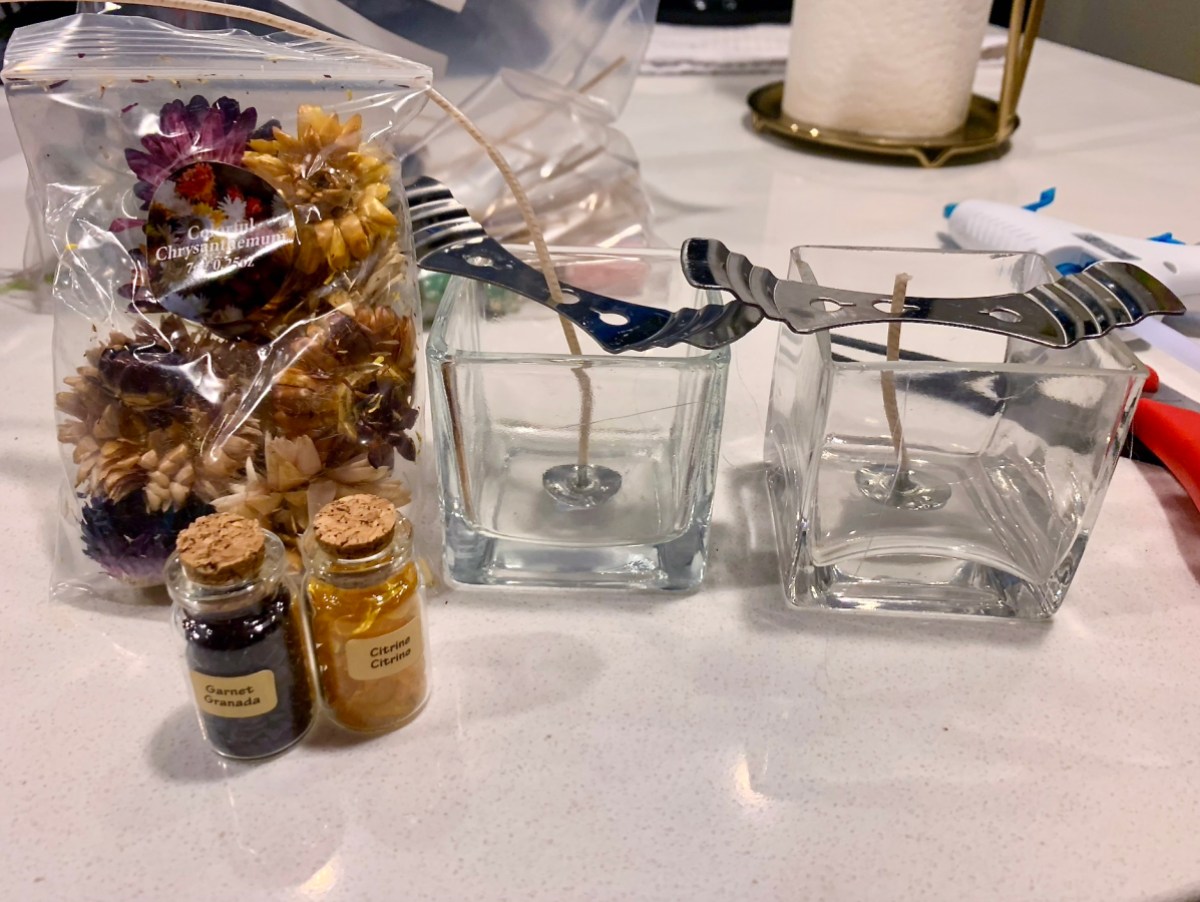
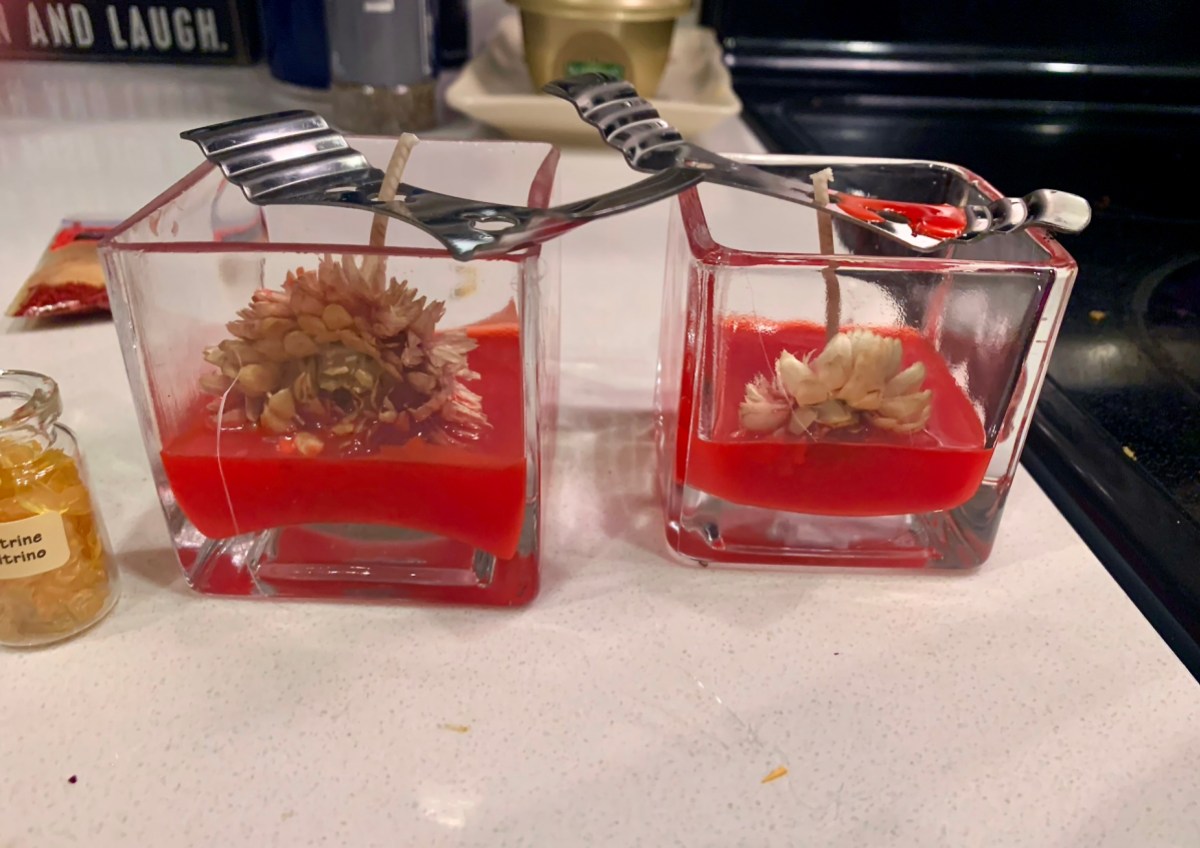
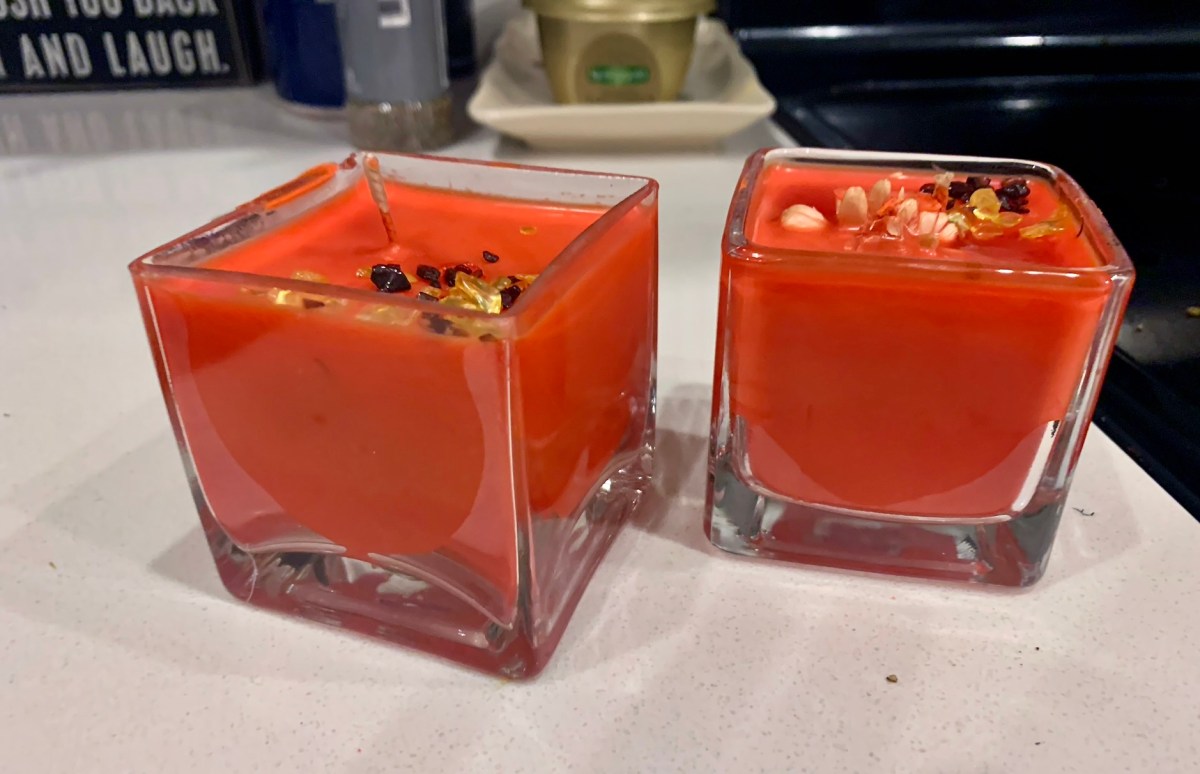
You’ll first need to plug in the hot glue gun and then glue the base of the candle wicks to the candle container. I’ve used two small square glasses I found at the thrift store, but you can use anything as long as it has a balanced shape and can hold hot temperatures.
After this, I cut the wicks to the candle height and got out my decorative pieces. Since I like making things personal, I usually order dried flowers off Amazon (or if you are able to forage them that’s even better) and small gemstones to incorporate throughout the wax. Again, you don’t need this part but I often make little thoughtful personalized candles under a theme, such as “inviting love” where I put dried rose petals and rose quartz in with a fruit or citrusy scent. For this candle, I decided to go with chrysanthemums, garnet, and citrine to stay with colors and a general theme of healing. If you have metal wick stabilizers you’ll want to throw those on as well. I found mine at Goodwill, but you can also just use two parallel popsicle sticks.
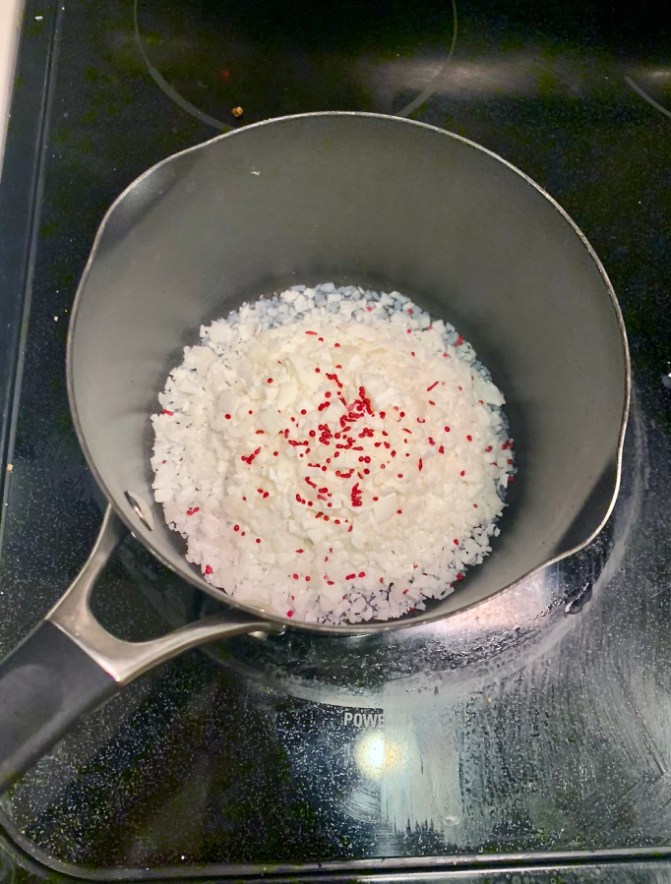
Now that you have a plan for what will go in your candle, it’s time to start melting wax! For this part, you can use a regular sauce pot or get a metal wax melter (the one shown in the first picture) and hold it in a boiling pot of water or put it on a hot plate. I find the double boiler situation a bit clunky and I don’t have a hot plate, so I got this saucepan for $5 at Goodwill that I dedicate only to crafting. The little candle-making kit I also found at Goodwill included candle coloring as well, so I threw some red dye in there. I typically don’t color my candles, but it seemed fun this time.
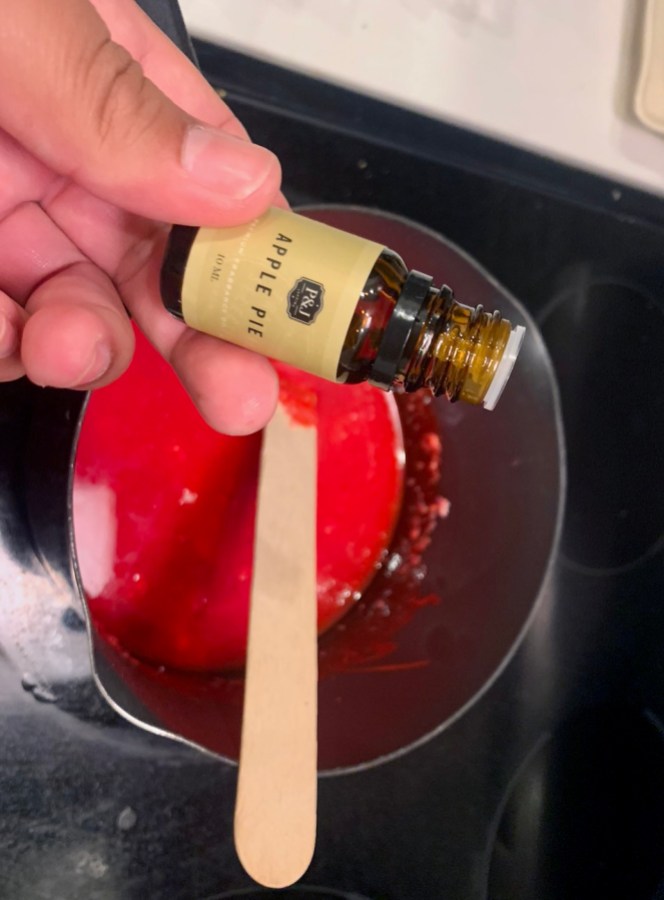
Use a popsicle stick to continuously stir the wax until it’s melted. If you’d like a add a scent in, you can do this once it’s melted. This random candle-making kit I found at Goodwill even had scents, so I added a few drops of the apple pie one!
Once that’s all mixed in you can start pouring the wax into the vases. I decided to put flowers up against the glass to create an imprinted effect, but again at this point, it’s all the artist’s choice.
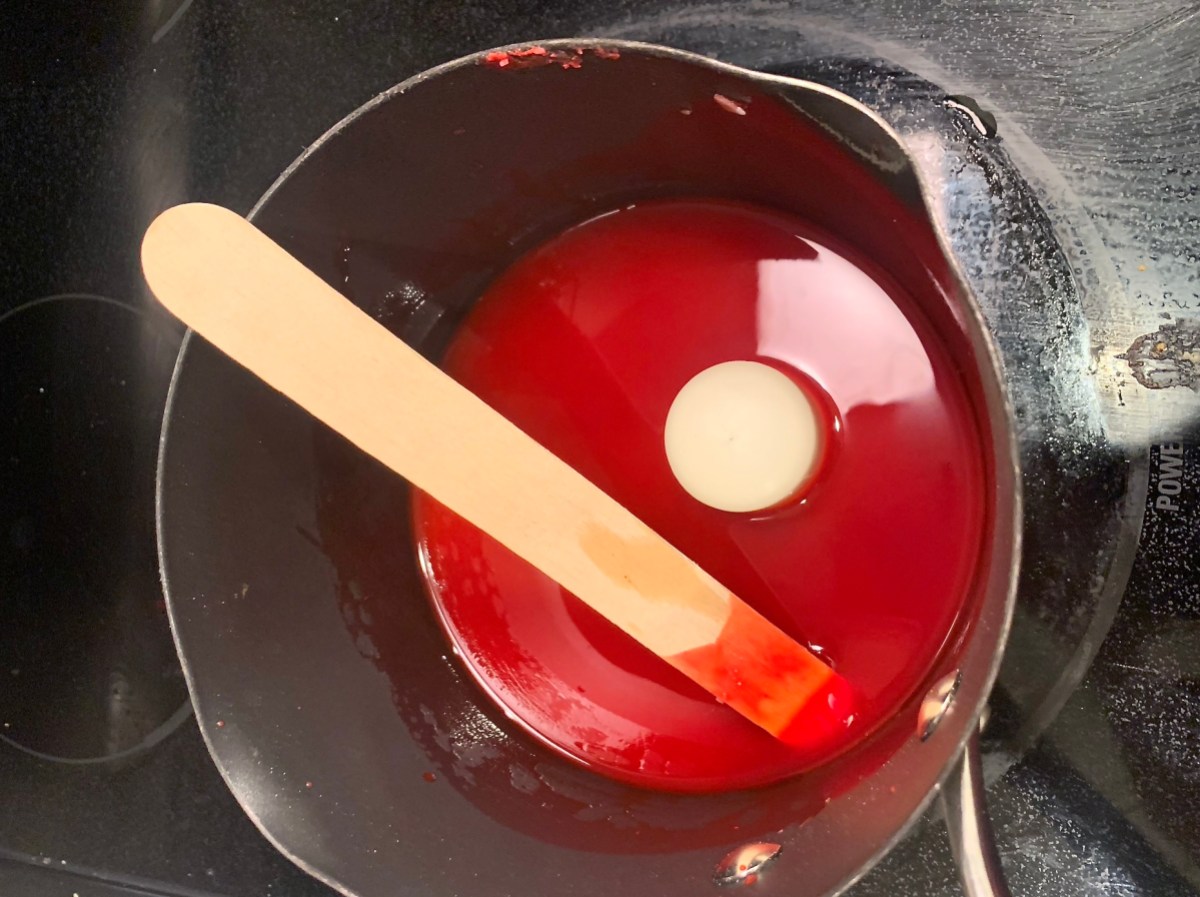
After pouring in half the wax, I realized I didn’t have enough melted so I improvised (here’s where the “other” candles come into play). I have a cheap box of tea lights I keep around for this exact reason, so I pulled the wick out and plopped one in.
Now that our candles are full to the brim, it’s mostly a waiting game. If you drop the crystal gemstones in now, they’ll just sink to the bottom, so I typically wait an hour or so before I add them to the solidified top. As you can see below, the flowers didn’t totally come out as planned, but the crystals on top add a nice touch (especially if you are giving them to someone and explaining what it’s charged with).
Now that you’ve made all different types of candles, you can give them away or arrange them on your coffee table like this!
Happy fall candle-making cozy queers!


Comments
I love this! I’ve tried it once and you’re SO right about the hot glue gun; I glued it down with candle wax but guess what melts and makes the wick float up when hot wax is poured on it? Wax. Still worked but it was TOUGH.
I hope this is a whole little series! I made soap when I was a kid and I’d love one for that
thank you!!!!
This is really amazing.Instead of Apple Pie I’ve used Lavender because of it’s soothing and calming effect for better sleep.
Was the title supposed to say “ holiday?” Or was that a type-o for Holiday? 😊
Oh it’s holiGAY on purpose — a little fun joke, since this is an LGBT website! Though all DIY, craft, and candle aficionados are welcome to join us :)
curious how experience is with the flowers – will they not burn?
So here’s the thing…they might. I’ve found the key is finding containers that can hold a high temp