

Friendship bracelets, keychains, and shrinky dinks were my go-to during play times or while away at summer camp. Even as a summer camp counselor, I opted out of rock climbing, hiking, swimming, and pretty much all sports to craft with a bunch of kids all day. Whether I was making it for a camp crush or my new BFF, it was always made with thoughtfulness and love. Something with that much intention, especially at a sleepaway summer camp, feels very gay, don’t you think?
While I’d like to think this whole trend stems from a group of millennials getting together and reminiscing about the innocence of youth, credit is due to rave culture where festival attendees have been swapping kandi for years. I don’t personally have experience with kandi, but I have quite a few friends who have pointed out that Taylor Swift concert bracelets are anything but novel. However, I am forever grateful for this growing trend, because I am SO here for making bracelets for literally any and every event. I did, indeed, go to the Eras tour, but I made it gay.
In addition to lyrics and references, I made a batch of bracelets that said “I’M GAY UR HOT” with my phone number. During our specific night, MUNA opened for Taylor Swift, so my game plan was to look around in my nosebleed seats to see who else knew all the lyrics to every MUNA song. Unsurprisingly, most of the crowd was uninterested, except for this group of people in the adjacent section who were screaming “Silk Chiffon.” We instantly acknowledged each other and playfully gestured to each other. It got real when lead singer Katie kissed her ex and current band member Naomi. I turned around and screamed at the other MUNA queers. I knew I had to give at least one of them a bracelet. So, after their set, I went to the bathroom and happened to pass by one of the cute folks from the group. I made some small talk, said something about how pretty she was, and gave her my bracelet! Nothing happened after that, but I got to relive my camp days as a queer adult, and at the end of the day, that’s what bracelets are made for.
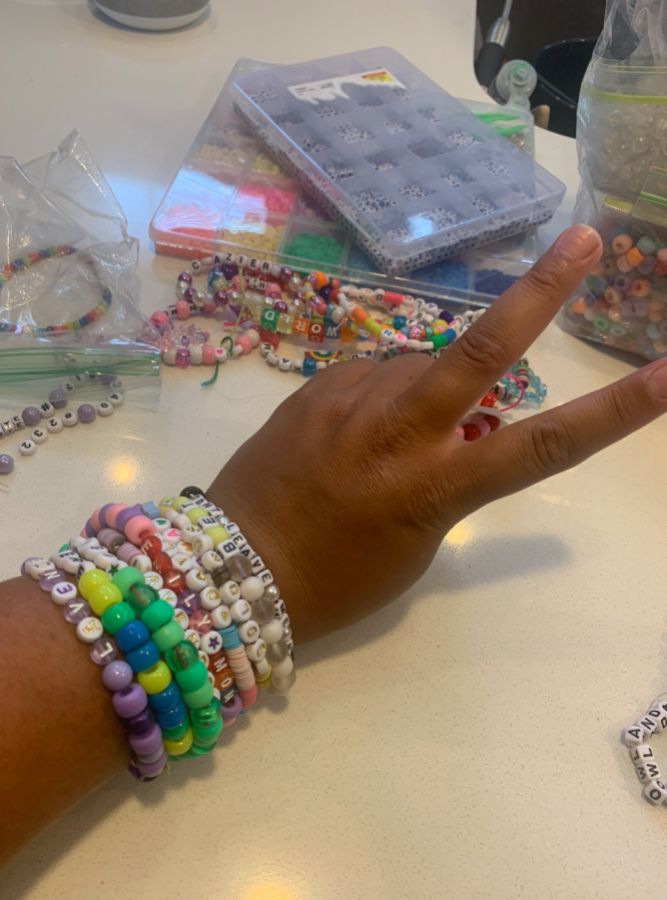
I’m going to make some more gay bracelets to wear proudly and maybe even give out. Want to join me?
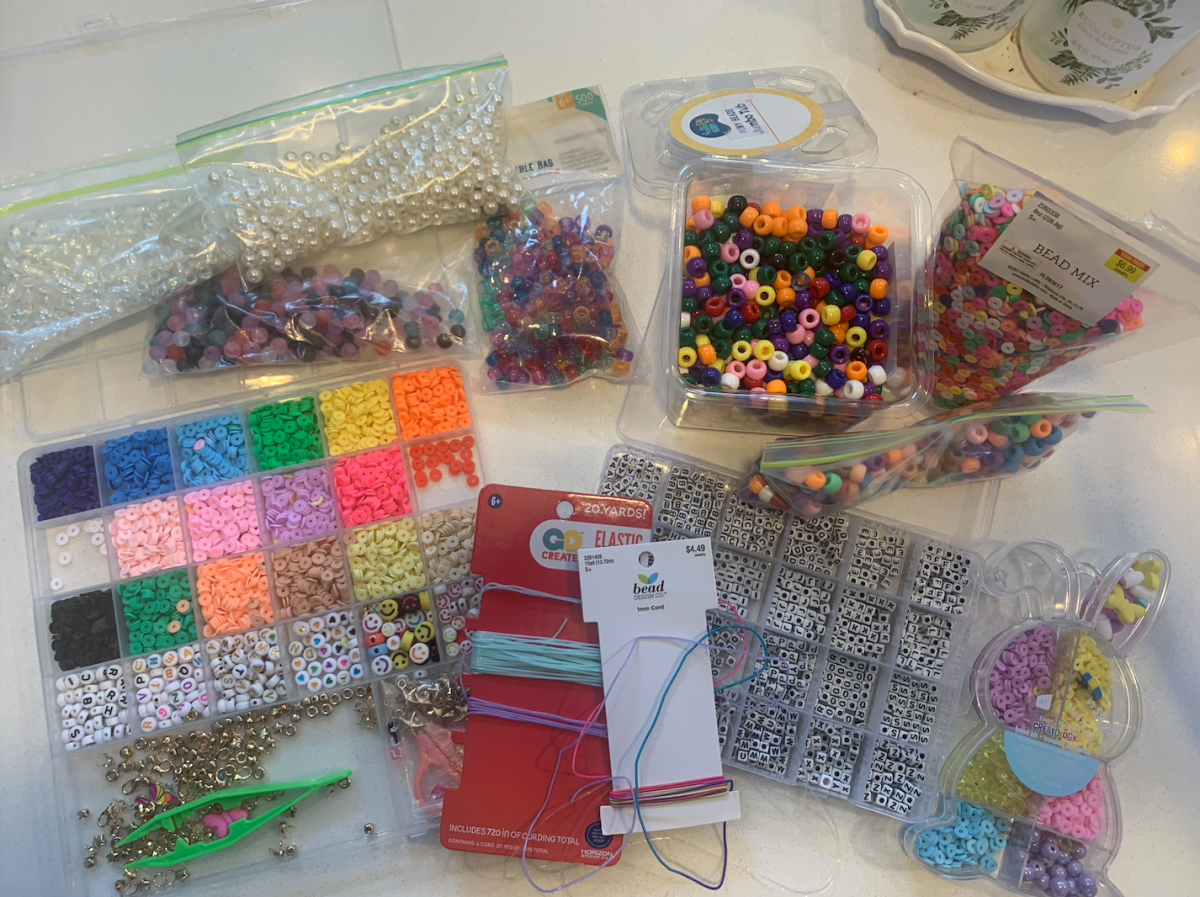
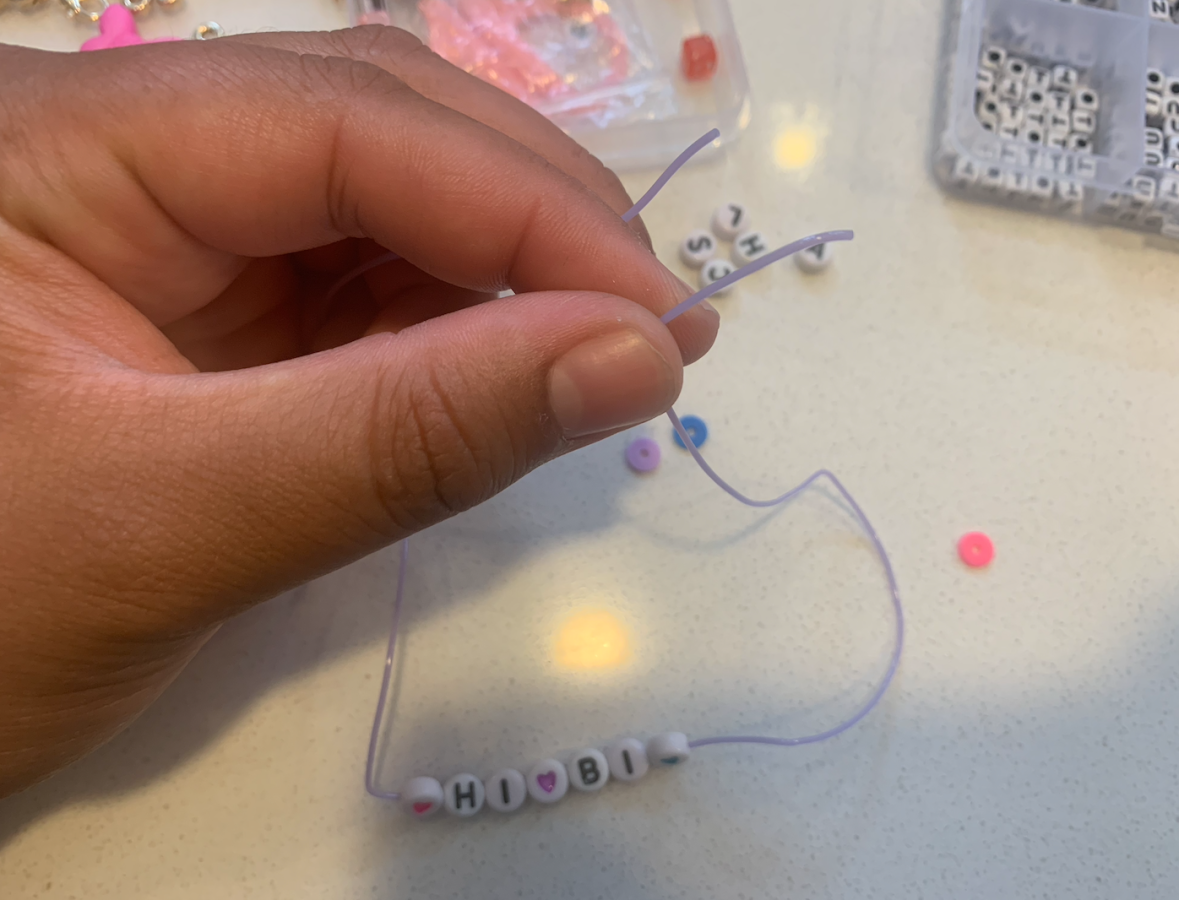
Let’s start with the clay beads first. These are much smaller, much more delicate, and much more time-consuming than plastic beads. Typically, these beads come in kits such as the one in the photo above. The opening for these beads is very small, so you’ll want to use a thin, elastic string. You know, the annoying kind that’s difficult to knot (we’ll get to that). I usually wrap the string around my wrist and then add a few inches for good measure before making the cut.

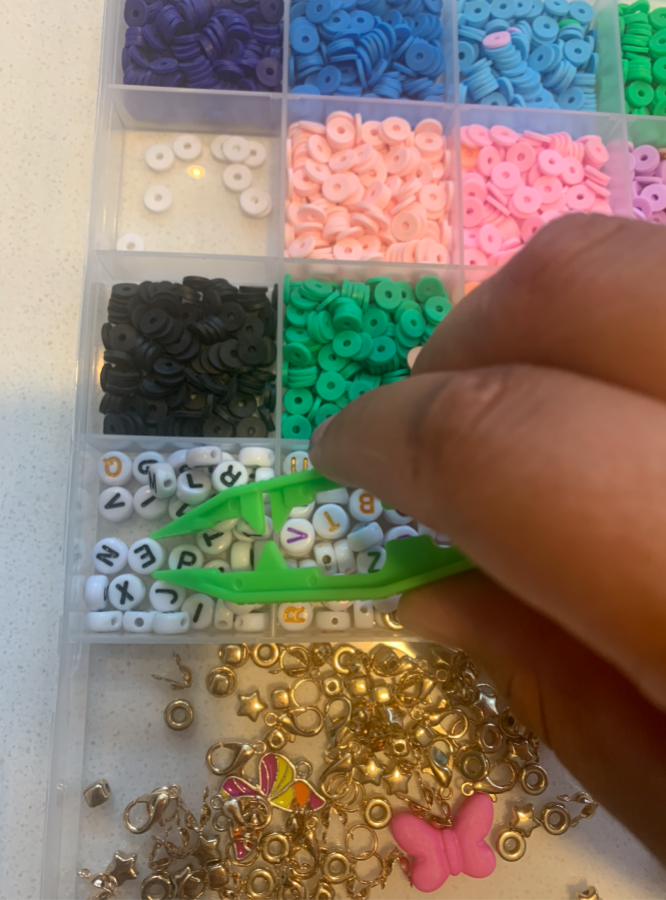
Once I have my string situated, I take my little bead pliers and pick out the letters for what I want to spell. For this bracelet, I went with “HI BI.” Then, I decided what colors I wanted and which order and placed them right next to the beads. For this bracelet, I kept it simple with a bisexual pink, purple, and blue alternating pattern.
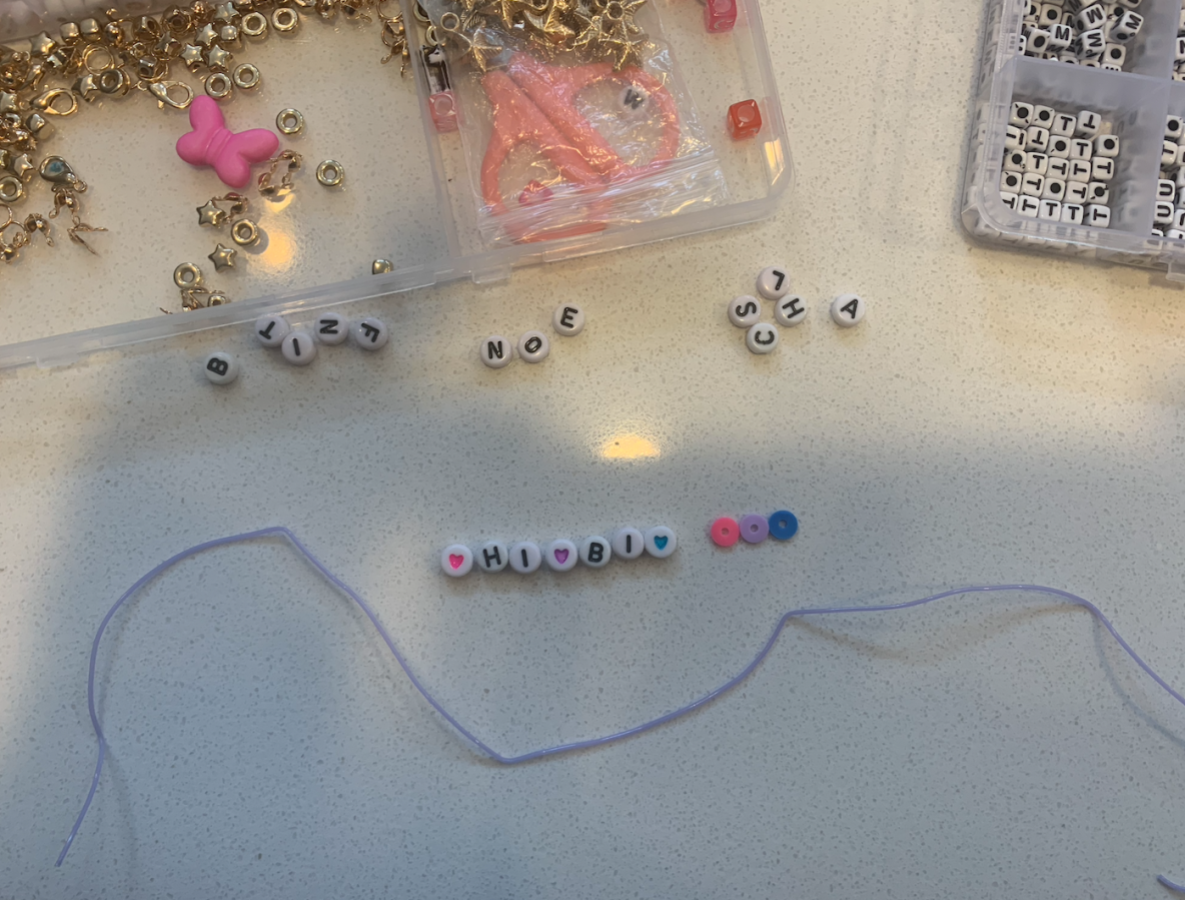
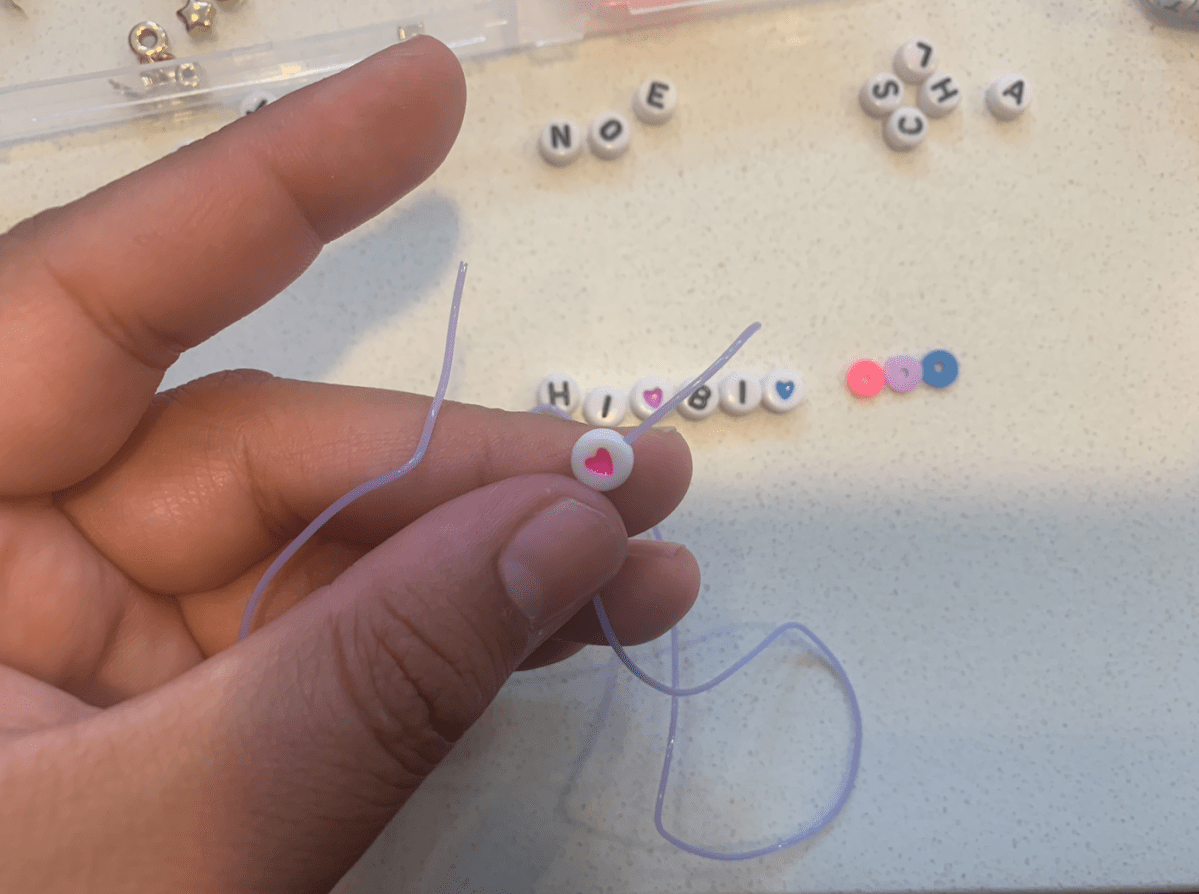
This next part everyone does a bit differently, but because I’m not the most detail-oriented and simply get confused easily, I like to string the letter beads in the order I want them to appear, and leave room on the left and right to add the colors afterward. For this bracelet, I wanted the little hearts between each of the words, so I started with the pink heart, then the “H,” and then “I,” etc., stringing them from the right side of the string to the left side of the string. If you’re going to do it my way, you MUST hold on to the left end of the string so that the beads don’t immediately fall off once you slide them on.
Once I have the words in place, I add my pink-purple-blue pattern to the right side and count out six sections of this combination. Then, I do this to the left side. Again, make sure you are holding on to both ends so the beads don’t slip away.
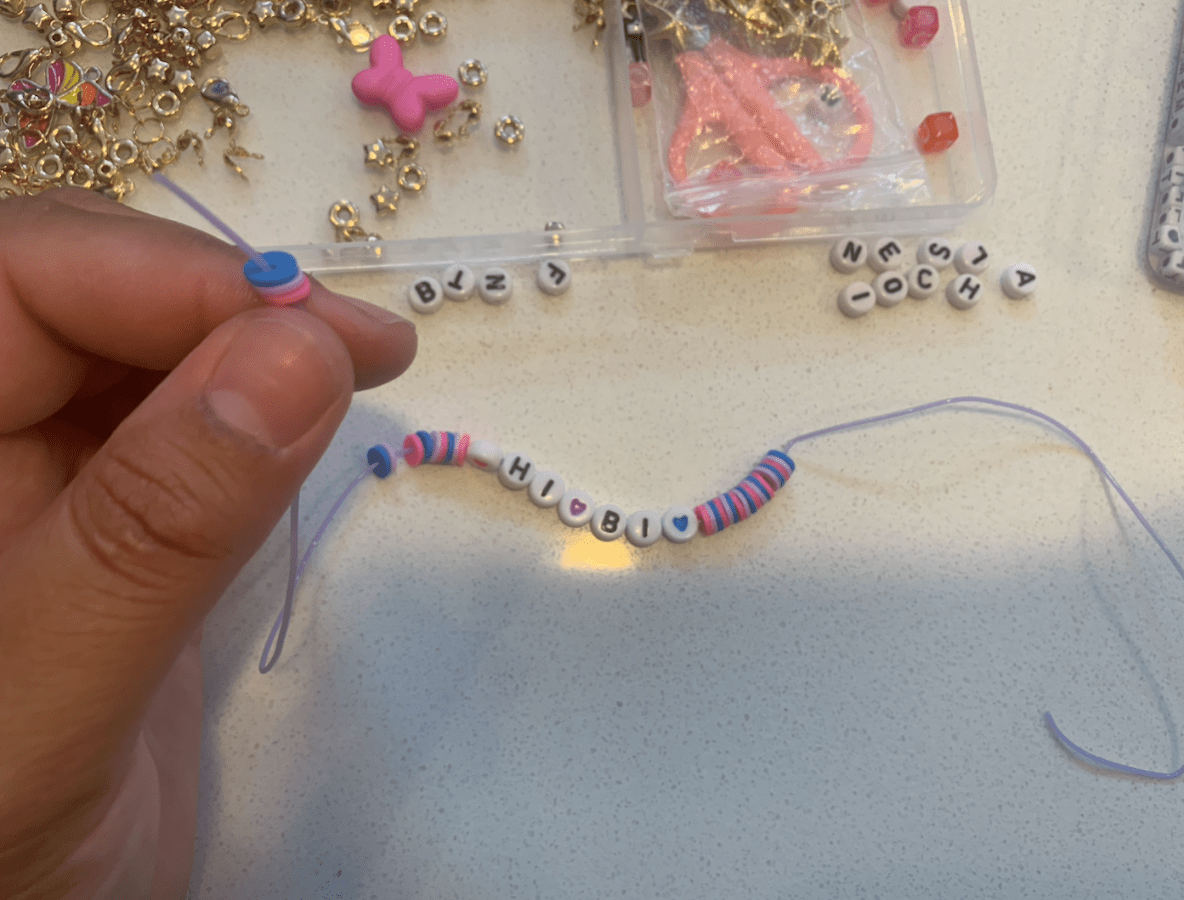
After this, it’s pretty much a copy and paste situation. Sometimes I like to add little charms like these gold squares to visually break up the pattern (and because this process takes less time the thicker the beads are). The most important part is the symmetry, so make sure you’re counting out how many units of your combination you want between each charm.
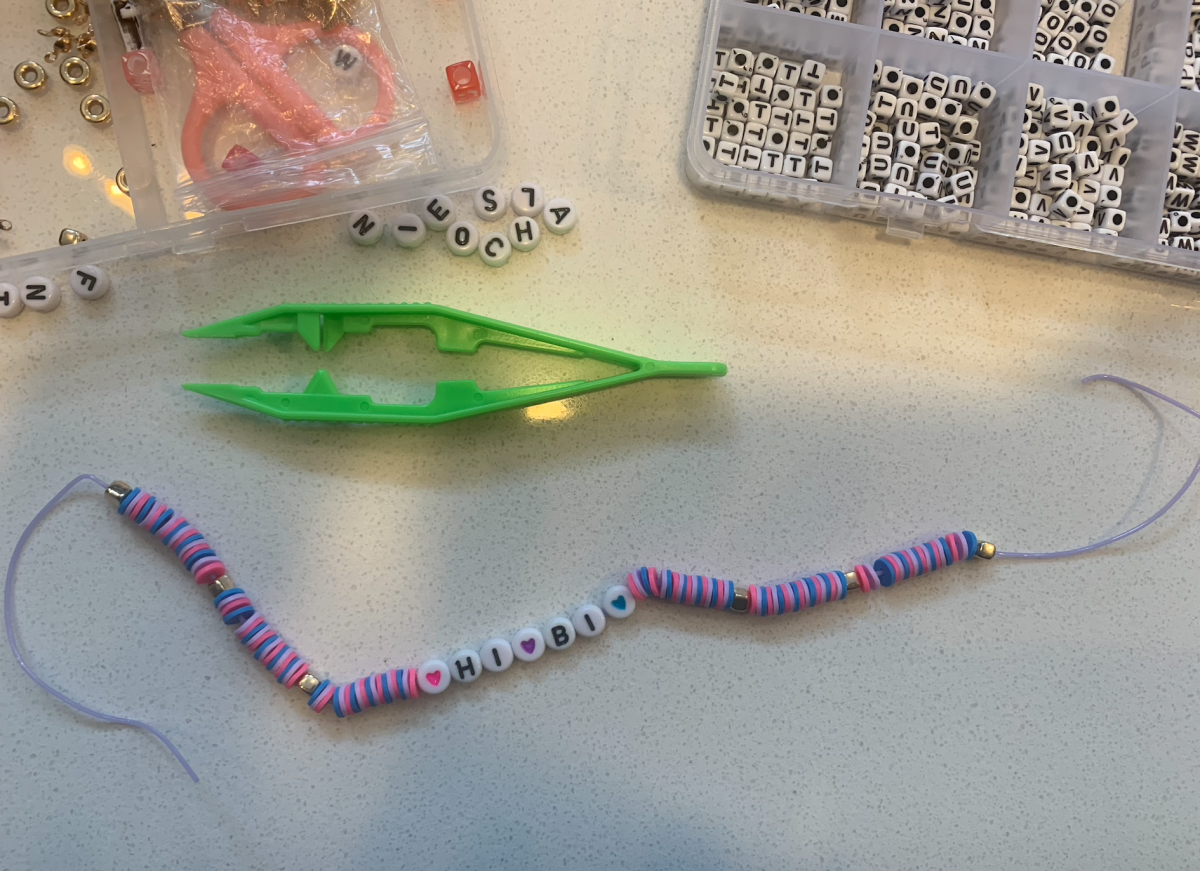
When you’re finished with your beading, carefully bring the two ends together and knot them as many times as you possibly can. I’ve tried all the little tricks for tying elastic string more effectively, but they just don’t work for me. After each knot, pull the string tightly before knotting again. You should need to do it about four to five times.

You did it! Now, onto the easier, less time-consuming bracelet!
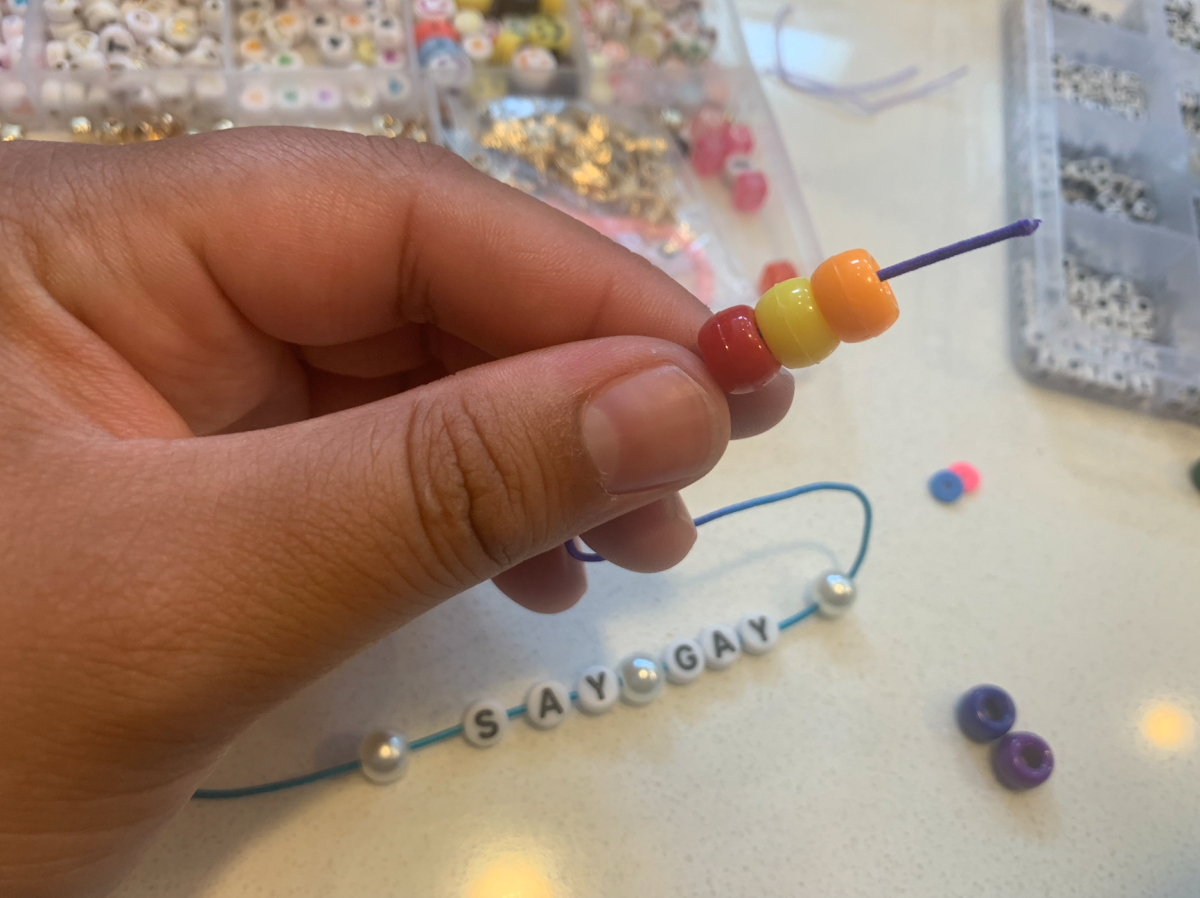
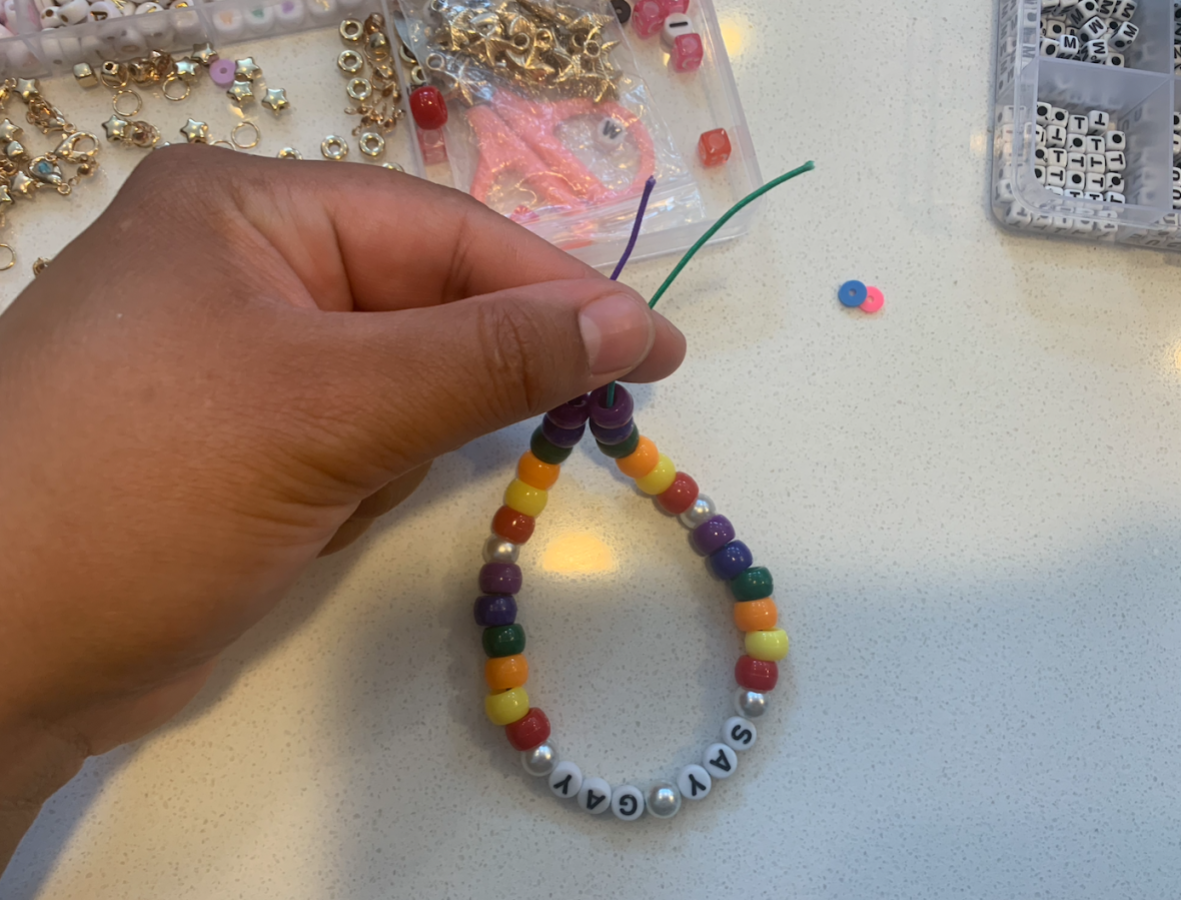
For this type of bracelet, it’s easiest to go with a thicker, more knot-friendly string. Since the bead holes are fairly large, you can’t really go wrong with any type of string or pattern. Just like the previous bracelet, measure the string around your wrist but factor in a few more inches since the beads will take up a bit more room. You’ll want to decide your color/pattern scheme and lay that out with the words. Since I live in good old Florida, I decided to stick with the classic “SAY GAY” in rainbow, but to break it up I decided to add some pearls to it.
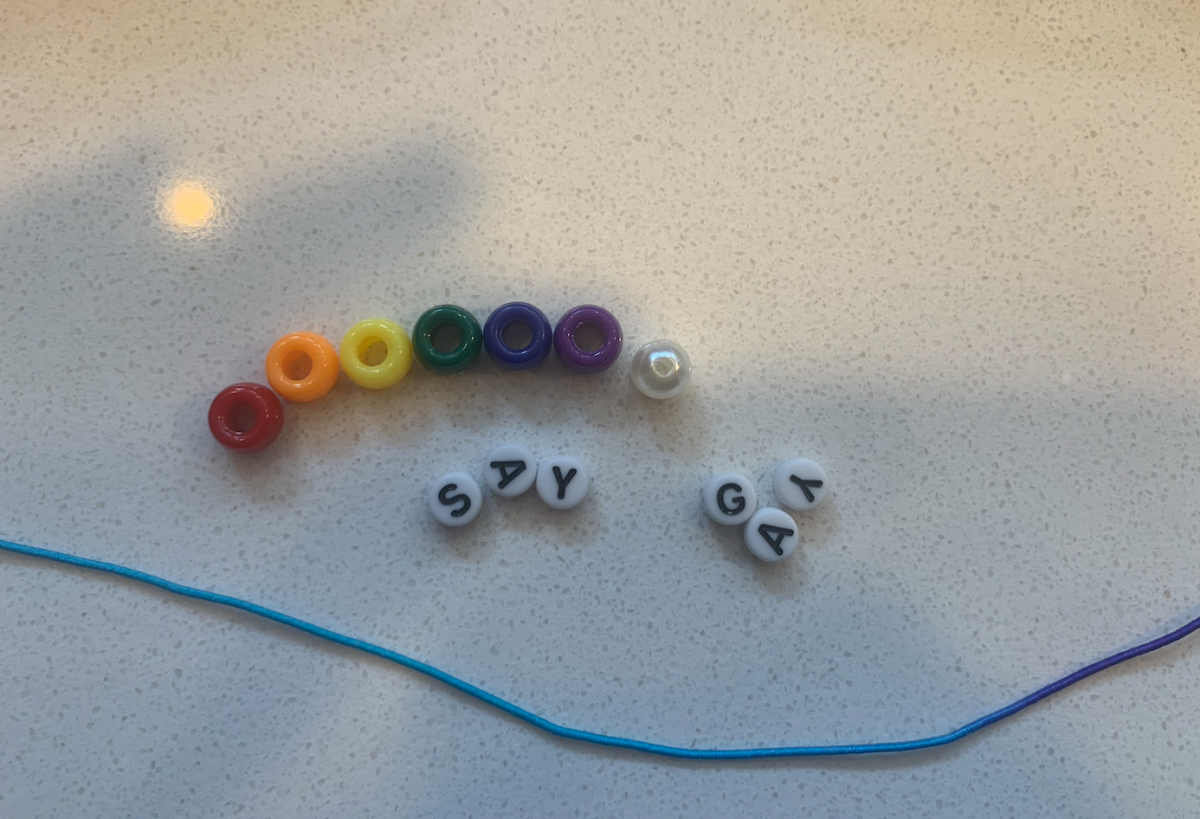
Again, I like to complete the phrase I’m putting in the middle before I add the colored beads, so I strung them right to left with the pearls. I completed the rainbow pattern on the right side, and then on the left, making sure to hold both ends so the beads don’t fall off!
The knot for this type of string is so much easier than the string for the clay beads! You can just do a regular tight double knot, and it should hold.
Now you have the gay friendship bracelets of your dreams! Happy crafting!


Comments
I love these! that hi bi one especially is so cute!
Hello fellow former camp counselor who also opted out of sports in favor of crafts! These are great.
I taught so many campers how to make woven embroidery thread friendship bracelets – like this – https://www.instructables.com/how-to-make-a-friendship-bracelet-1/
I feel like flirting with friendship bracelets is very queer and also very true to those summer camp roots.
I feel extremely seen by this. I was GREAT at making those bracelets with the thread. And I subsequently spent elaborate amounts of time making bracelets for girls that, in retrospect, I had giant crushes on
“I have quite a few friends who have pointed out that Taylor Swift concert bracelets are anything but novel.” Unnecessary much? The Swifties started making and trading bracelets cuz of the song “You’re on your own, kid”. They didn’t claim to create making friendship bracelets however trading friendship bracelets started trending again after the release of Midnights. Y’all will really take any opportunity to hate on others.