

WELCOME TO BRA WEEK! This week and next, the Autostraddle writers and some special guests will be giving you the scoop on over-the-shoulder-boulder-holders and otherwise-inclined chest-covering situations — fashion, history, feelings and so much more.
Kaitlyn and I decided to take a stab at making our own bras (of different styles and functions!) and showing you how it’s done. Let’s get to it!
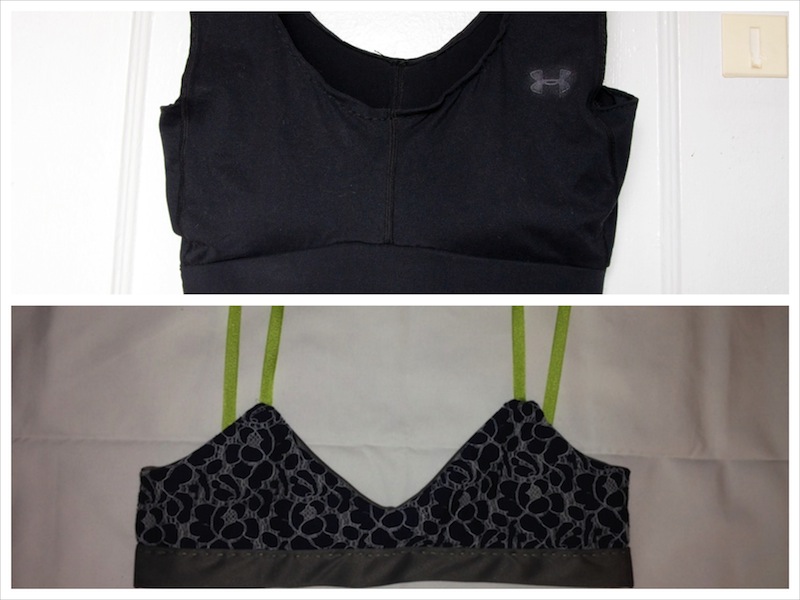
Kaitlyn’s Sports Bra
Sports bras are one of those things that I know I need but feel silly spending a lot of money on. I wear them two or three times a week, primarily during activities where I end up covered in sweat, and I feel like the big bucks should be reserved for sexy lingerie or the perfect supportive, comfortable day-to-day bra. Making a sports bra out of old workout leggings, on the other hand, requires spending little-to-no money, and provides the added benefit of clearing things I never wear out of my dresser.
The key to this DIY is finding a pair of leggings with a waistband just a little smaller than your bra band size. Measure your bra band size directly under your breasts, making sure to hold the measuring tape horizontal all the way around your torso. The elastic waistband of your leggings will stretch, so I’d say that ideal size is an inch or two smaller than your bra band. (If your bra band is 32 inches, for example, you’ll want a waistband around 30 inches, depending on the stretchiness of the elastic.) You want the band to stay firm and do most of the heavy lifting, but not be so tight as to cut off circulation.

Supplies Needed:
+ An old pair of leggings
+ measuring tape
+ needle
+ thread
+ scissors
+ pins
+ a pencil or marker
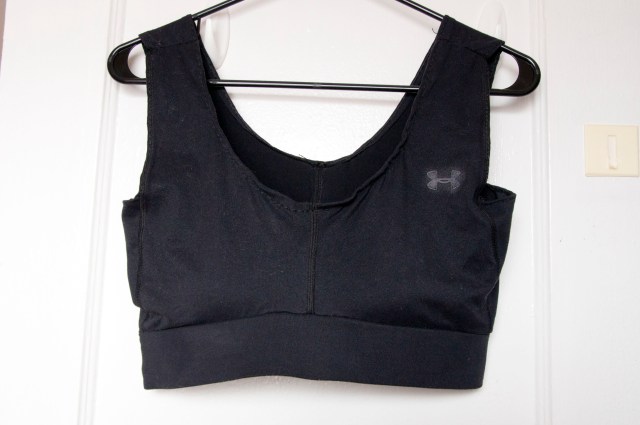
+ a sports bra you like as a guide
+ foam pads from an old bathing suit (if you want extra coverage)

Step 1: Turn your leggings inside out and upside down and lay the sports bra even with the bottom of the waistband. You can use wither the front or the back of the leggings for the front of the bra, depending on your bust size; larger busts may benefit from the extra fabric in back. Trace loosely around the rest of the bra, adding a half-inch seam allowance. Cut off the legs and remove the guide bra.
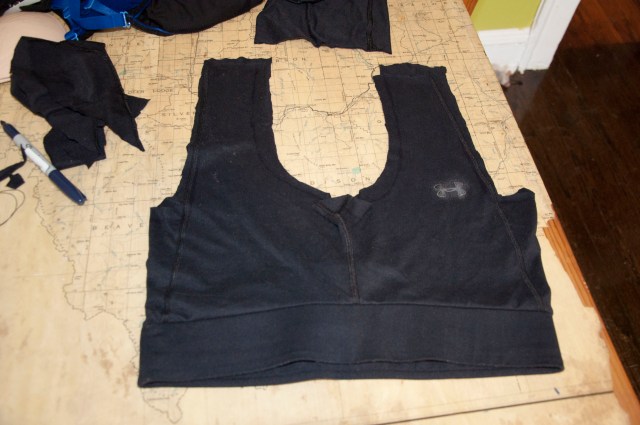
Step 2: Cut out the pattern for your new bra. The most difficult part of this for me was the neckline, because I had to eyeball how much of the extra crotch fabric to cut out before I could lay it out flat and trace the real neckline. If you’re nervous about this, just cut right along the inseam, which will go more or less down the center. After you’ve cut it open and laid everything flat, you can adjust your neckline as needed.
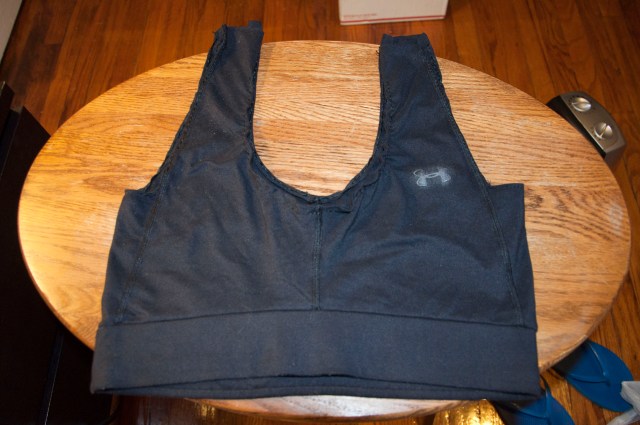
Step 3: Hem the fabric all the way around by folding it in and sewing shut. I hand-sewed a back stitch because it creates a strong seam and a nice straight line on the exposed side, but whatever you prefer will work. This would have taken about a quarter of the time with a sewing machine, so if you have one, congratulations/a pox on you.
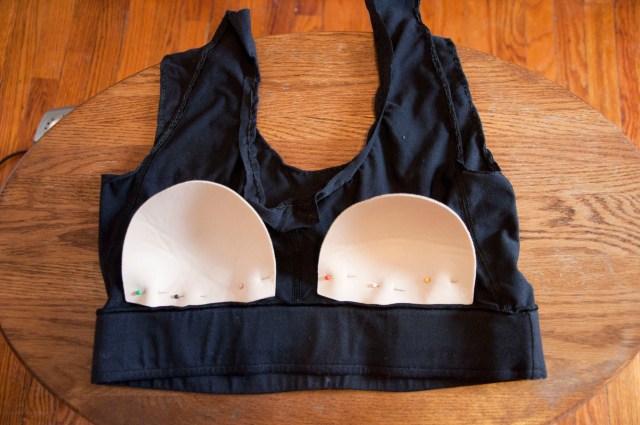
Step 4: Take your foam pads and pin them to the inside of the front of the bra. You can either eyeball the placement or hold it up to your chest to measure, but you’ll want to sew the bottom of the pad directly to the hem of the waistband if possible to keep the thread from showing through. I didn’t sew the top of the pad at all, but you can certainly do that if you want them a little more secure.
Step 5: Turn the bra right side out and put it on so you can measure the shoulder straps. Mark the line with pins, then take it off and sew the straps together. Trim any extra fabric or loose threads, and you’re all done!
Chelsey’s Wireless Lace Bra on next page
Chelsey’s Wireless Lace Bra
Bras can be super expensive! I’ve been wanting to try making my own for a long time, because it is kind of ridiculous how much money I’ve spent on them in the past. This is my first bra attempt, and hopefully they will get better with more practice! I think this one is pretty simple to make, offers pretty good coverage and is cute! Here we go!
Supplies Needed:
+ Lace fabric (I got 1/2 a yard, but it was WAY too much. 1/3 would probably work nicely)
+ A solid, opaque fabric of your choice
+ Thread
+ Pins
+ 1″ knit elastic
+ Grosgrain ribbon in any color you choose (for the straps)
+ Hooks and eyes (size 2)
Step 1: Measure the elastic around the underside of your bust. Cut a piece that is about 2 inches longer than that in order to leave room for the hook and eye clasp.
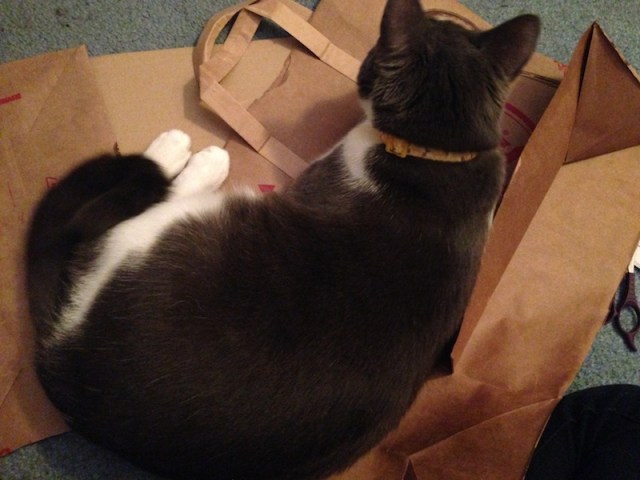
Step 2: Cut a paper bag in order to make a pattern. (Note: Your cat will probably be attracted to the sound of crinkling paper and lay down on your supplies for a bit, don’t be deterred.)
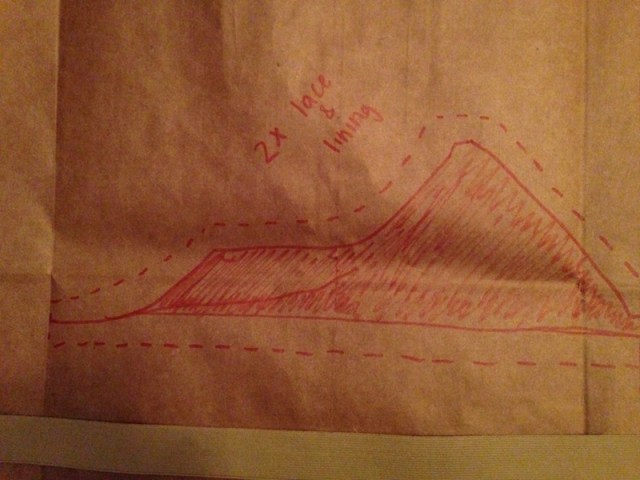
Step 3: Using a bra that fits you well and the elastic you cut as a guide, draw half the bra on the paper. Be sure the cup will allow enough coverage, and make a dotted line, in order to leave room for the stitches. Cut around the dotted line.

Step 4: Fold the lace fabric in half and pin the half bra pattern to both sides of the fabric. Repeat this step with the lining fabric as well.
Step 5: Pin the lace cut out to the lining cut out, inside out so that when you stitch them together, you can turn them inside out and the stitches won’t show.
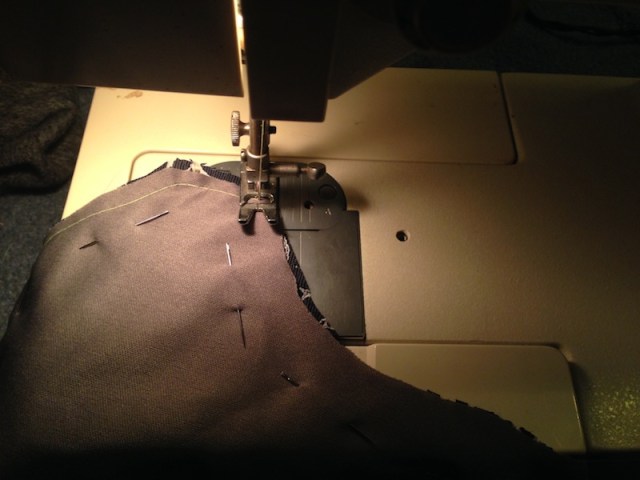
Step 6: Sew along the top only, leaving the bottom open so you can turn it inside out!
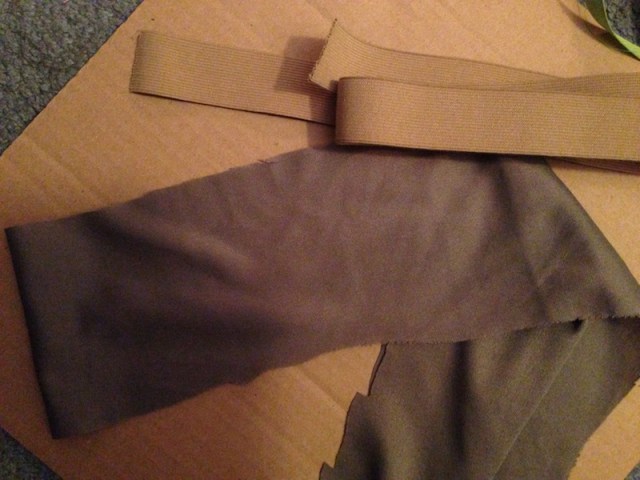
Step 7: Measure a piece of the lining fabric that is 4 inches wide and as long as the piece of elastic. This piece will cover the elastic.
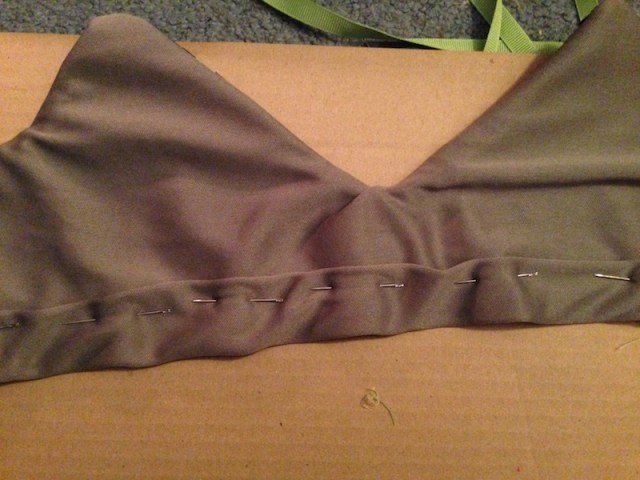
Step 8: Use the 4 inch piece of lining and wrap it around the elastic piece. Pin all of the layers together, with the unsewn bottom of the top piece tucked behind the elastic.
Step 9: Using a sewing machine, stitch across the top of the elastic, connecting all the pieces together. At this point in the process, my super old sewing machine decided to stop working, so I hand stitched these all together.

Step 10: Fold over the edge and stitch it together to make an end. Then attach the hooks and eyes so they adjoin on the ends.
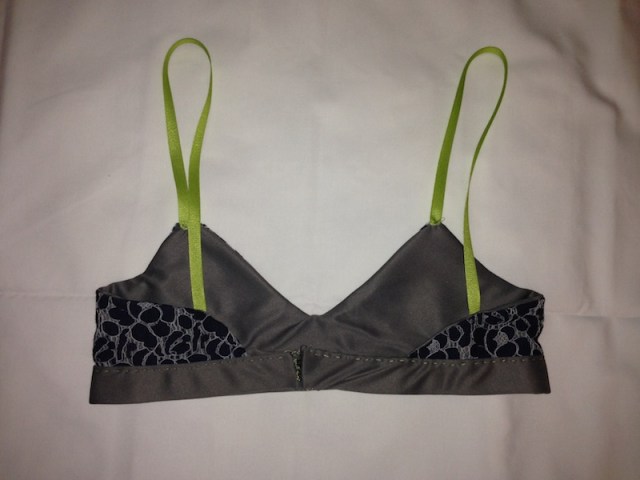
Step 11: Measure the grosgrain ribbon on your shoulders against the strapless bra you’ve constructed. Stitch those to the shoulder and back by hand or using a machine if yours is feeling helpful!
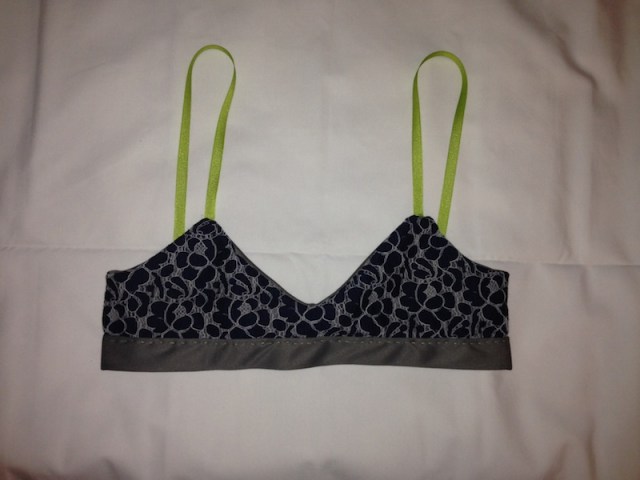
Voila!
Header by Rory Midhani


Comments
These are amazing! I’m seriously impressed. I mean, I made underwear but bras are terrifying to me. (maybe because they so rarely fit me properly) Now I want to make one!
You shooooould. I was a little scared, but this was actually really easy, and now I have a super comfortable sports bra that fits well and cost me next to nothing!
Enlisting Kaitlyn to make all my sports bras for me forever. Bwahaha. This is so cool.
Awesommeee! I think if I tried to make one it would end up looking like I put on a sports bra, and then got attacked by a hoard of angry cats, but maybe I’ll try anyway.
Wow, this seems like it would be a really ambitious project, but you make it look so non-threatening. I would’ve never thought of making my own bras. Great project!
I don’t mind spending a lot of money for a sports bra
Both bras look so awesome! Great job, guys! I’m curious how much it was to buy the supplies total?
I spent like $2 on a giant roll of thread, but everything else came from my closet! I even had an extra pair of leggings to use when I screwed up the first pair and had to throw them out and start from scratch…
Mine was about $12!
I know I’m never ever going to make a bra myself, but this is great!
I love this thank you
Very inventive and impressive, but still only suitable for the small of bust.
I wear a C cup and I made a bra like this one that fits me. So this can definitely be for not small busts, you just have to use more fabric. Just FYI!
I was thinking more in terms of support, one piece of elastic doesn’t seem very secure, but hey, you do you and I’ll just avoid stairs.
if you used the back of the pant at the front then split all the way down the seam to the waistband you could sew in a triangle of fabric adding more ease to the bust.
Well, I did it. I have never sewn before. Hubby gave me a machine over a year ago and I had not yet gotten around to using it. I have RA and I’ve been having a terrible time with costochondritis (inflammation of the ribs). Since I wear a J cup I had not been able to find a comfortable bra to wear at home. I used a worn out pair of Lands End Starfish pants and turned them into the most comfortable bra I have ever worn. It is ugly – LOL, what with crooked stitches and such but it is so soft and comfortable plus fits better and is more supportive than those stretchy sleepy bras. I am thrilled and now inspired to practice and become a better seamstress. Thank you. :-)
Thank you so much for this tutorial, I will definitely make it my business to try this project. I shop in thrift stores for these kinds of pants to go walking so I just happen to have a pair that is too small. This will be my newest project! Once again Thank You.
Amazing!! Thank you for sharing, I will definitely try to make my own sports bra :-) For bra inserts I want to use bylly sports bra pads. I recently discovered them and they stay permanently in the bra pocket. No more shifting and folding bra pads. Sounds amazing.
I am not a very confident person when it comes to my chest area and bras but this made me mich more confident. I don’t know if it is because it’s more comfortable or because I made it, I just know this is really helping me with my confidence.