

I live with a lot of other people in a house where mail is pushed through a slot in the door and gathers in a subsequent pile on the floor that spreads out into the hallway. It’s a lot of large random things like catalogs for senior citizen cruises that hide a lot of tiny really important things like jury summons and bills. But today I have decided that Enough is Enough, and I’m going to make us a mail organizer — also known as cubby holes for people who are trying to act like grownups. Or! Mail organizers for people who have new Autostraddle pen pals and want to make sure their special letters don’t get lost amidst a roommate’s coupons.
I had an image in my head of what I wanted this to look like, and so I made it up as I went along. There were some how-to guides on the internet, but they all involved sewing. I’m a busy girl. I bet you are too. So this is going to involve some fabric glue and thumbtacks. Everything I used I bought at my local discount craft store. Ready?

You will need:
a rectangular stretched canvas
fabric in at least three colors or patterns (one for the base, one for the mail pouches, and one for letters)
heavy duty thumb tacks
permanent fabric glue
fabric trim
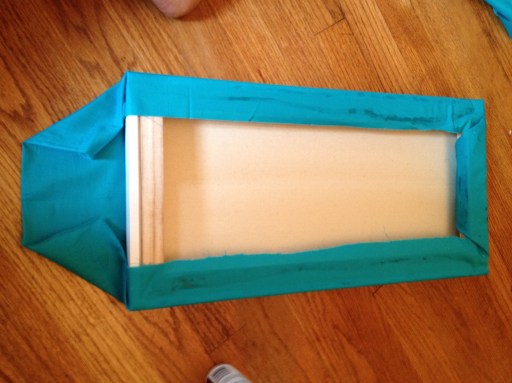
1. To make the base, cut a piece of fabric to be slightly larger than the canvas — large enough so that it can cover it completely and wrap around, so like, three inches bigger or so on each side. All the fabric I bought had been tightly folded into a squares, so before I did anything I ironed all of it. Then I wrapped the canvas up like a present, using fabric glue to attach the fabric to the wooden frame of the canvas. Make sure the fabric in front is laying nice and flat.
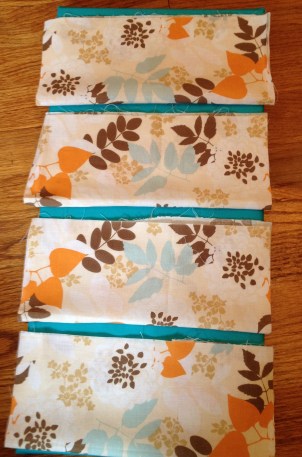
2. Cut the fabric that you’ve selected to be your mail pouches into however many compartments you need to make. Make sure they are all square and the same size. Fold each in half and arrange on your base in a way that looks appealing to you. Make sure you have enough room for everything and that they are evenly spaced and lovely. The open part of the folded fabric is where the mail is going to go, so make sure all of your openings are facing up (duh).
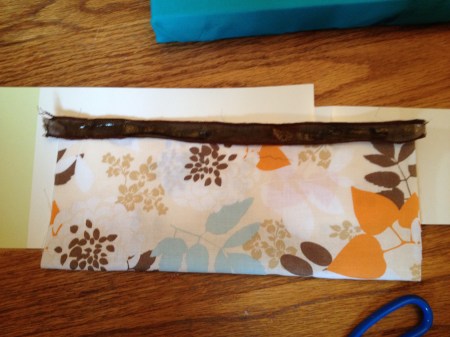
3. Glue a strip of fabric trim along the top of one side of your mail pouch, to cover up that edge that we don’t have time to sew a seam on.
4. Okay, here comes the tricky part that I definitely improvised on until I got it to work. To attach these guys and make them functional, you’re going to use both glue and thumb tacks. The edges of each pouch need to be folded under about half an inch, and then attached to the base. I started by doing this:
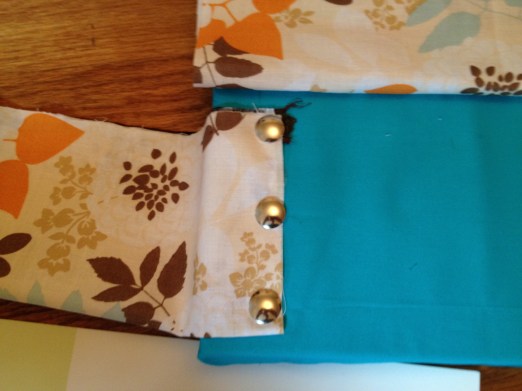
And then putting the fabric back into position and tucking the other side under, the same amount that was just tucked on the pushpin side. Then I stuck my hand in the pouch and pushed the pins into the other side as neatly as I could, so that it would match the pinning pictured above. When you open the pouch up, it should look like this inside:
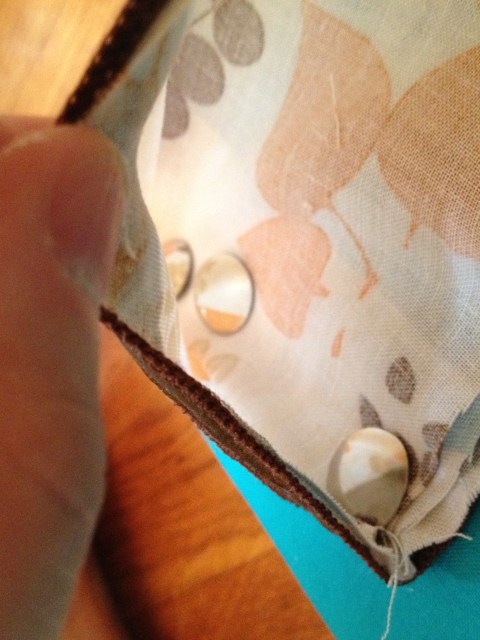
please, please ignore the glue on my fingers
Glue the back of the pouch onto the base, and then glue a strip of fabric trim at the top of the back wall of the pouch, half on the pouch and half on the base. It should now look this on the outside:
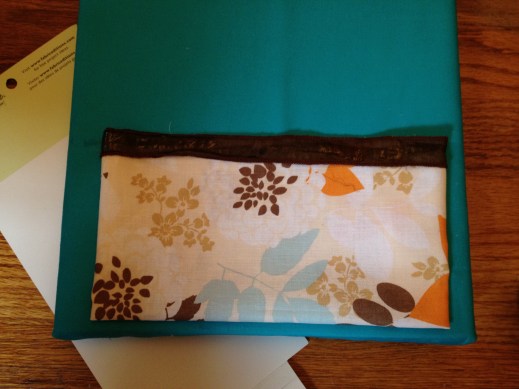
Repeat as necessary for the rest of your mail pouches.
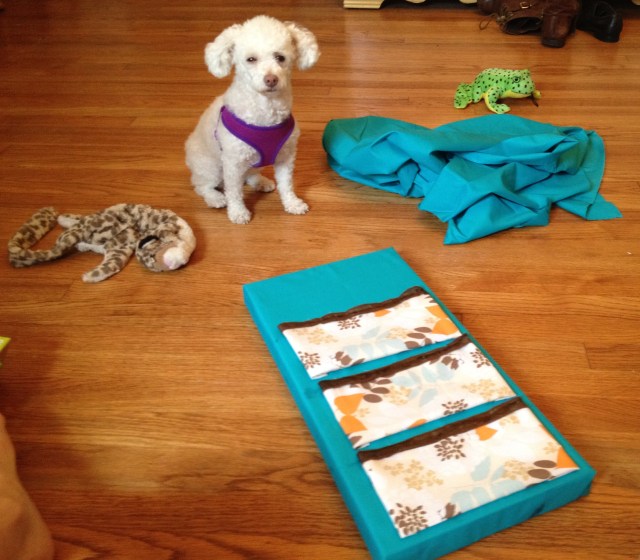
kimberly was understandably hurt that she didn’t get a pouch
5. Okay, so now you need a way to tell whose pouch is whose. I cut our first initials out of my third piece of fabric and glued them to the lower left hand corner of each pouch. This was actually the hardest part for me because my handwriting has been compared to that of a serial killer. I probably could have done this more carefully; I should have maybe even drawn the letter on the fabric and then cut it out. I didn’t do that, but you should.
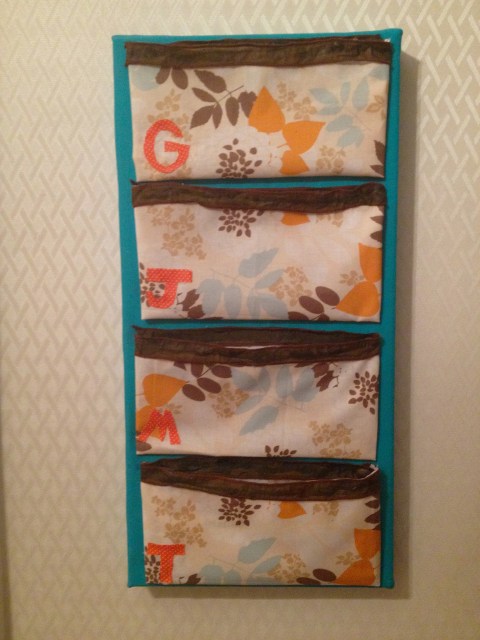
bring it, mail

such a good idea! and a pretty idea! I need one of those in my house.
Cubby holes. Cubbyhole. LOL.
Get out of my brainwaves.
you have fabulous wood floors in your house!
Adorable! And will totally fix our mail problem…I have missed so many bills and stuff haha.
I love sewing though, so will probably sew mine to make it a bit stronger.
Love the idea!
What is a “Grown-Up”?
Sounds silly to me!
Not the cubbies, those are cool!
Omg, these are the cutest! Ever! In the whole world! I wants to make them!
If I only had roommates I’d need this…I just have a pile of my own mail I lose bills in.