

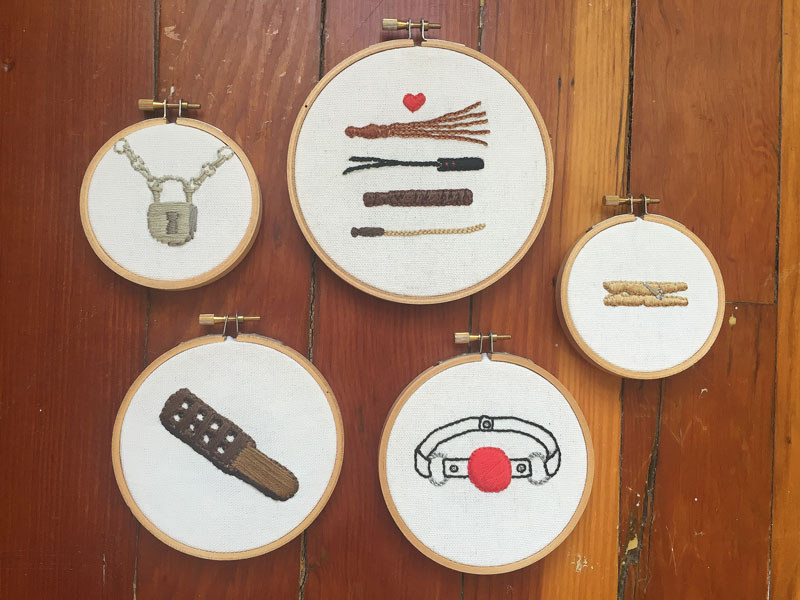
Embroidery courtesy of quinnittowinit and ceepdx
I get a real sense of satisfaction from making something cute and domestic, just a bit deviant. Whether it’s a cake piped with ‘Happy Fucking Birthday’ or a set of kitchen towels with embroidered ball gags and whips — I just can’t get enough.
I’m here to make your domestic dreams come true. Today, I’ll walk you through some set-up tips and four essential embroidery stitches that’ll set you up for crafty success. You will soon be breaking hearts with your thoughtful embroidered gifts and delighting your house guests with your terribly witty embroidered artwork.
Supplies:
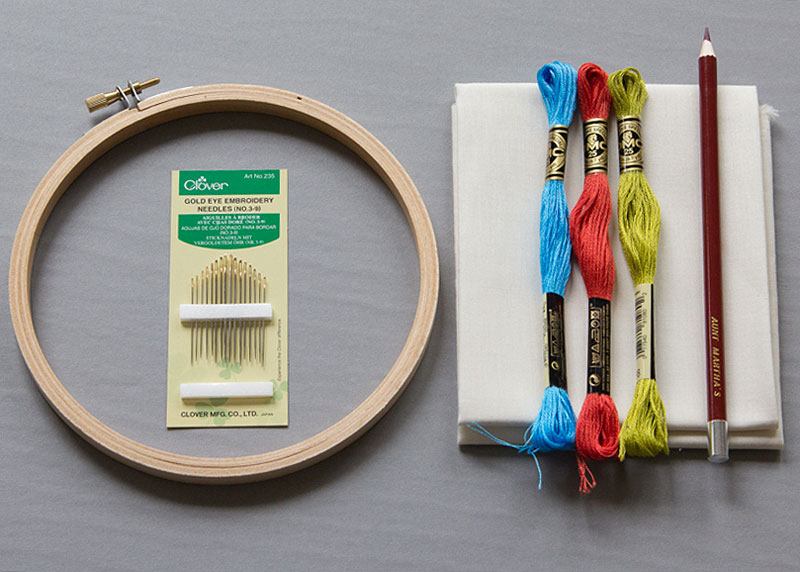
- Fabric: To start, try some muslin or quilting cotton.
- Embroidery Hoop: A 6″ hoop seems to be the perfect size. If your design is larger, you can move your hoop around rather than working inside a huge hoop. To start, the cheapy wooden hoops are fine. But, if you fall in love, it’s worth it to get a nice one like this.
- Embroidery Needles: This is important. Make your life easier as just invest in some nice needles. I like these gold tip ones, they’re sexy and super sharp. They key is to use a needle with a large enough eye to thread with embroidery floss and sharp enough tip to pierce through your fabric.
- Embroidery Floss: 6-thread, good quality, 100% cotton for beginners.
- Transfer Tool: I use a iron-on transfer pencil but even a led pencil can be used.
Transferring Designs

There are tons of ways to transfer designs to fabric for embroidery. My favorite technique involves using iron-on transfer pencils. Once a design has been printed or drawn, you can simply trace the design with an iron-on pencil. Once traced, your design can be ironed onto any fabric that you intend to embroider on.
In the design pictured, I traced the design with a fine-tip permanent marker in order for the marking to bleed through to the backside of the paper. Then, I traced the mirror image on the backside with the transfer paper. Remember — words are hard to read backwards.
If you don’t have access to these fancy pencils, a light led pencil or chalk marking will work. To avoid seeing the markings through your embroidery, keep them thin and light.
The Set-up
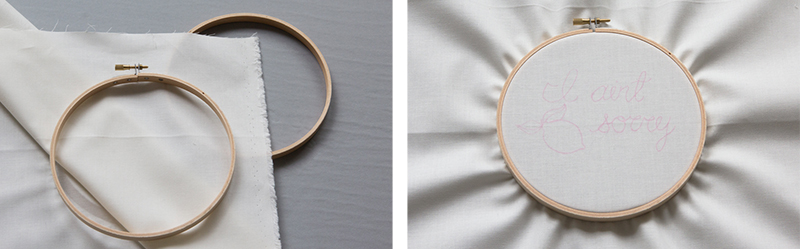
- Loosen the screw on the outer hoop to separate the outer and inner hoop.
- Place the inner hoop under your fabric, with our motif inside the circular area.
- With the outer hoop still loosened, but not too much, push the outer hoop down over the inside one. This will sandwich the fabric between the two hoops. Tighten the outer hoop screw. Your fabric should be taut, not floppy. If it is not taut enough, it will be difficult to manage the tensions of your stitches.
Threading
Embroidery floss comes in different weights and types. I recommend starting off with 6-thread embroidery floss, it’s the easiest to find and work with. These threads are sold by the skein and are made from 6 different threads loosely twisted together. Generally, these threads are separated into different thicknesses and 3 thread weight is a nice standard weight to start with.
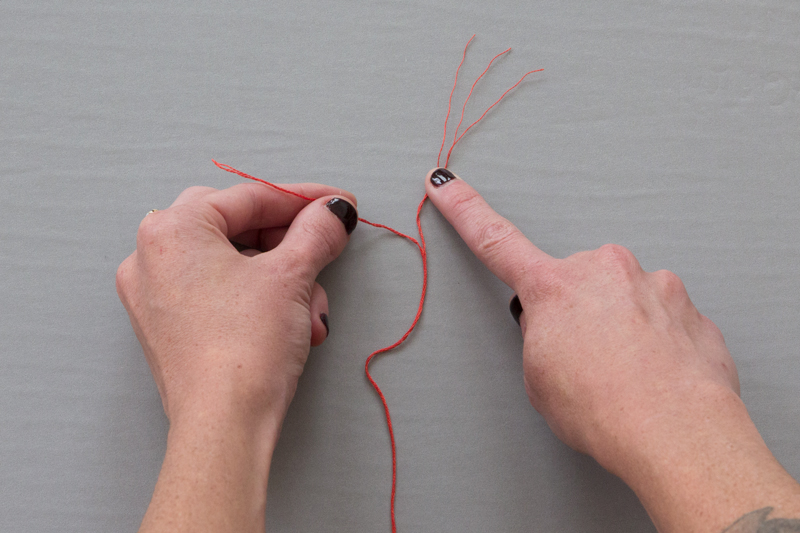
- Cut your thread at a manageable length. Some say that you should never work with a longer length than your forearm but you do you.
- At one end, separate three threads from the 6-thread floss. Slowly pull your three threads from the rest of their buddies. Now, you’ll have two lengths of 3 thread floss to work with.
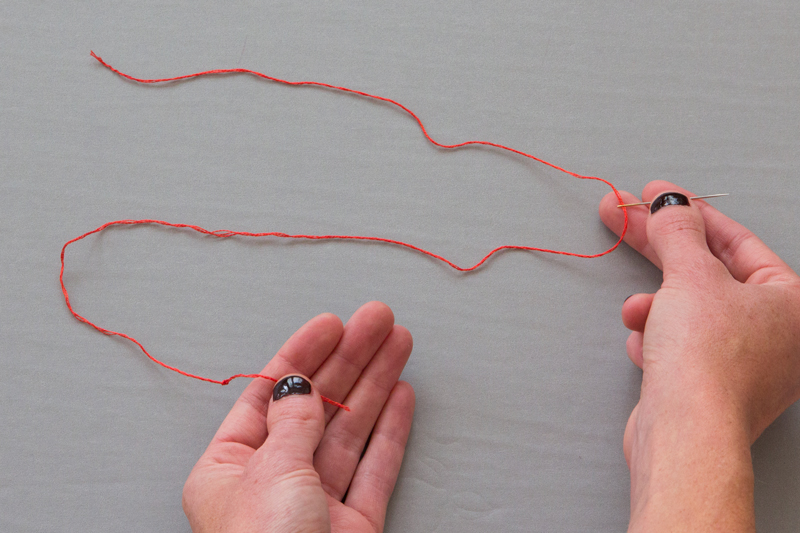
- Thread one end of the thread into the eye of your needle and tie a double knot on the other end. When embroidering, one end of the thread is knotted and the other flows freely. See photo for reference.
The Backstitch
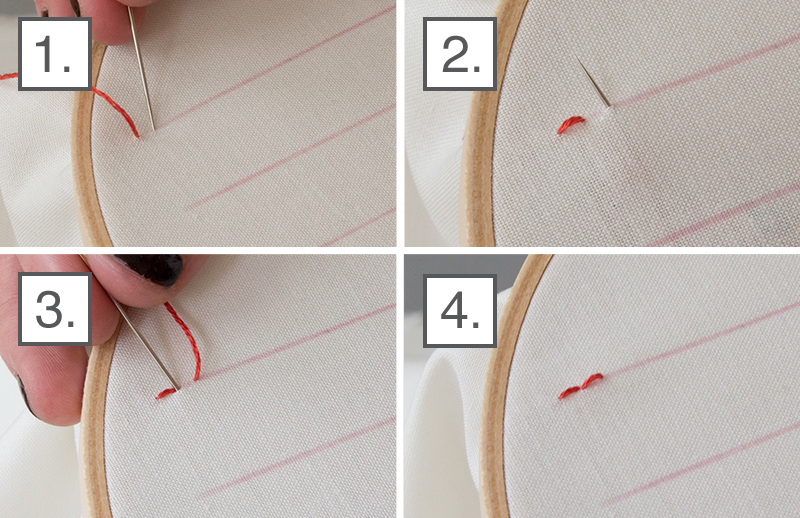
- Make a single stitch by bringing the needle up from the back of your hoop and back down again along your design’s line. I prefer to make a stitch that is about ¼” long.
- Continue along your pattern line, but bring the needle up a “stitch length” ahead. For instance, if my original stitch was ¼”, I would bring my needle up ¼” down the design’s line.
- Bring your needle back down into the same hole at the end of the first stitch you made.
- Continue this same back and forth for the rest of your backstitching.
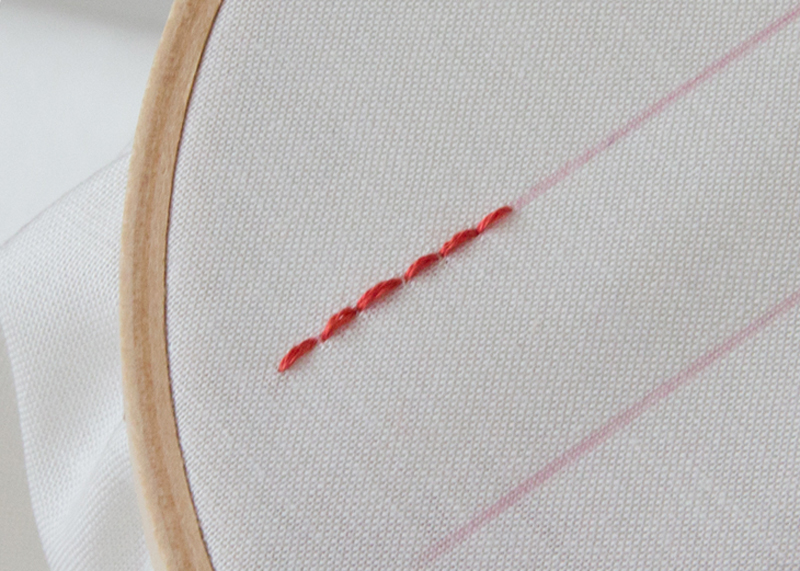
The Split Stitch
This stitch is almost exactly the same as the backstitch with one slight variation.
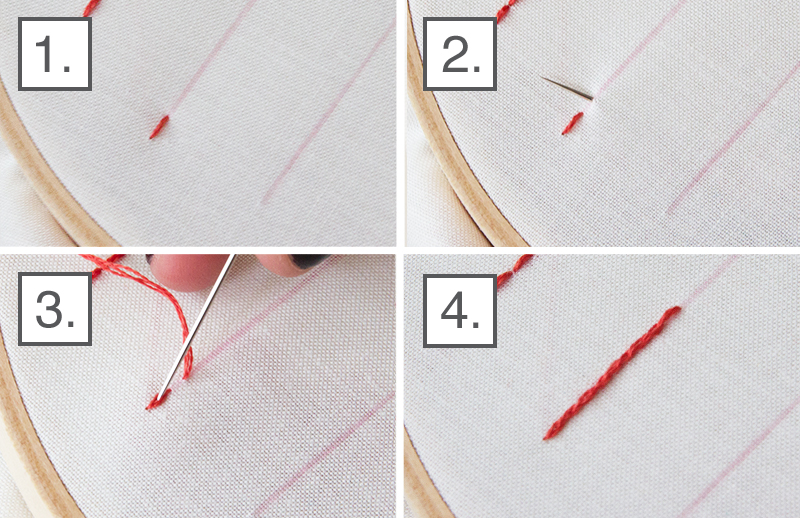
- Make a single stitch by bringing the needle up from the back of your hoop and back down again along your design’s line.
- Continue along your pattern line, but bring the needle up about ½ a “stitch length” ahead. For instance, if my original stitch was ¼”, I would bring my needle up ⅛” down the design’s line.
- Bring your needle back down into the middle of the stitch you made previously. Continue this same back and forth for the rest of your backstitching.
- Continue this same up and through the stitch motion for the rest of your split stitching.
The Satin Stitch
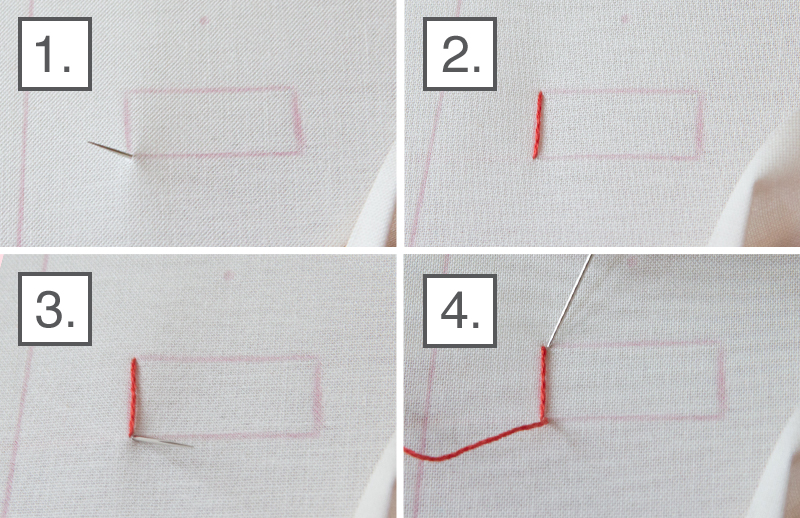
- Pierce your needle through to the front side of your work, along the edge of your shape that is going to be satin stitched.
- Bring the needle to the opposite side of your shape’s outside edge and pull it through to the backside of your work.
- Bring your needle to the front, very close to the original stitch along the outer edge.
- Continue to stitch from edge to edge along the shape.
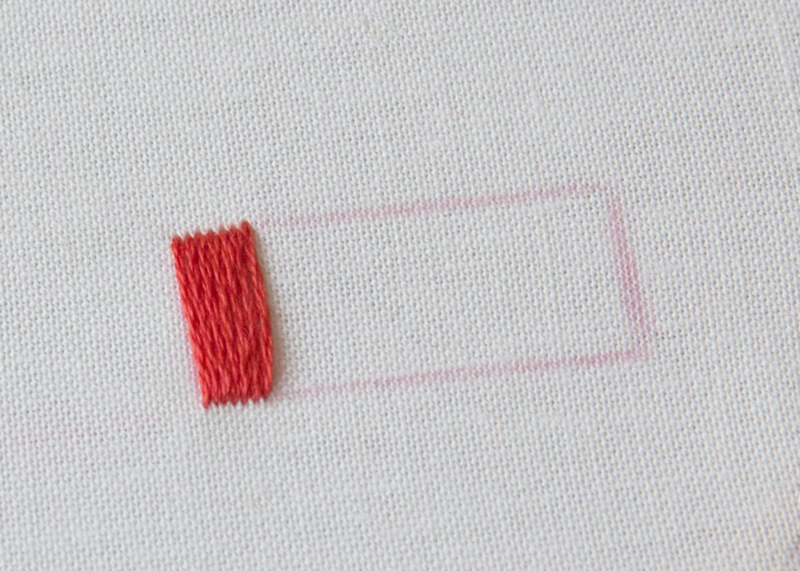
A few tips for satin stitching:
- First outline your shape in a backstitch and then satin stitch on top of the backstitch. This will give your edges a bit more structure and keep the edges from pulling.
- To create an even more three-dimensional look to the satin stitch, fill in the inside of your shape with some running stitches (no prettiness necessary). These running stitches will act as padding for your shape. Simply ignore them when finishing with a satin stitch.
The French Knot
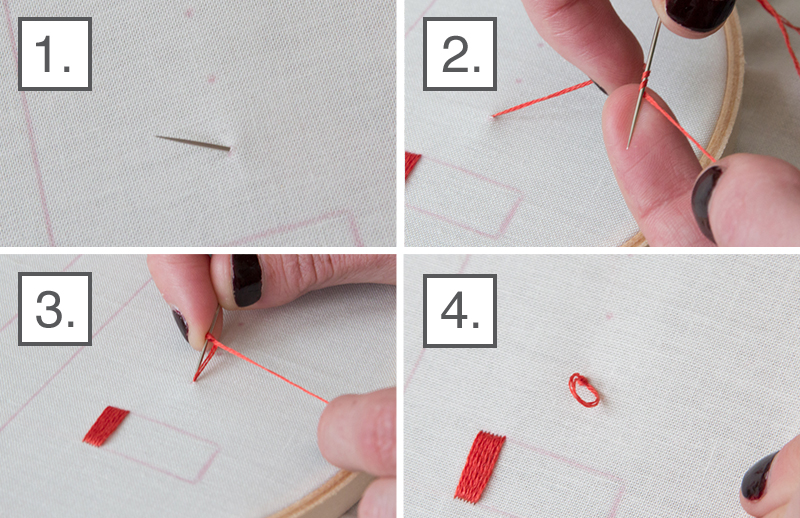
- Bring the needle up to the front, through the place where you would like your french knot to be.
- Wrap the thread around your needle two times, keeping a good grip on your thread in order to keep it taught.
- Bring the point of your needle straight through the place you came from, still holding onto the loose thread.
- Pull the needle through to the backside of your work, creating a knot on the topside of your work.
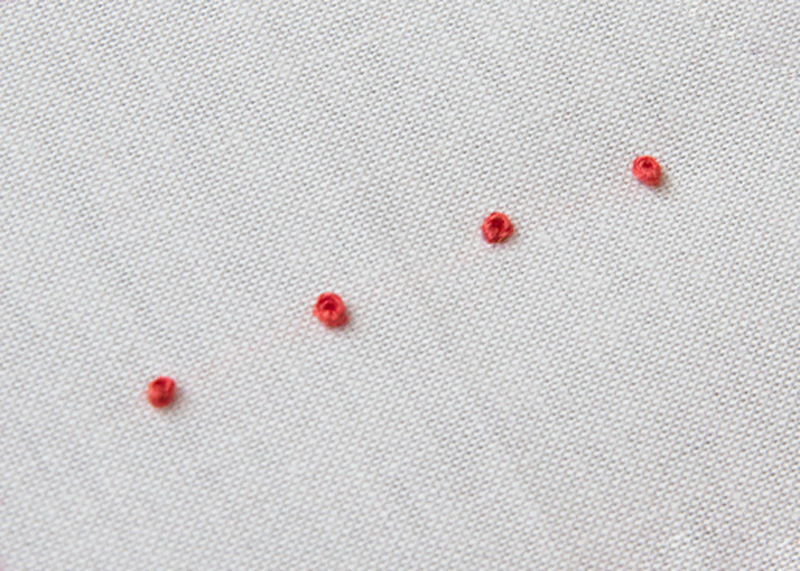
The french knot takes a bit of practice but as you can see, they are stupid-cute.
Extra Resources
- Sublime Stitching: Great how-to’s, patterns, and artwork including this Dolly Parton portrait.
- Castellation Embroidery Kits: Because, duh.
- Studio MME: PDF patterns and kits with your favorite animals.
- Odd Ana Stitch: Strangely beautiful embroidery patterns and kits.
- Her Made Collective: Some risqué inspiration.


Comments
I’m excited to see this! I’m a long-time subversive cross-stitcher and November and December have always been prime time for me. I’ve been wanting to try some embroidery and this may be just the push I need, especially feeling as I do right now the need to get my face out from behind a computer screen. Thanks for the tips.
I have been looking for a big patch for the back of my pin covered denim jacket… something that says ‘riots not diets’ or #notmypresident… now maybe I will just make my own!
YESSSS!!! I recommend using canvas or a linen blend and using all six strands. (Check the remnants section of your local fabric store for deals.) Rawr!!
Please, please, do this.
I love this!
I’ve never embroidered before, but I’m looking for hobby. Do you think I would like embroidery? My fingers are kind of on the thicker side – does that affect anything?
I really enjoy embroidery. You can buy a kit if you want to try it. Finger size shouldn’t matter — as long as you can get the needle in the thread, you should be OK.
It’s a super relaxing and portable craft! Plus, it’s a smaller investment than buying a loom ;)
This is awesome! Another way to transfer drawings is with a transfer pen that has water-soluble ink. So you would trace the design onto the fabric (I place it on my laptop with full brightness to make it easier to trace, but you could also use a light box or window), then sew, and then spritz water on it or use a damp cloth to clear away the lines!
That is an awesome idea, thanks Kristina! <3
I love embroidery but I always find the instructions hard to follow. these were so simple and easy! Thank you!! :D i am excited to start stitching again
My proudest embroidery achievement is still this pillow I made for my sprout-tattooed, roller derby-loving, Hufflepuff girlfriend, but I did it all with backstitch only, and I’ve been wanting to learn more elaborate stitches, so this is awesome!!
http://i.imgur.com/kSJvOlV.jpg
Ah, my first attempt at posting a photo. Maybe this will work??
Wow that looks really cool!
whoa!!
AGGRESSOR SPROUT
One of my better punning moments :D Also, just kind of perfect for my agriculture-loving Hufflepuff girlfriend, who used to work on a sprout farm…
As a fellow skatin’ Hufflepuff I just died! Way to be friend!
YES! thank you!!! I’ve just started to try to learn embroidery and definitely was doing a few things not quite right, the pictures really helped! Now to improve my “CPTSD BLOB” patch
Thanks for this! I’ve been cross-stitching most of my life but I’ve never felt confident enough to delve into embroidery. I may have to try my hand at it this winter!
Embroidery always seemed so boring to me, i always think of a straight laced super uptight person with no social skills when it comes to embroidering. If I can make it slightly inapropriate and make my own designs, I’m in.
After reading this article, I found this kit to make a cross stitch angel ornament in my parent’s basement and improvised…. thanks for the inspiration!
This is so excellent.
Also maybe I’m a heathen but it the fact that it was supposed to be used to make an angel makes it even more excellent.
Oh dang! This is so good!
I am so excited to start embroidering again. I used to love it as a teen. Thanks for the post!
I was needing something to distract myself after everything, so a few hours after reading this I went out and bought some basic supplies. I also went to one of those sites and bought a pattern that I thought was the cutest and now after half a season of Broadchurch and a season of Parks and Rec I have this to show. (I’m going to hope posting this picture works the first time.)
My partner also used those patterns! The kits are so easy to stitch up and turn out beautiful.
Oh my goodness! I love this! My partner made me one of these kits (the fox one, duh) when we first got together. Way to get into some selfcare and do something productive. It sure beats refreshing a social media feed over and over, which I’m just now climbing out of.
Love this!
I’m just getting back into cross-stitching, and I was wondering if you could explain how to neatly pull back the fabric in the hoop when you want to display it?
The link below will take you to a tutorial for a technique I’ve used before. Whatever you do, do not just cut the extra fabric right up against the hoop. Your hoop needs that fabric to properly hold the tension of the fabric. If it’s not there, your hoop will eventually be a bubbly mess.
http://stitcharama.com/how-to-display-your-finished-embroidery-in-a-hoop/
Cheers, thanks!