It’s December, which means another year is almost in the books. Here at This Queer House, we’ve had some ups (my dining room furniture looks great!) and some downs (one word: caulk).
To finish the year off strong, I took to twitter to answer your burning DIY questions.
Question one is from @mchodora, who writes, “I need help rewiring a lamp. Please!”
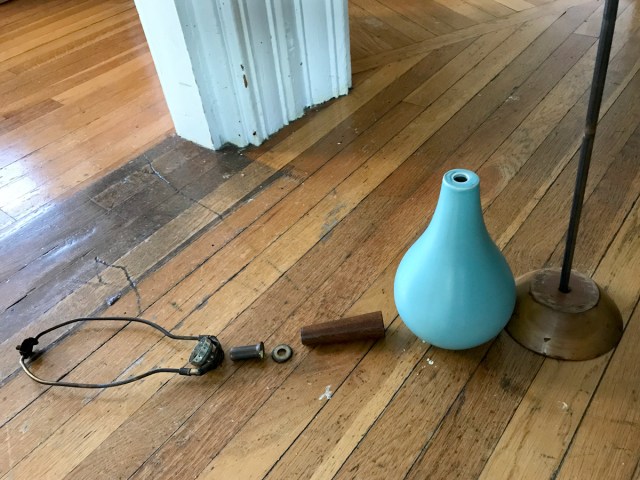
Let me tell you what, the idea of rewiring a lamp is a lot more daunting than doing the actual thing. I borrowed an old, out of order lamp from a neighbor, and the whole project took well under an hour. Here’s how I did it:
What You’ll Need:
- Lamp
- Rewiring Kit – I accidentally bought a lamp-making kit, which came with a whole bunch of parts I didn’t need. All you really need is a new cord and socket and you should be able to reuse the old hardware.
- Pliers – I like using needle nose, for dexterity.
- Wire cutters – Many pliers have built-in wire cutters, so be sure to check.
- Screwdriver

What To Do:
1. Take off the shade and remove the lightbulb. If it’s an older lamp, like the one I was working on, you might need to use some WD-40 and pliers to get the top cap off.
2. Remove the socket sheet and pull out the old socket. The socket sheet should just slide right off. I was able to pull the socket out of the socket cap easily, but you may need to use your screwdriver and gently pry it out.

3. Cut the cord and remove it.
4. Thread the new cord through. My lamp was a bit tall and tricky to get the cord through, so I took it all apart.
5. Reassemble the lamp (optional). If you took your lamp apart in step 4, now is the time to put it back together up to the socket cap.
6. Tie an underwriter’s knot with the cord extending out of the socket cap. I had absolutely no idea what this was, or how to do it, but I found a woman on YouTube who showed me how. She is lovely!
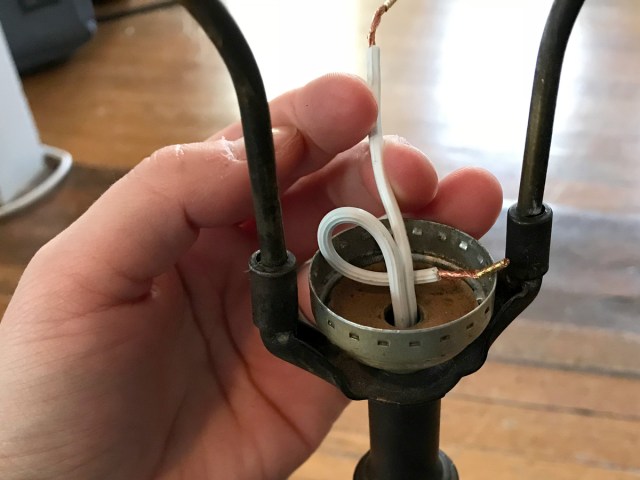
Halfway to an underwriter’s knot.
7. Identify the neutral conductor. Your kit should tell you which one it is. My kit claimed that one conductor had ribbing on the insulation, but tbh they both kind of looked ribbed. I asked my wife for a second opinion and she said, “Yeah, I think you’re probably right, but it’s a 50/50 chance anyway – just go for it.” Wise words when dealing with electrical work, indeed.
8. Connect the wires. Again, consult your kit here because they should tell you which wire should go to which screw. Loosen up the screws, wrap the conductors around, and then tighten the screws up.
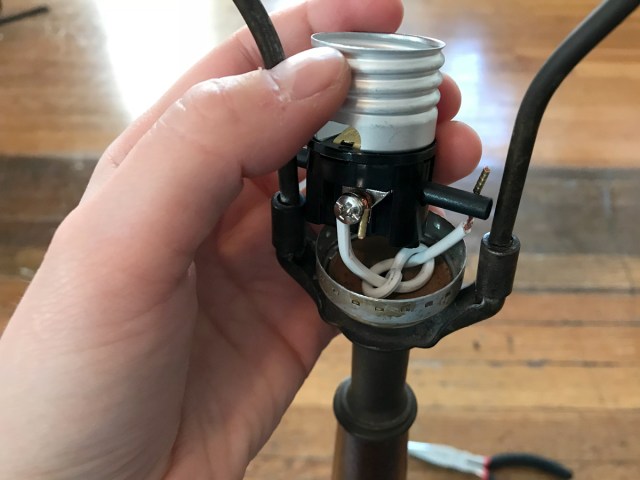
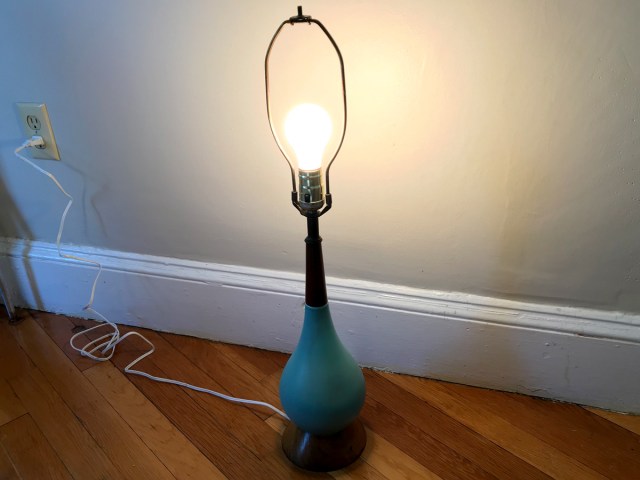
9. Push the socket into place and cover it with the socket sleeve. That’s it! All that’s left to do is grab a bulb and plug it in.
The next question comes from @33katiek: “Love this column! I’d also love to know how to replace moldy silicone between my vanity unit and the tile backsplash!”
Katie, just reading this question gave me intense flashbacks to a column I wrote a few months back where I replaced the caulk in my bathtub. Assuming what you need to do is similar to that, I’ll direct you there and let you learn from my mistakes.
Our final mailbag question, from @lucyhallowell, asks, “how do you stop a toilet from running?”
This actually happened to our toilet recently, and it wasn’t too difficult to get it to stop. Here are some possible fixes:
-
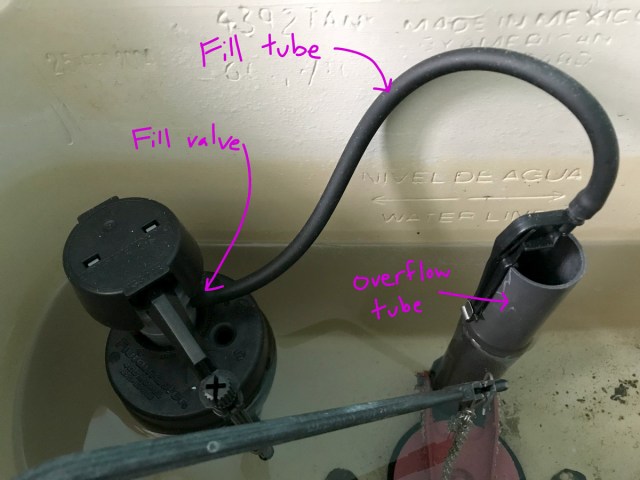
- Check the fill tube. If something is wrong with the connection of the fill tube, the tank might not properly fill up. Check to make sure the tube is firmly secured onto the fill valve and that it sticks up about an inch out of the overflow tube.
-
- Adjust the float. If your float is set too high, it could cause water to spill back into the overflow tube and make the toilet keep running. The float should be easily adjustable – look for a clip to squeeze.

-
- Check the flapper chain. Ideally, the chain should connect the flush rod (the piece that attaches to the actual handle on the outside) to the closed flapper (the red seal on the bottom of the tank) with just a little bit of slack.
- Replace the flapper. This is what we had to do to fix out toilet, which would run intermittently, and it seems to be a common issue. If the flapper doesn’t seal thoroughly, the water will leak through slowly and cause the toilet to run. We weren’t able to match the type of flapper exactly, but buying a universal replacement has done the trick. Flappers are easy to install – most snap right on.

Well that’s it for This Queer House in 2017. I’ll see you with more DIY tips/projects/lessons in 2018!

“Wise words when dealing with electrical work, indeed.” PLEASE DON’T GET ELECTROCUTED I LIKE YOU A LOT.
That toilet running thing is super helpful! I’m usually pretty good at intuitively fixing my toilet but sometimes I run into issues – I had no idea the floater was adjustable, so that’s super good to know. Thanks for your great advice and adorable photos throughout the year. <3
Electrical appliances and lights (like in the ceiling) have always been a bit of a mystery to me. I’ve never interrogated that. Reading this column I’m like, well, that doesn’t seem so hard after all. I don’t need to rewire a lamp, but I do need to install a new light in my dining room, so maybe I’ll have the confidence to tackle that now, since my DIY sister-in-law won’t be visiting for a while.
You’re right, that knot-tying lady was super lovely!
I was going to call a plumber or handy-person to fix my leaking flapper valve until my brother looked it up on youtube and showed me how easy it is. I had to replace the flusher knob (or whatever) too because as it degrades the flapper valve gets gummy, and I let it go so long that one day the flush arm snapped! Haha. No one in my family is particularly hand (except my mom, probably), so it was a big revelation to my siblings as I shared my toilet-repairing stories on email, and I think we all felt a feeling of accomplishment when I successfully made the repairs for a few dollars!
Thank you for this column. It’s seriously helpful for this city girl who never grew up “doing” things like this.
Congrats on a great year Jenna!
Btw there is another way to identify which wire is the neutral and I’m always happy to help with technical questions if you have them! :)
What is the other way! Teach me! :)
The neutral prong, the thing you stick into the wall receptical, on a plug without a ground will be the wider of the two prongs. This is not true in every case because some devices don’t care which conductor is which, but on most lamps it will be the case. So check for ribbing first and if that fails check the prongs.
this column zen(ned) me out in a way I didn’t know was possible until I read it. Maybe time to pick up some tools and work on a project? Thank you!
Yay! Thank you for answering my question about replacing silicone – don’t know how I missed that the first time. I will definitely give this a try – here’s a to less disgusting vanity!
Just wanted you to know that this post inspired me to finally rewire not one, not two, but THREE awesome flea market lamps that have been sitting around my house for months. Yay working lamps!
