Way back a long, long time ago, people would gather in close circles in their homes and sew garments with their hands, their work illuminated only by flickering candlelight. They darned socks, made christening gowns from scratch, sewed buttonholes, embroidered beautiful designs onto the edges of collars and onto the pockets of aprons — there were many items of clothing they needed, and they made most of it themselves. The first sewing machine was invented in 1755, and within a hundred years the device was commercially available to middle class families around the world who were overjoyed at the prospect of making quick work of sewing clothing. A man’s shirt could now be completed in only an hour with the aid of a sewing machine, compared to the 14 hours it once took to sew by hand. The construction of clothing had been changed forever, and so had the lives of the housewives, children and servants who had been depended upon to create the bulk of a family’s essential wardrobe items.
There is something astonishing, even magical about sewing with your hands. Most tools of the trade are tiny, but effective — little thimbles that fit over the fatty parts of your fingers to keep them from bleeding when you inevitably stick yourself with a “sharp;” needle eyes and points of various sizes and widths, each combination made for sliding easily in and out of a specific type of material; thin ribbons of thread that you double knot at the end and pull through a tiny ball of wax to keep it smooth and free of twists when it travels through the surface of your cloth.
Alabama Chanin, a designer and seamstress based out of Florence, AL, has even dedicated several books to the art of hand stitching articles of clothing from scratch. In a world where fast fashion is the norm and even the sewing community gets fixated on the newest gadgets and gizmos to make clothing construction easier and quicker, Chanin’s books stand out. There is a definitively anachronistic feel to them, and yet her books include fresh, simple patterns and provide an interesting element of clarity to the age-old craft. While I so admire her work and the unique perspective she offers the modern seamster, for the purposes of this article I am going to focus on machine sewing and all the tools, notions, and know-how that one needs to get started with familiarizing themselves with the craft.
For intermediate and advanced sewers, most of what I will cover here will probably be very basic to you, but my hope is that you still might find a little something new in the discussion. For brand new and beginner-level sewers, please note that this series of articles is not meant to be a comprehensive guide to All Things Sewing, but rather a jumping off point for you to feel inspired to learn more. There’s tons of information to be found on the internet, in libraries, in textile museums, in vintage stores and in conversations with other makers, and I hope that all of you continue learning and unearthing more knowledge about slow fashion and making and recycling clothing on your own terms.
Sewing Machine 101
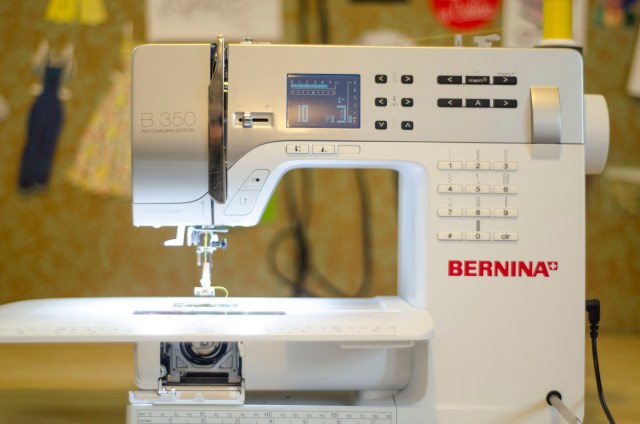
This is the machine I use the most; it’s a really fantastic model with a computerized screen, a function for an embroidered alphabet, and dozens of decorative stitches. But most importantly, it can handle sewing through several layers of thick fabric which is useful when I am working with denim, upholstery and leather.
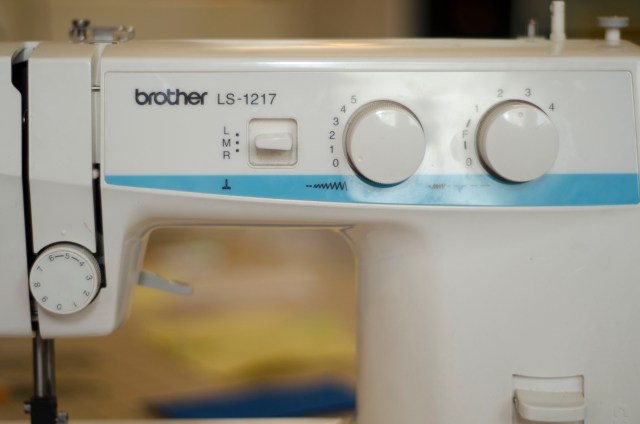
First on the agenda: Sewing Machines. As I mentioned, it is completely possible to build beautiful, durable clothing without the use of a machine, but there is no denying that machines are much quicker to work with, and the learning curve is not very steep. There are machines on the market that can do virtually everything but clean your house for you and they are very fun to watch work, but for the purposes of sewing seams and making garments, you only need a machine with a handful of basic functions to do the job. As with any community of die-hard hobbyists, there is a lot of brand loyalty amongst sewers, and finding a machine for yourself, whether you are just now learning to sew or have been sewing for years, can be pretty daunting. It’s generally true that older machines were made a bit better than the newer ones that are currently on the market; most older machines have metal parts which can stand the test of the time when regularly serviced, compared to the plastic bits and pieces in newer, cheaper models which break and wear down more easily. But as long as you aren’t carting your sewing machine around with you unprotected and you know it’s limitations, even a cheap model is likely to last you a long time; I’ve had my inexpensive Brother brand sewing machine for about 14 years and it’s still going strong. It has its restrictions (it doesn’t sew super thick material very well), but it’s great at the job it is supposed to perform, which is sewing straight and zig zag stitches on light and medium weight material.
Singers and Brothers are probably the best known commonplace brands on the market, while Elna, Bernina, Juki, Husqvarna Viking and Janome make up the higher-end of the spectrum, but here’s the catch: all of these brands are spread far and wide in terms of price range. I’ve seen some inexpensive Janome machines and I’ve seen some unexpectedly pricey Singers. As with any big purchase, do your research. Bells and whistles included on a machine are really neat, but they are generally reserved for proficient seamsters with special needs.
Here is what you DO need in a machine:
- straight stitch
- reverse stitch
- zig-zag stitch
- (not entirely necessary but SUPER helpful in the long run:) an auto or multi-step button function.
By manually changing the stitch length and width at specified intervals, you can create buttonholes with any machine that has a zig zag function.
To clarify, an auto button function allows you to choose a pre-determined length for your buttonhole, and then your machine will stitch the entire thing on its own. A multi-step function will come with directions in your machine’s manual on what to press and when to press it in order to achieve a perfect buttonhole; usually a machine will have a numbered dial or lever of some sort that lets you choose the step you need to complete in the correct order.
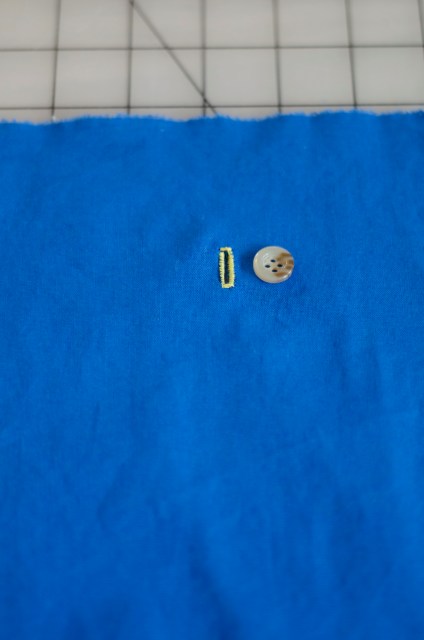
A beautiful buttonhole!
Each step changes the stitch length and width to create a small, sturdy box of stitching on your fabric — once it is complete, you cut open the fabric inside of the box which gives you a hole in which to fit around your button! In sewing, you will use a straight stitch 90% of the time. A reverse or backstitch is also important because it makes the beginning and ends of your lines of stitching more durable.
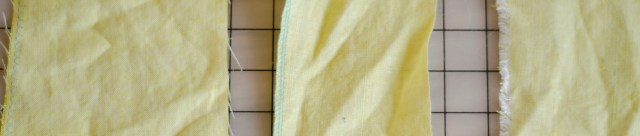
From left to right: linen with zigzag stitching, linen with a serged edge, and linen with a raw/ unfinished edge.
A zig zag stitch is mostly useful for creating buttonholes as we just discussed, but it is also helpful when finishing the raw edges of fabric; some fabrics unravel very easily (like linen), and to keep those fabrics from wearing down to the stitching lines and creating holes at the seams, you “finish” the raw edges. You can finish raw edges in lots of different ways, and using a zig zag stitch is just one of many. Lastly, a zig zag stitch is important if you want to sew with knits. And sewing with knits is my absolute favorite! But I’ll get to that in a minute.
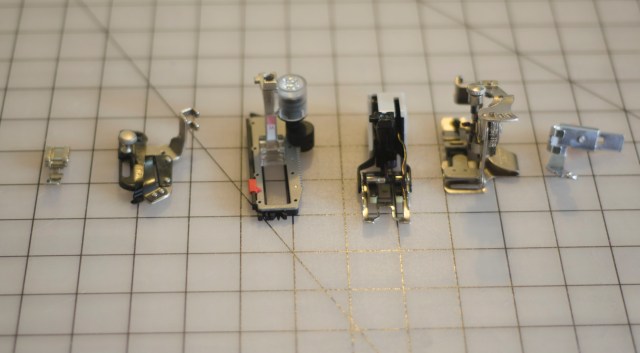
For some reason a lot of feet for vintage machines look very steampunk. The middle two feet are an auto-button making foot and a walking foot.
The next order of business in talking sewing machines is talking FEET. A foot, also called a “presser foot” is the little metal or plastic implement that connects onto your sewing machine where the needle is. Feet work in tandem with the feed dogs on the bottom of the machine to guide your fabric through in order for it to be stitched by the needle and thread, and there are lots of different kinds of feet that you can use for certain tasks.
Again, for a beginning sewist, you won’t need much in the ways of feet — new machines will come with several different attachments that will work for your device, and if you buy a used machine it’s pretty easy to purchase extra feet online or from a sewing machine store. The only essential feet you will need for the majority of your sewing is a regular straight stitch foot, a zipper foot, and, if you are planning on making dresses and skirts, an invisible zipper foot (you need two different feet for the two different kinds of zippers). I also get a lot of use out of an attachment called a “walking foot” which is weirdly bulky looking but super effective. Walking feet are essential for quilting because they help to keep all your layers of fabric from sliding around under the needle, but they can also be really helpful for sewing silky fabrics and certain stretchy knit materials, which tend to behave outrageously when being sewn.
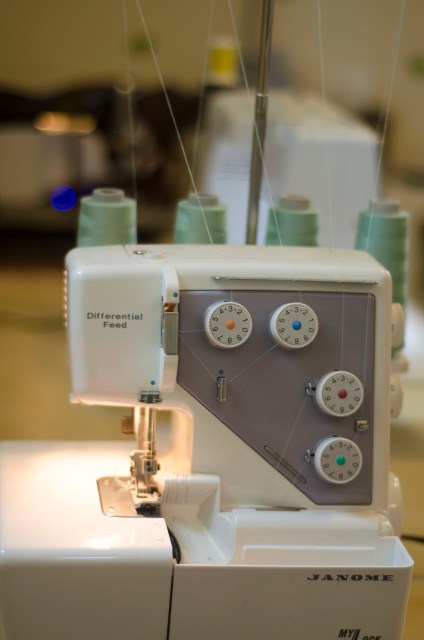
This is my 4 thread serger, and although it is frustrating to thread and change colors, it makes quick work of sewing with knits and finishing seams. This machine is a must-have for my sewing room now.
In addition to your run-of-the-mill straight stitching sewing machine, there is another type of device that is a great addition to a sewist’s arsenal. I will be referring to it a serger, but it can also be called an overlock machine. Sergers have many functions, but most notably they can “finish” your seams (an unfinished seam is one in which the edges of the fabric are “bare” or “raw”) by enclosing them in a three or four-thread stitch that keeps the edges from unraveling and gives them a professional finish. Sergers can also sew two pieces of fabric together while simultaneously finishing the edges, and here is where we get back to my love of sewing with knit fabric. To fully understand how awesome sergers are, you need to have a firm grasp on the main differences between apparel fabrics which we will get to in part 2 of this article.
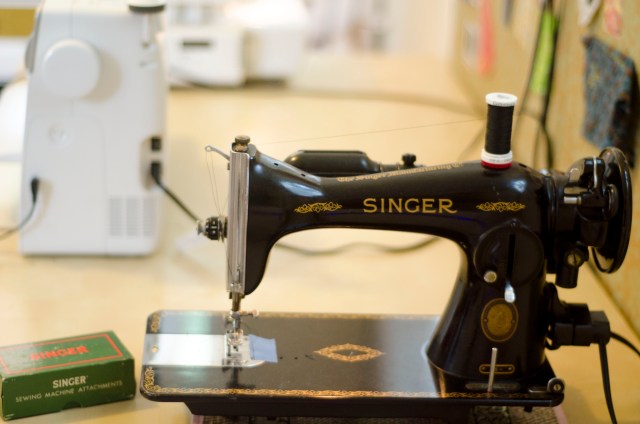
My vintage Singer is a dream to sew on, even though it sounds like a locomotive when it’s working at it’s top speed.
After deciding on what kind of machine you would ideally like to have, you will need to figure out where you plan on getting it, and I (unsurprisingly) have some pretty strong opinions on this topic. I’ve always wanted to see some projected statistics on how many sewing machines currently exist in the world, because my theory is that there are a lot more than we as a population would even know what to do with. This is why I am a big fan of working with used sewing machines — there are already a LOT out there, and they are wonderful!
Four of the five sewing machines I have owned have been used: one was purchased from Craigslist, one from eBay, one was bought at a tea shop that was having a going-out-of-business sale, one was given to me by a real estate agent who had it in her basement for 20 years, and one was the Brother that my mom bought me from WalMart for $100. It doesn’t matter who manufactures your machine, how old it is or how often it has been in use — none of that will determine how well a machine will run and how well it will serve you. So instead of running out and spending a lot of money on the newest piece of equipment on the market, I urge you to take the time to research and find something that speaks to you and works for your needs and space.
Since you don’t get to see the insides of a serged garment, you can make really fun and unexpected thread color choices.
Craigslist and eBay are fantastic sources to find great deals on both working vintage and top notch newer model machines, but you should also check out local estate sales in your area. Using keywords like “sewing,” “quilting,” and “crafting” on sites like estatesales.net to get notified of potential sales has led me to some great bargains that I otherwise would never have found. Hunting around at vacuum and sewing machine repair shops is also a great way to find a good machine. These shops almost always have older floor models that have been replaced or used machines which have been left by non-returning customers over the years, and the shop may be looking to get rid of some of these pieces (which means you might be able to do a little negotiating, if that’s your thing).
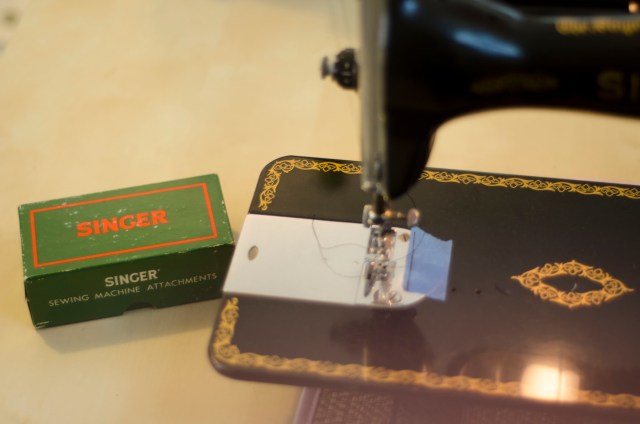
Glamour shot of the vintage Singer.
Also, if you have a sewing machine that was passed down to you or is hiding in your grandma’s coat closet and you aren’t sure if it’s in working order, it’s usually worth taking to a repair shop to get it checked out. I took my real estate agent’s vintage machine that she had never used off her hands because I wanted to do a good deed after she worked so hard to help us get our house. It was very old and dusty and I assumed it was broken, so it sat in a corner of my craft room for over a year while I planned to sell it on craigslist for parts. Imagine my surprise when I looked up the machine online to get information for my listing and I found out that it was one of the most popular Singer machines from the 1950s, with a reputation for being exceptionally good at sewing everything from leather to silk! For $125 my local sewing machine repair shop cleaned it up, oiled it, gave it a new lightbulb and replaced the frayed power cord. Now, apart from being a beautiful vintage machine, it makes quick and efficient work of all my straight stitch sewing needs and I use it all the time. It’s a lesson to keep your options open; you never know where the machine of your dreams will come from!
Stay tuned for Part 2 of this series, where we’ll tackle fabric, patterns, and resources!

I’m pretty sure home ech room in one of the middle schools I attended was outfitted with singer sewing machines approximately as old as your vintage one, and BOY WERE THEY SOMETHING.
I broke four needles and jammed at least two different machines before my teacher gave up and just sewed the damn bag for me, whoops
(when I moved to another state, the home ech rooms Did Not Have Sewing. they had COMPUTER MODULES where we learned about germs and food safety and how to take care of weirdly realistic robot babies.)
IM SO EXCITED
Yay Jasika! I wish this column could be everyday.
That’s awesome, Jasika! Thanks so much!
I am so excited for this column! Thank you for doing this :)
I really appreciate machines that have dials or levels that allow you to control the speed, a feature I discovered when I borrowed a friend’s Janome (that my 40 year old Singer did not have).
Soooooo jealous of your Singer, she’s gorgeous! Thanks for this great article, Jasika. Well done.
Feed dogs! Well that’s an adorable term.
Looking forward to this column, you’ve inspired me to start making more of my own clothes this year. Never heard an overlocker called a serger either so thank you for teaching me all the words.
I only ever heard them called overlockers in the UK, but in N. America everyone calls them sergers.
I’m very excited for more of this series. I used to do a lot of sewing (mostly costumes though) and I’ve been recently wanting to try my hand at sewing more every day at the office kind of wear. I stashed my fairly basic machine at my parents and now I live on the opposite side of the continent. I was just debating having it shipped out here or getting a new one, but now I’m thinking I might try craigslist and possibly upgrade. Thanks for a great article!
I’m really excited about this! I enjoy sewing, but I’ve never really been taught, so I’m eager to learn more!
Wonderful! I cannot wait to learn a bit more. A neighbour just gave me her old Singer, that looks v similar to yours: did it come in a wooden suitcase? I love it but can only just about stitch in a straight line… Looking forward to the next article!
This is awesome! My grandmother gave me a sewing machine not terribly long ago, and I haven’t yet gotten around to trying it but I have lately been planning to go to a few secondhand shops around here and find some piece of clothing to practise on (maybe something that’s a bit too big or something that I can re-make into something else). I haven’t really sewn since I was in middle/high school, and that’s quite a while ago. Hence the need for practise. So this kind of article/column is really great, and pretty nicely timed. ^^
I look forward to reading the second part. ^^
I’m so excited for this series! I bought a machine a few months ago but got so overwhelmed with how to start out that it’s basically just been sitting there. Thanks for this!
YAAAAAAAAAAAAAAAAAAAAAAS. I have been waiting for this for soooooo long! Okay, now I’m gonna read it. I just had to comment my excitement.
I am so very excited for this column, thank you so much for taking the time to write about it, sewing is definitely something I’ve been hoping to improve on and this is the perfect way for me to start doing that.
This may be super obvious, but I would highly recommend trying sewing machines before buying them, especially second hand.
Don’t worry about any fancy stuff – just straight stitch and back stitch. See if the stitching comes out even on both sides of the fabric. If not, ask if the tension can be adjusted, and try sewing again, and seeing if it works this time. You really want the stitches to look basically the same from both sides, and not as if they’re “tighter” on one side. I’ve had experience with some machines where the tension was constantly a problem, so the machine keeps making a gnarly mess of thread, or it puckers the fabric etc. There are a lot of things that can affect the tension, but you should definitely be able to sew straight stitching on a medium weight fabric (like
basic shirt thickness of fabric) without a problem.
I find it really helpful to make sure the machine is ready to start sewing, especially if you’re a beginner, and don’t have spare cash to have it fixed, and want the least obstacles between you and all the amazing projects you want to do (like all the wonderful things Jasika is going to show us – hurrah and thank you!!).
Oh, also, if the machine doesn’t have a guide book, ask if they can show you how to thread it, and jot down the instructions/order somewhere.
Jasika – I LOVE your guide! I have been thinking about buying my first sewing machine for a few months, but the amount of levels and buttons on those machines is always so daunting. It’s really nice to have an expert explaining what to look for.
(Btw, Chanin’s books!! So gorgeous!)
Yay!! I have a sewing machine and don’t totally know how to even use it. Got it as a surprise Christmas gift from my momma a couple years ago. So far I’ve made a quilt top (no back to speak of yet), a halloween costume, some pillowcases, and a few drawstring bags. My goal for 2016 is to start to try making some clothes for myself!
YAY Jasika!! SO excited to see these posts. I’ve been a follower of yours in first the knitting and now the sewing, and I’m so glad you’re sharing your enthusiasm and knowledge here now too!
My first sewing machine was from a garage sale, and it somehow grew legs and walked away when I moved last year- I’m still convinced my ex took it to New York by mistake and didn’t want to admit to it- but I bought a new basic model off Craigslist about four months ago. It’s a model that was commonly used in Home Ec classes in the 80s and 90s, so I figure it won’t fall apart on me that easy!
Nice post. I will follow your guidelines.
Jasika,
This is a very informative post, very well explain in details.
I love it!
Keep doing the great work!
Wow, great article. I’m looking for it here. I just bought a sewing machine brands The Brother XR9500PRW. I’m wondering about some kind of garments and articles helped me to solve this problem. Thank you for sharing, I will attempt to create one product and demonstration for you to view. Thank you very much !
Really nice article. Found your blog very useful. With this blog now I’m able to make new design products on my own! Thanks much for this blog! Sewing Machine