Learning to feed yourself can be one of the most terrifying things. Am I about to give myself food poisoning? If I eat this too often will I end up with scurvy? How can I get the most nutritional bang for my buck? Why does this still taste like ass?
With Ode to My Pantry, learn to navigate a grocery store without having a meltdown in aisle three. Give a man a fish and feed him for a day, teach a queer to cook and stave off malnutrition for another semester.
Growing up my mom taught me a lot of kitchen-type things, but pie dough just wasn’t one of them. She’d tell me these wondrous tales of my aunts’ curry pies and infinitely delicate desserts, but apparently this just wasn’t our thing. Maybe we were lazy. Maybe my mom didn’t like the mess. Maybe my mom didn’t trust me with a food processor. Whatever the actual case may be, whenever it came time to make my pumpkin pie, Tenderflake would be our calling. So luckily I’ve been getting a crash course in pastry making every time I’ve watched my girlfriend make pies.
All Purpose Pastry (enough for one covered pie or two pie shells)
+ 2 cups all purpose flour
+ 1/4 tsp salt
+ 1/4 tsp baking powder
+ 1/4 cup shortening, chilled
+ 1/4 cup butter, chilled
+ ~9 Tbsp. ice water
1. Combine flour, salt and baking powder in a large mixing bowl.
2. Use a pastry blender or forks to cut the butter and shortening into the flour until it resembles corn meal.
3. Sprinkle water over the flour and fat mixture and continue cutting with the pastry blender. The dough should seem dry.
4. When the pastry starts to hold together by itself, use your hands to squeeze the dough into a cohesive ball. Cover with plastic wrap and chill for at least an hour.
5. Roll out the dough into the desired size with the desired filling.
6. Bake at 425°F for 15 minutes and 350°F for 30-40 minutes.
Wow your family with pies at holiday get togethers to avoid questions like, “What do you plan on doing with your life.”
Sounds easy enough right? But unlike making cakes, cookies or bread, crust-building flexes an entirely different set of culinary muscles. Your goal is to cut your flour with tiny pellets of solid fat and roll said fat into thin sheets. Once it’s in the oven, the supporting fat will melt and/or vaporize, leaving a bunch of cavities for your teeth to crunch through (the potholes of pastry if you will). While other treats require a hefty amount of gluten, pastry only wants enough of that springy protein to hold the whole mess together. Too much gluten will transform your tart from flaky and tender to hard and tough. Take a cue from your muffins and pancakes and lean towards lazy.
Keep everything cold. Pastry gets flaky when your fat melts away, but it only does its magic in the oven. Butter contains a fair amount of water, so if it starts melting in your mixing bowl, gluten will start crashing the pastry party. You could rely on water-less shortening to avoid the problem all together, but it isn’t nearly as tasty as butter. So throw your bowls and utensils in the freezer, leave your fat in the fridge for as long as possible, add ice cubes to your water and most importantly, touch it as little as possible.
Cheat a bit. Even though it’s an infinitely small amount of baking powder for this amount of dough, it still provides a bit of a lift. If we’re aiming to have tender flaky golden cakey pies, we might as well make those flakes flakier.
Let it rest. A decent dough doesn’t use a lot of water, so give your flour granules some time to suck up the water that is there. Portion your dough into the top and bottom crusts, cover them in plastic wrap and stash them in the fridge for at least an hour. Well hydrated dough will be easier to roll and less prone to cracking. Plus the fat will re-solidify, giving your pie the chance to be all it can be!
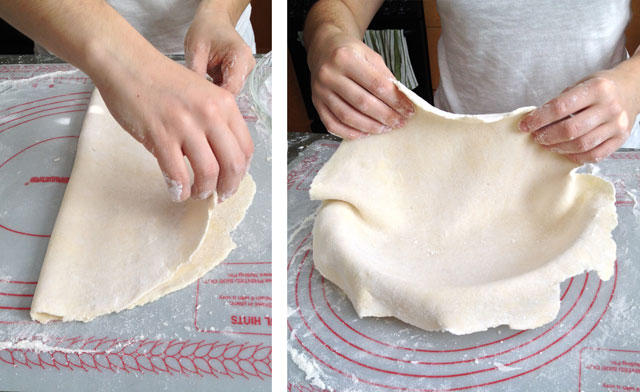
If your kitchen resembles a scene from Moonstruck, you’ve almost used enough flour.
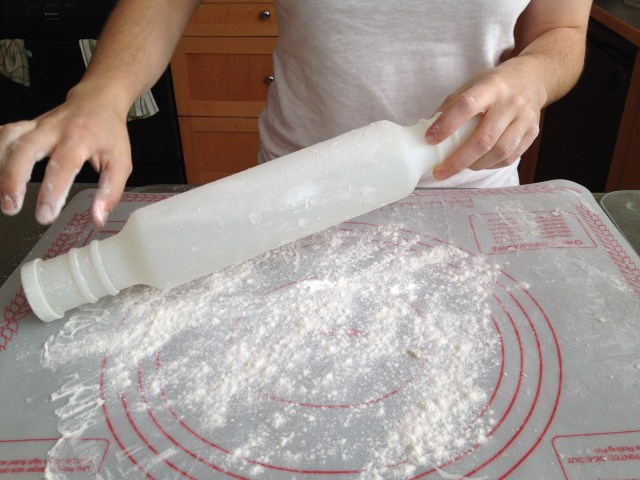
Never fear overflouring. Even though flour is plentiful and cheap as heck, I often found myself skimping out come rolling time. But all of that flour is lube and you’d never skimp on lube, right? Just keep on adding flour since there’s no point in making paper thin crust if you can’t get it off the table! So flour your board, your pin, your dough and your hands if you need to. If your pastry recoils slightly as you roll it out, you’ve used enough flour.
Get a good rolling pin. Save some effort by getting a pin that does the work for you. To stay in control of your pastry prey, choose a pin that’s dense and nimble. Heavier pins require less downward pressure, so they require a little less thinking and/or effort on your part. Thinner rolling pin shafts have smaller turning radiuses so you’ll have more control when changing rolling directions!
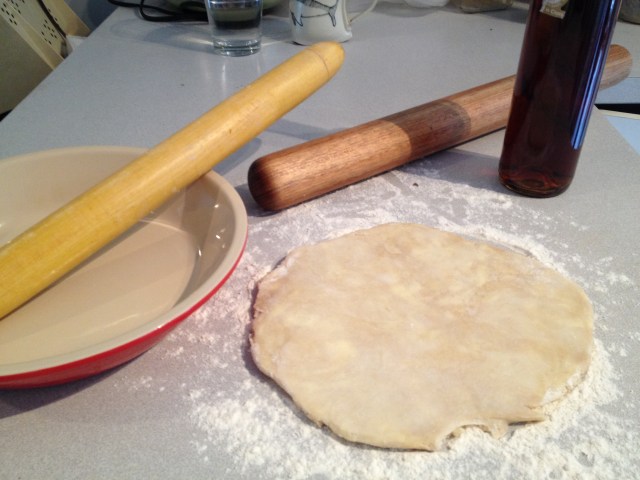
French: Great. Dowel: Good. Liquor bottle: Good enough.
Solid dowels get the job done, but French rolling pins with their tapered ends can prevent bruised knuckles. Ice water rolling pins seem like a great idea, but the added condensation ensures everything’s coated in a layer of papier mâché paste. If you’re in a pinch and have to go the wine bottle route, try to grab one free of labels or embossing lest you have to explain those creative embellishments later.
Throw on some elastics. When your dough is almost thin enough, slap some thick rubber bands (like the kind they use to bind broccoli) to ensure an even thickness. It’s easier than handling a ruler and cheaper than buying spacer bands.
Everything tastes better browned. Remember that Maillard reaction I wax poetic about every waking moment? Add a bit of tan to your tart by brushing your crust with a wash of milk and beaten egg. The milk sugars will promote browning while the egg can add a bit of golden colour. Plus it makes a fab glue when you’re adding on pie lids, securing lattices or mending torn pastry.
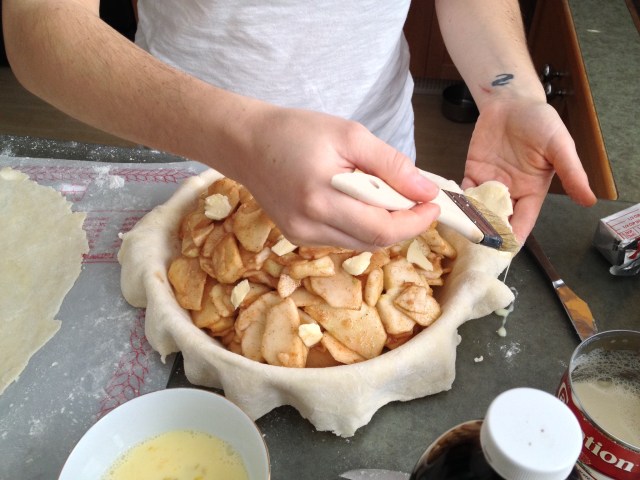
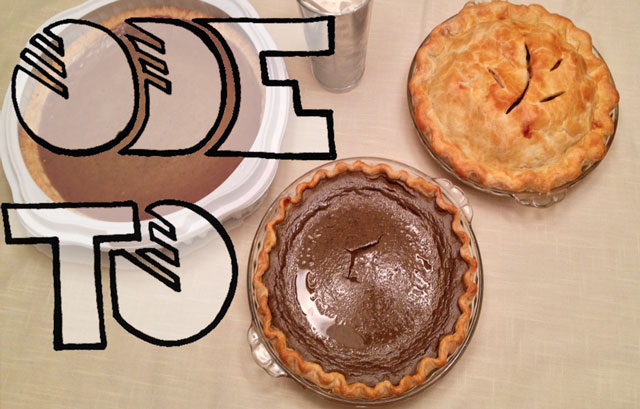
Just to ruin the surprise, we were making apple pie.
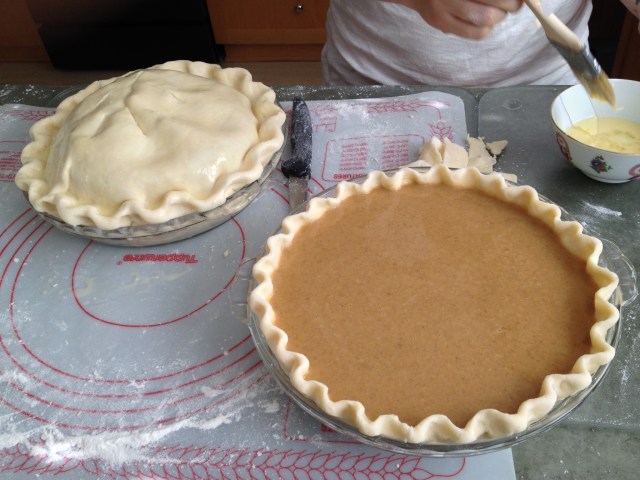
Vent it. For the love of all that is holy, make sure you vent your pie. Even though you might not be using a lot of filling, without an easy exit, your pie is sure to inflate and blow it’s top. Slash a few vents (post egg wash) to make the whole process a bit easier. Agricultural motifs are optional, but appreciated. Or you could use this as an excuse to buy a pie bird.

Look ma, we made a chaff of wheat.
Give it a rest. Bake it up all golden brown and delicious and let your pie cool for at least ten minutes. In addition to preventing a mouth full of pain from the molten pie, it’ll give the pastry time to set so it doesn’t crumble as you cut. It should give you just enough time to start making another pie.
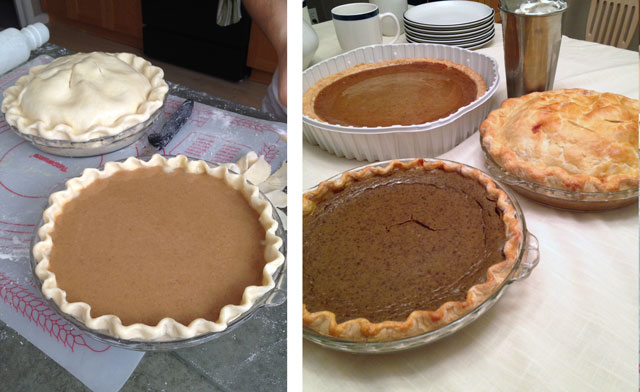
When in doubt, make more pies.

The title of this post is fantastic. I was just recently considering how awkward this Thanksgiving might be, and brainstorming ways to make it less awkward (i.e. lie about my entire life). Now I can just make pie crust!
Awesome! Thank you Kristen. I love making pies, but I always struggle with the crust. I’ll try doing it like this!
this looks so amazing. it’s ok if i only eat pies ever again, right?
how do you make the crust edges wavy like that when the pie dish is round?! so fancy, please share so I can do it too!
Just look at the first 10 seconds of this video. Keep watching if you want to see a video dissertation on the subject ;)
http://www.youtube.com/watch?v=zO5gsFKZoA8
I never want to bake, but you make me FEEL like I can do it. Which is good enough in my book. Well done, Fokker.
Definitely coming back to this one!!