We had so much fun making indigo tie-dyed hankies at A-Camp! For those of you who couldn’t be there or would like to host your own indigo parties this summer, here’s a simple tutorial to get you started.
Shibori is a fabric manipulation technique that controls dye distribution and resistance in certain parts of natural textiles. The material is bound, stitched, gathered, clamped, or folded and repeatedly dipped into an indigo dye vat to make unique surface patterns. In this tutorial, we will be pulling some inspiration from this traditional Japanese technique to create indigo tie-dyed fabrics.
The process of Indigo resist-dyeing can never be entirely controlled thus creating a unique piece every time. Once you unbind your pieces, you’ll be gushing over your lovely creations. Good luck resisting the urge to indigo dye everything in your life.
You’ll Need:
- Indigo tie dye kit– The kit includes indigo crystals, thiourea dioxide, soda ash, one pair of latex gloves, popscile sticks, and a few rubber bands.
- Fabric- Fibers such as cotton, silk, linen will absorb the indigo dye better than synthetic fibers.
- Organic fume respirator- Protect those lungs from harsh chemicals while mixing the dye vat.
- 5 gallon bucket
- Drying rack or clothes line
- Extra rubberbands
- Paint mixing stick
- Long gloves
- Clothespins
Fabric
Shibori and indigo dying are often done on natural fabrics, such as silk, hemp, or cotton. These natural fibers are absorbent and take indigo dye much better than synthetic fibers. Commercial textiles are often coated with a variety of chemicals and this coating may sometimes interfere with dye penetration. As a general rule, pre-wash all of your textiles before dying them.
Make a Dyebath
Indigo is the traditional dye used with Shibori. This natural dye is derived from fermented indigo leaves and is not soluble in water without the addition of a reducing agent. In the dye kit, you’ll find pre-reduced indigo crystals, color remover (Thiourea Dioxide), and soda ash. The color remover and soda ash increase the PH of the water, making it a proper reducing agent for the indigo.
Fun Fact: The first chemical used to reduce indigo was urine. There’s some fiber folklore out there which claims that dye houses were originally built near pubs. Drunken people would pee into buckets outside, and the dye house would collect the urine to use for indigo reduction.
Dye Vat Ingredients:
- ¾ oz pre-reduced indigo crystals
- 2.3 oz thiourea dioxide
- 3.5 oz soda ash
- 3 gallons water
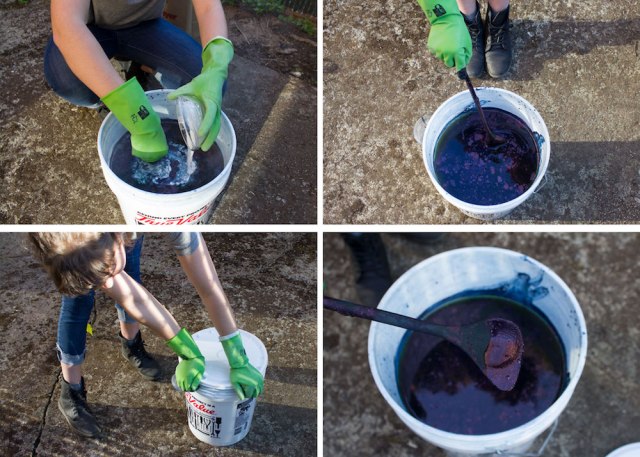
- Fill a large bucket with 3 gallons warm tap water.
- Add the pre-reduced indigo crystals into the water and stir.
- While stirring, slowly add the soda ash and thiourea dioxide to the water.
- Gently stir the vat in one circular motion, making sure to drag the stir stick along the outer edge of the container before removing it.
- Cover the container with a lid and allow it to settle for at least 15 minutes.
- After the vat has settled, remove the lid. The top of the dye bath will have a layer of foam called the ‘flower’ or ‘bloom.’ Gently push aside the ‘flower’ to check the color of the liquid. The dye bath should be a clear yellow or yellow-green. If not, let the bath settle for another 30 minutes.
Folding Techniques

Itajime aka Accordion Fold
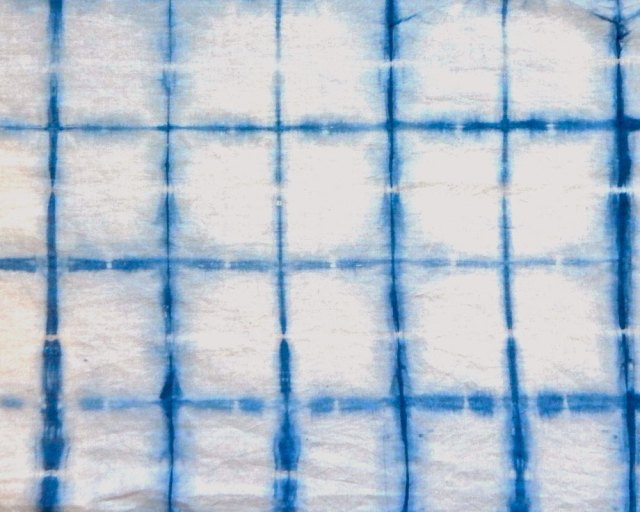
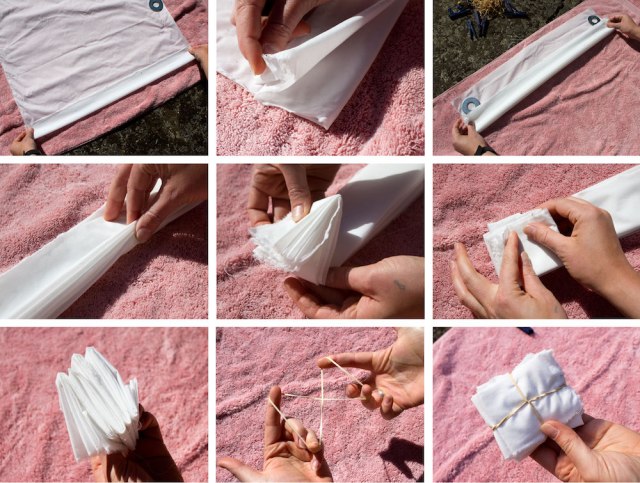
Accordion-folding fabric vertically, then again horizontally. Use a rubber band to keep the folds in place. You can even use clothespins on the edges to add even more dye resistance.
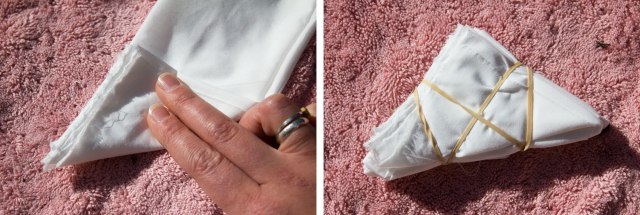
To create a triangle version of Itajime, accordion-fold the fabric vertically, then fold in accordion-triangles horizontally.
Kanoko aka Scrunchy Fold
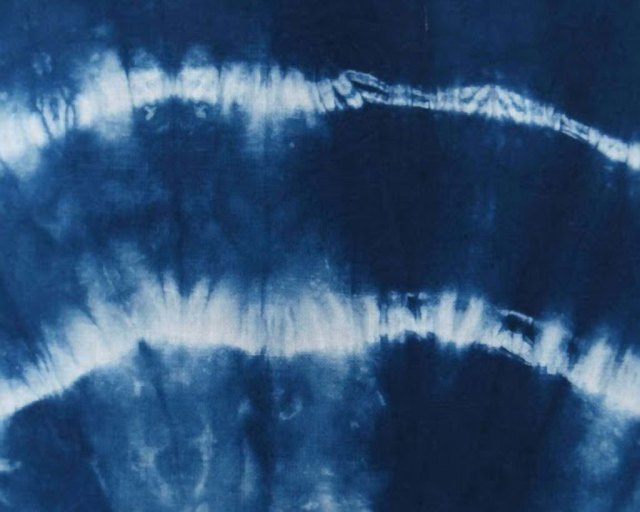
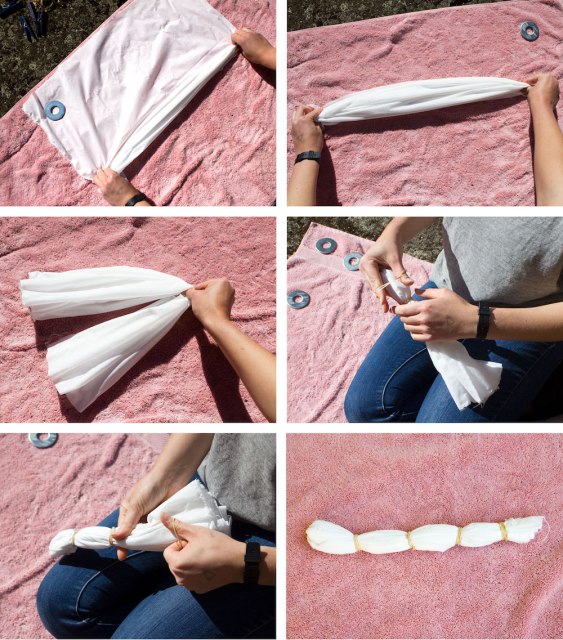
This folding technique involves pleating the fabric and tying in areas where you would like to resist dye. To create a line, bunch the fabric laterally, then rubber band over the whole bunch. For a circle, pull the fabric up in the middle like a tent, rubber band around the peak.
Kumo aka Bound Resist
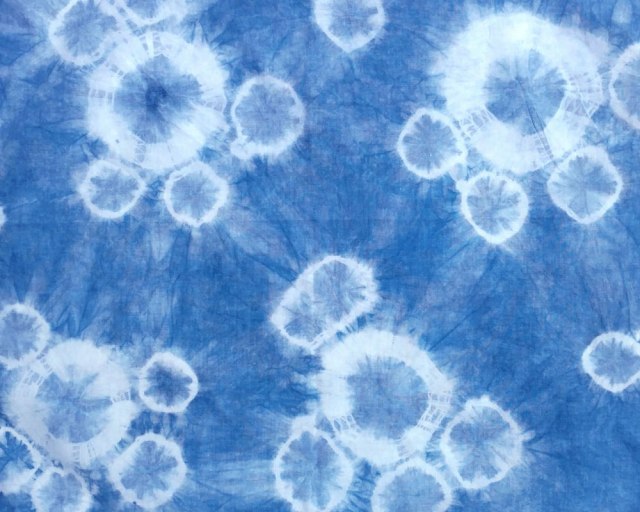
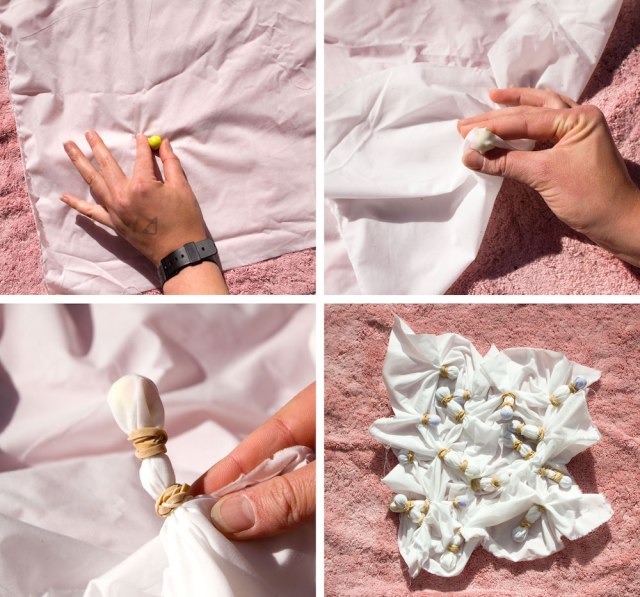
Place marbles on the fabric (you can also use rocks, or even just bunch the fabric) and secure them with rubber bands. Another ring will be created with each additional rubber band. Repeat this technique throughout the fabric. The rubber band creates a beautiful circular pattern most synonymous with tye-dye.
Let’s do some Indigo Dying!
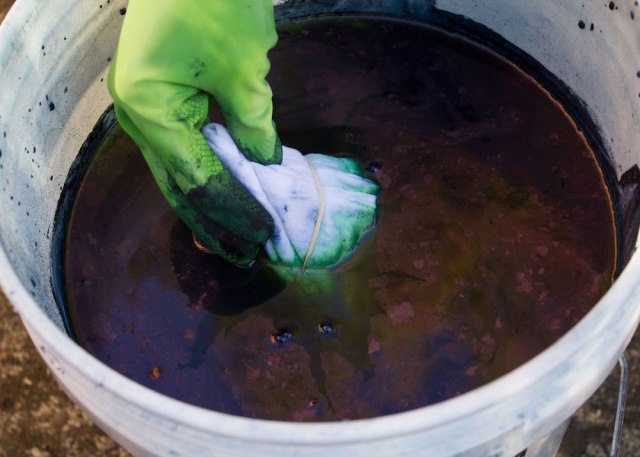
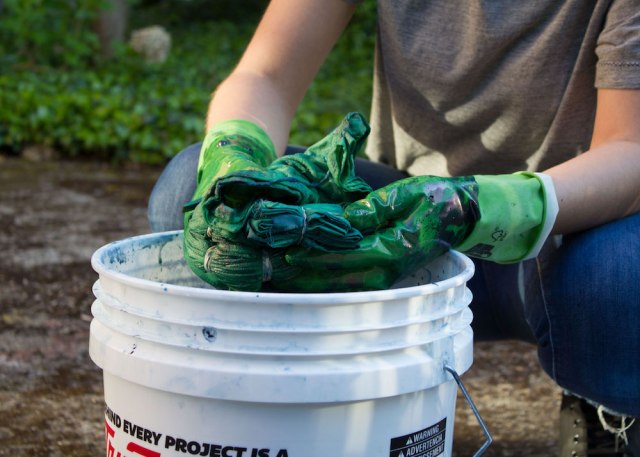
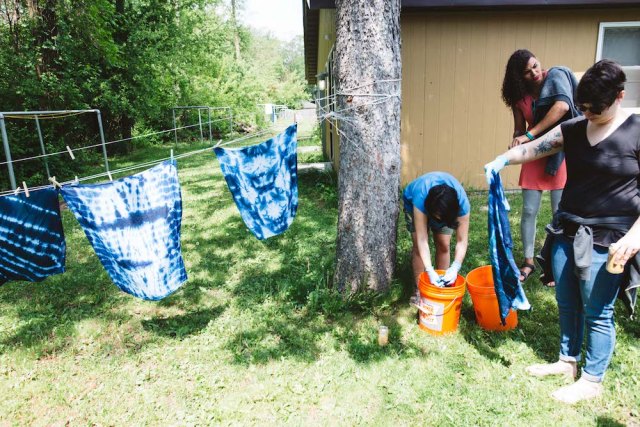
Place each folded piece individually into the indigo vat for 2 minutes. Slightly agitate the fabric to expose the maximum amount of dye to the fabric. Remove the fabric from the vat and squeeze the extra dye liquid into a “squeeze bucket.” Squeezing the dye directly back into the vat will add additional oxygen to the vat.
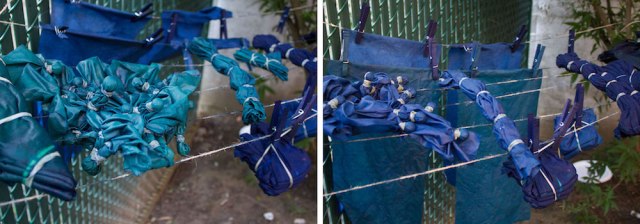
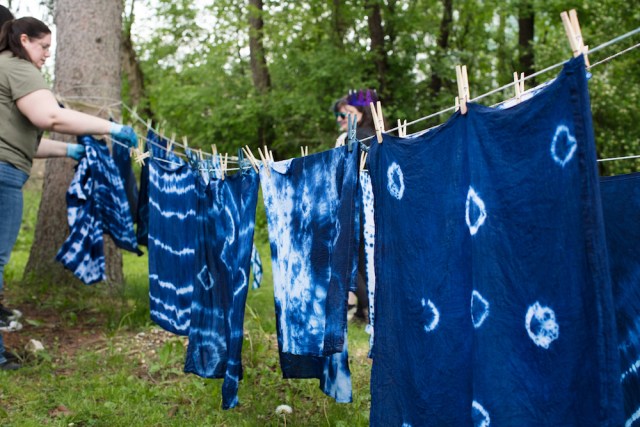
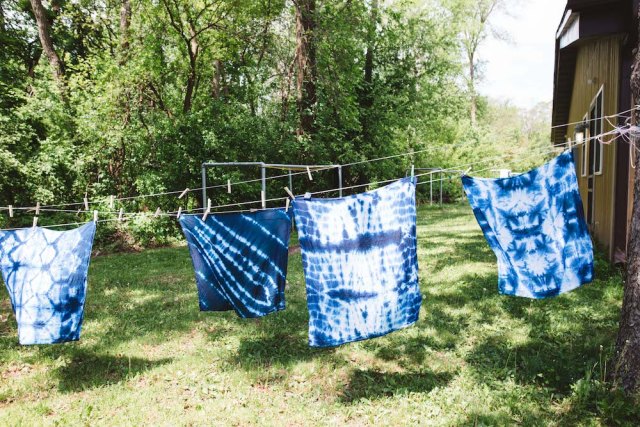
Hang the folded pieces on a clothesline or lay on a drying rack. Just make sure that oxygen can get to the top and bottom of the fabric. Oxidize the indigo for 10 minutes. Exposure to air will turn the green dye into an indigo blue. Wait until the fabric turns entirely blue before doing either the next dunk or washing out the dye.
Repeat steps 1 and 2. One dunk will create a light blue, and with each successive dunk, the indigo will be darker. About 3 or 4 dips is a good place to start.
Unfold and hang the fabric for approx. 10 minutes to let every last bit of the dye oxidize.
Rinse the fabric until the water runs clear. A good water rinse will keep your designs crisp with contrast and set the color. Just to be safe, launder the indigo fabrics separately before throwing them in with your general laundry.
There are endless amounts of variations of folding that you can try with indigo. To learn more about Shibori, take a gander at Shibori: The Inventive Art of Japanese Shaped Resist Dyeing by Yoshiko Iwamoto Wada. This book is so informative and is packed full of pictures that’ll make you go, “Mmm, that’s nice.” Here are a few more resources to keep you indigo dying all Summer long.
- The World Shibori Network
- Traditional Craft of Shibori documentary.

I love this! I have been looking at different natural dyes and indigo in particular. Get outta my head, autostraddle!
This is such great news! What in particular have you been thinking about making!?
KATIE!!!!!
ERIN!!!!! <3
OMG, this is absolutely amazing! Thank you so much for this article! I will definitely be doing this!
Thanks Lauren! If you have any other questions let me know, I’m happy to help <3
I was next-door staring longingly at the indigo girls and their bucket
NICE!
LOVE this Katie! It makes me miss Japan a lot. I lived there for about 8 years. One of the towns I lived in, Tokushima on Shikoku island, used to have a famous festival every year called the “Awa Odori” in which there was this beautiful, seemingly endless stream of indigo dancing into the horizon. I would definitely recommend if you go to visit ;)
Hey Saga!
Your temporary stint in Japan sounds so dreamy. Truth be told, that’s my dream. I will begin obsessively researching that festival and island now ;)
I love the patterns!