Welcome to 2019!! I don’t know about you but I’m ECSTATIC that we finally got to kick 2018 to the curb. I’m looking forward a new year, a clean slate, and working on my resolution to spend more time creating in my kitchen. Cooking is so healing for me. Every time I put down my phone, tie on my apron and disconnect from the world in order to focus on a dish I get a rush of happiness and sense of accomplishment that no likes on social media can ever compare to. If you read the new year roundtable you may know that I chose the word abundance for the year which is part of the reason I decided to resolve to cook more. I want to end this year with such an abundance of recipes that maybe just maybe the idea of writing a cookbook wouldn’t seem impossible. I also want to feed people more often, as the only thing better than making food is watching other people enjoy it. I want all the culinarily-derived sweet tooth smiles, finger licks, and deep sighs of satisfaction my friends can handle and these cinnamon rolls have already delivered in a big way.
There’s a lot of sexy things going on in these cinnamon rolls but before we get into the recipe I know I have to address the eggnog debate. I learned in Laneia’s open thread that a whole lot of our readers don’t get down with eggnog. I understand it’s a really weird drink if you think about it, and maybe the only way to truly deeply enjoy it is if you’re able to not think about it. I love eggnog though, so I’ve taken it upon myself to write a recipe that I think even its most loyal haters will love. There’s no drinking the eggnog here, just using it to infuse the dough and glaze with warm winter spices and vanilla. The brown butter doesn’t hurt either; in fact, it makes the eggnog dough so mouthwateringly luscious with the cinnamon sugar swirl that our beloved Robin Roemer left this glowing review:
Honestly, sex is great but have you guys had Reneice's eggnog cinnamon rolls?!?
— Robin (@robinshoots) December 26, 2018
I really don’t think I could write a better endorsement than that so I’m not gonna try! I’ll just suggest that you get your hands on some eggnog – it’s all on sale now, or if you really want to take things over the edge you can make my recipe from the aforementioned roundtable – then get your roll on. I do think these turn out better with homemade eggnog since it’s often much more flavorful than store brands. If you’d rather buy the eggnog look for one that has multiple spices and vanilla listed in the ingredients or add them when you get home! Now, unlike my last few recipes which have been all about short-term gratification, these eggnog cinnamon rolls are a labor of love. Ingredients need to cool and bloom, the dough needs to rise twice, and the best results come from letting it chill overnight so the flavors can really blend and soak into the flour before baking. Recipes that take gratuitous amounts of time and love are wonderful journeys. They test your patience, attention to detail and skill, and come with immense pride payoffs when you finally pull the finished product out of the oven. Especially when that product is a warm eggnog-infused and glazed cinnamon roll fresh from the oven on a cold Saturday morning. Just don’t say I didn’t warn you when you suddenly find yourself on team eggnog.
For the dough:
1 stick unsalted butter
1 package active dry yeast
3/4 cup eggnog (with alcohol included if you drink) 2 large eggs
1 large egg yolk
3 1/2 cups all purpose flour
1 teaspoon salt
For the filling:
1 stick unsalted butter, room temperature
1/2 cup brown sugar
2 tablespoons ground cinnamon
For the icing:
1/3 cup eggnog
2 3/4 cups powdered sugar
*some of the pictures are from a different batch cause I missed photos of some steps on shoot day. Bear with me as I readjust to single food photography life!
1. Butter a 9×13 baking dish, line the bottom with parchment paper, and set aside. Lightly butter a large bowl and set aside as well.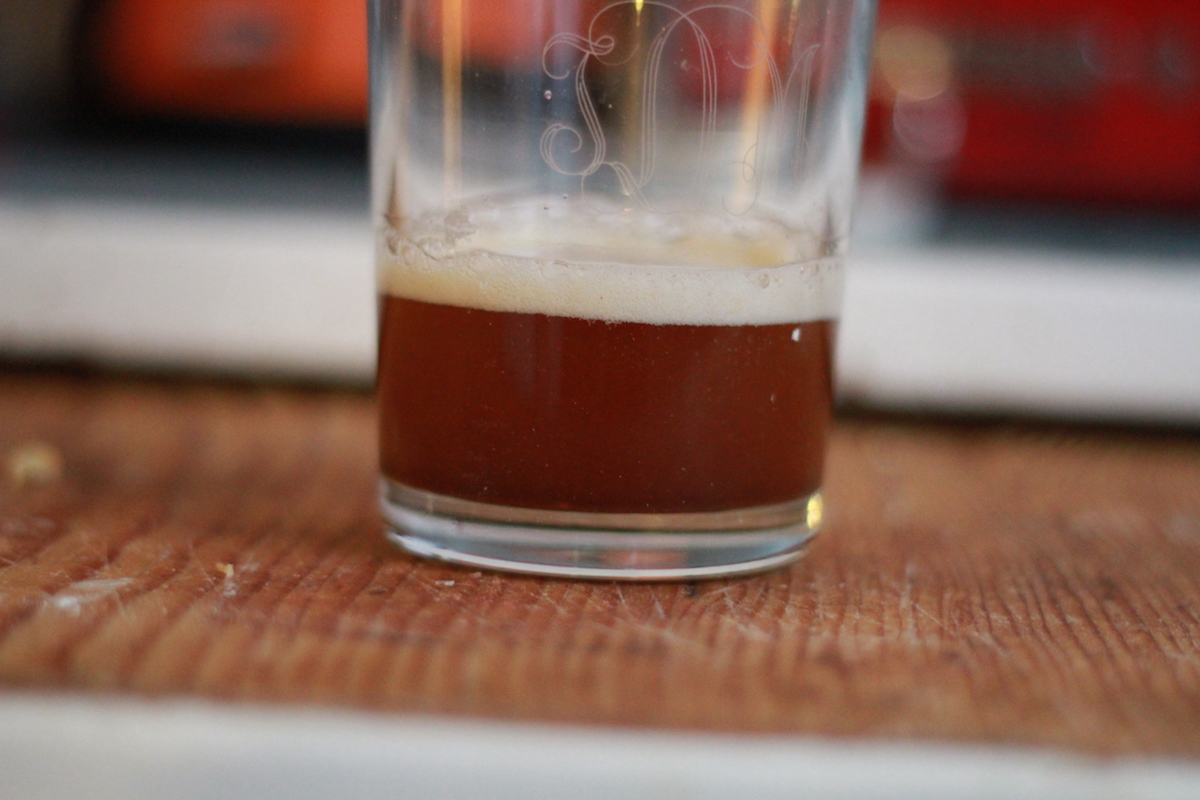
2. Brown the butter! In a small, heavy bottomed sauce pan melt one stick of butter over medium heat, whisking constantly. The butter will start to bubble and foam, then a minute or two after the foam goes down small brown specks will start to appear at the bottom of the pan. Keep whisking for about 10 seconds then quickly remove from heat. The butter should be a nice deep amber color and smell like roasted nuts. Set aside to cool.
3. Grab the eggnog and heat just until warm. If it gets too hot it will kill the yeast so you really just want it to be slightly warm to the touch. If you have a thermometer you’re aiming for 100-105°. Once the eggnog is at the right temperature, stir in the packet of yeast and set aside for about 5 minutes. When you come back to check on it there should be a thin layer of foam on top of the eggnog. If there’s no foam your yeast is likely dead and you’ll need to try again with a new batch. Forgot to get a photo of this but it’ll be really clear whether it’s foamed or not! 
4. Once the brown butter has cooled–it should be no warmer than the eggnog was when you added the yeast– and the yeast has foamed in the eggnog, grab a large bowl or the bowl of a stand mixer if you have one. Add the flour and salt to the bowl followed by the butter, eggnog, eggs and egg yolk. If you’re using a stand mixer: you should be mixing the dough on the “stir” setting with the dough hook attachment just until it starts to clump together in one big ball. Once that happens, turn the mixer up to medium and knead until the dough is shiny and smooth, 3-4 minutes. If you’re making it by hand, likewise stir until the dough comes together in a ball, then turn out onto a floured surface and knead by hand for about 10 minutes or until the dough is shiny, smooth, and starts to spring back into place when you push or pinch it.
5. 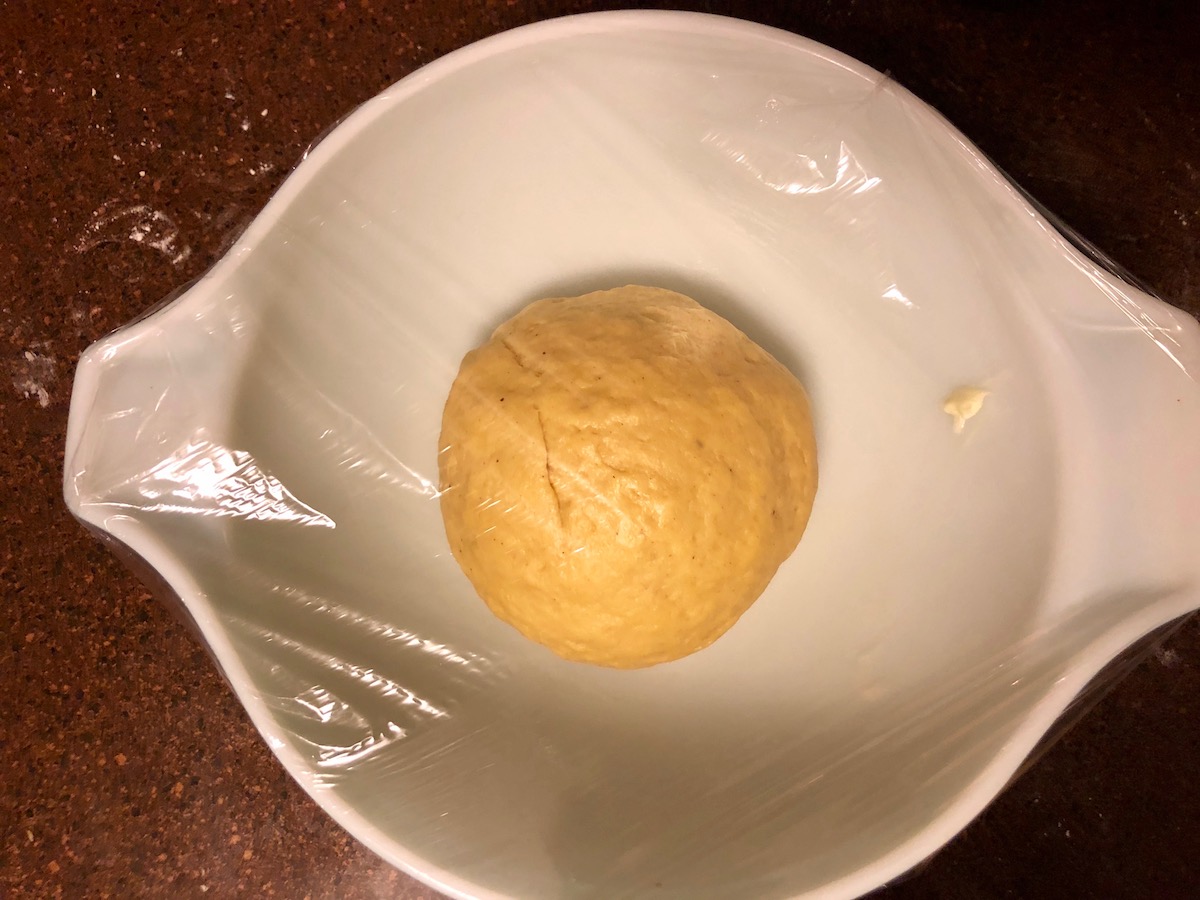
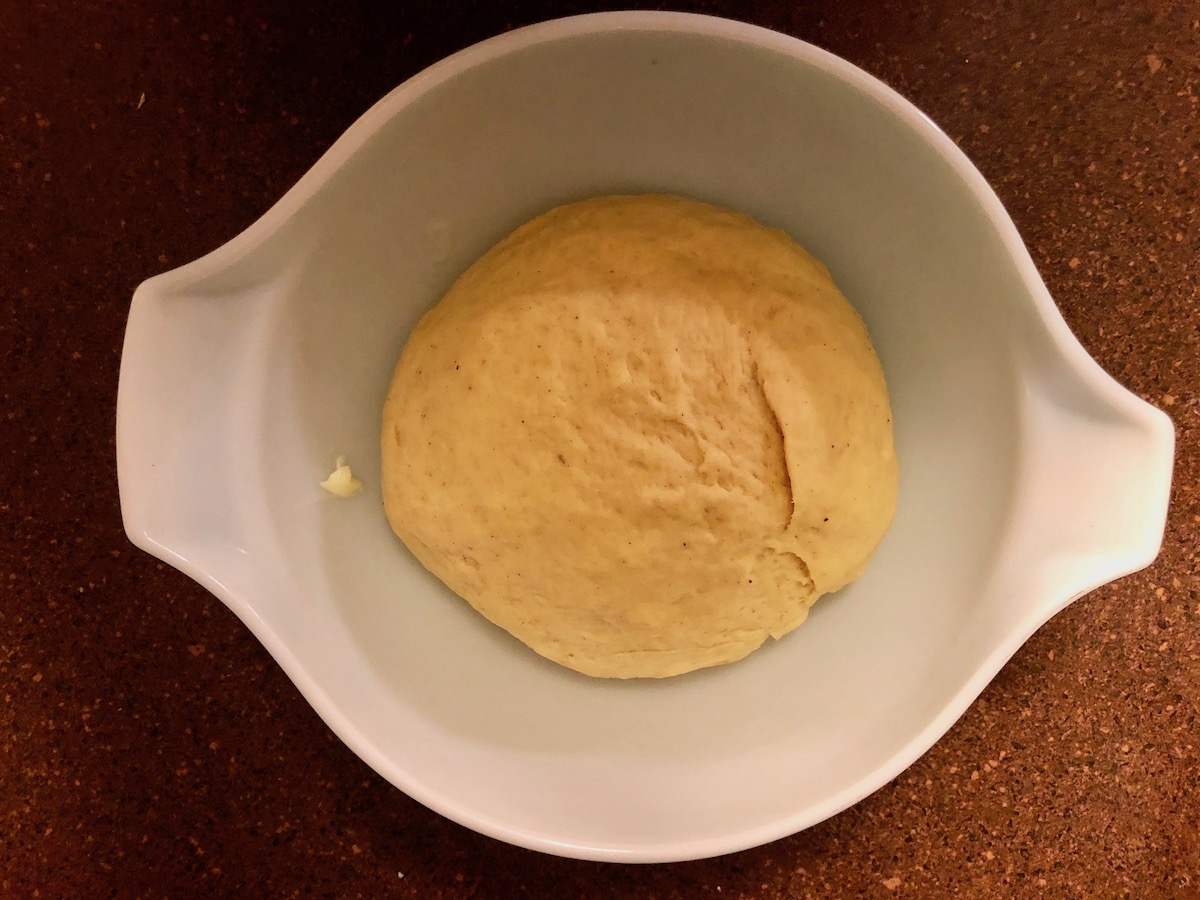 Place the dough in your lightly buttered bowl, cover with plastic wrap, and allow to rise for about an hour until doubled in size.
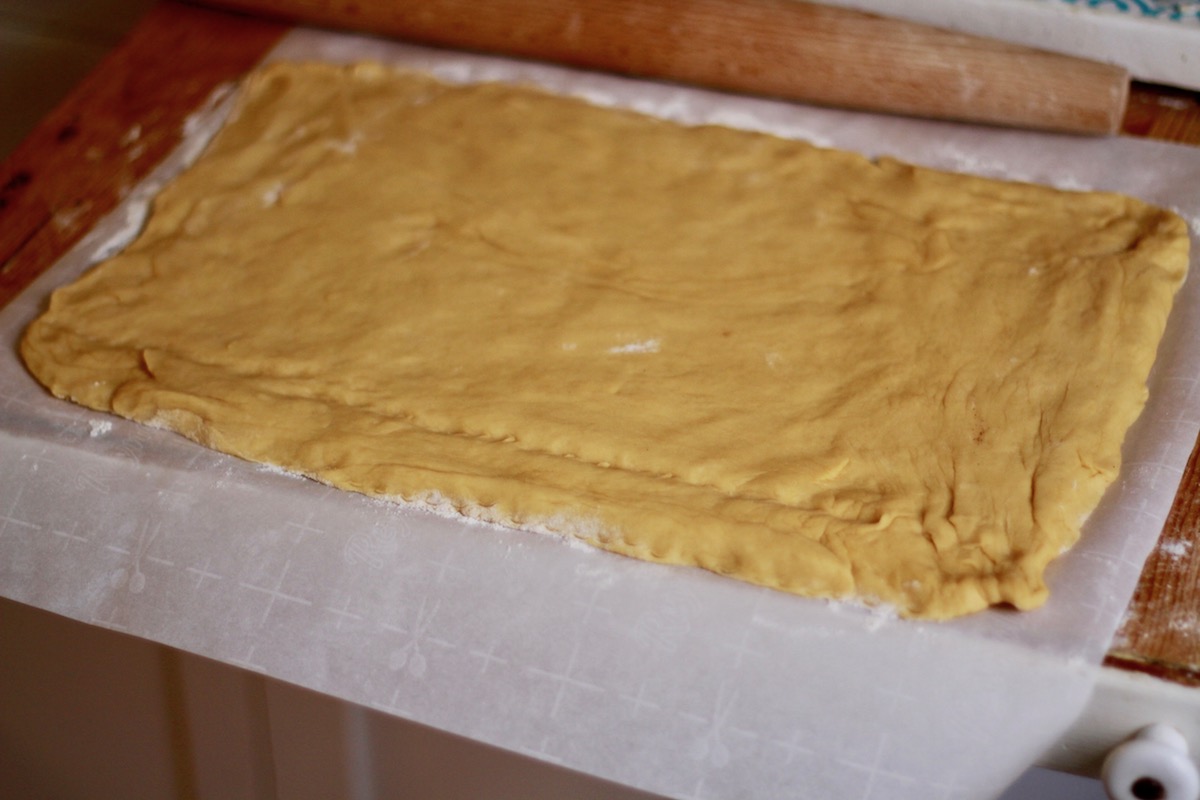
6. Once the dough has puffed up, place it onto a lightly floured surface and press it down to deflate it. Next flour a rolling pin and roll the dough out into a rectangle that’s about 10×16 inches (roughly 25x41cm). I usually cut a piece of parchment paper and make marks on it as guides to make sure my dough is rolled out to the right dimensions. 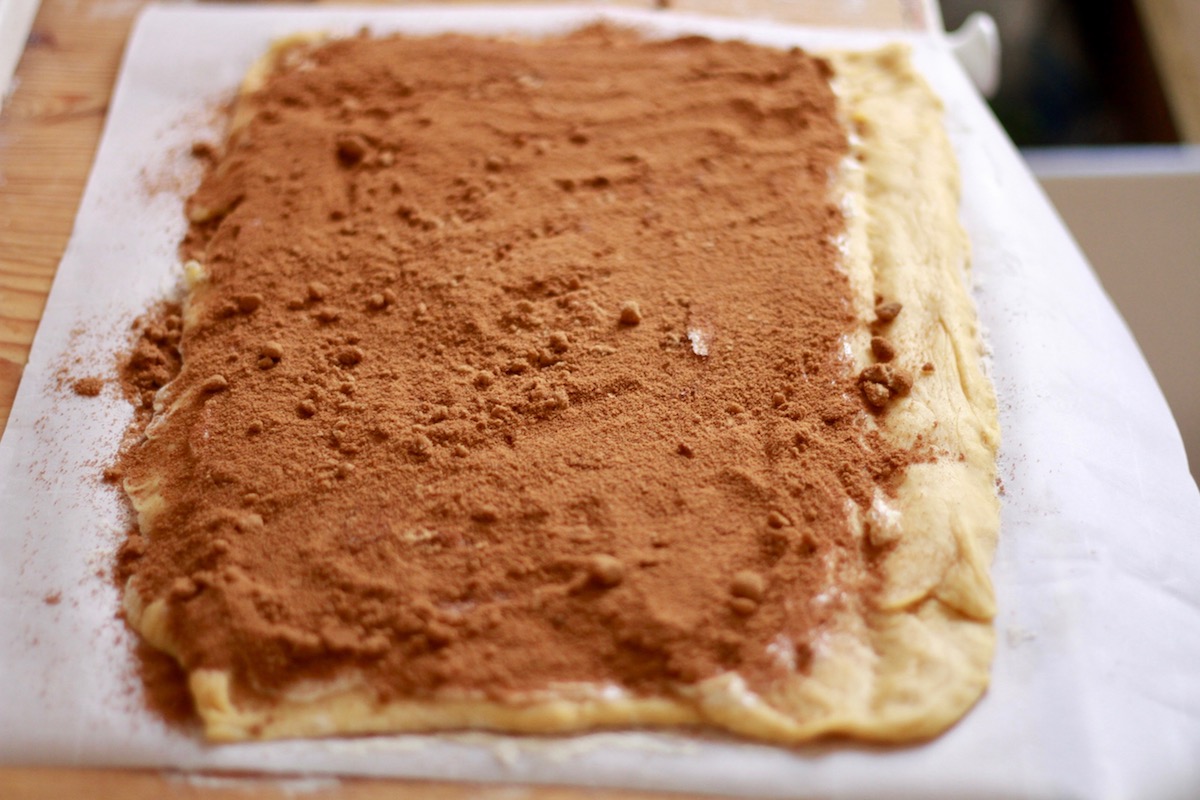
7. Now that the dough is rolled, spread the room temperature butter onto the dough but leave about an inch unbuttered on one of the long sides of the rectangle. Whisk together the brown sugar and cinnamon in a medium bowl then sprinkle the mixture over the buttered portion of the dough. 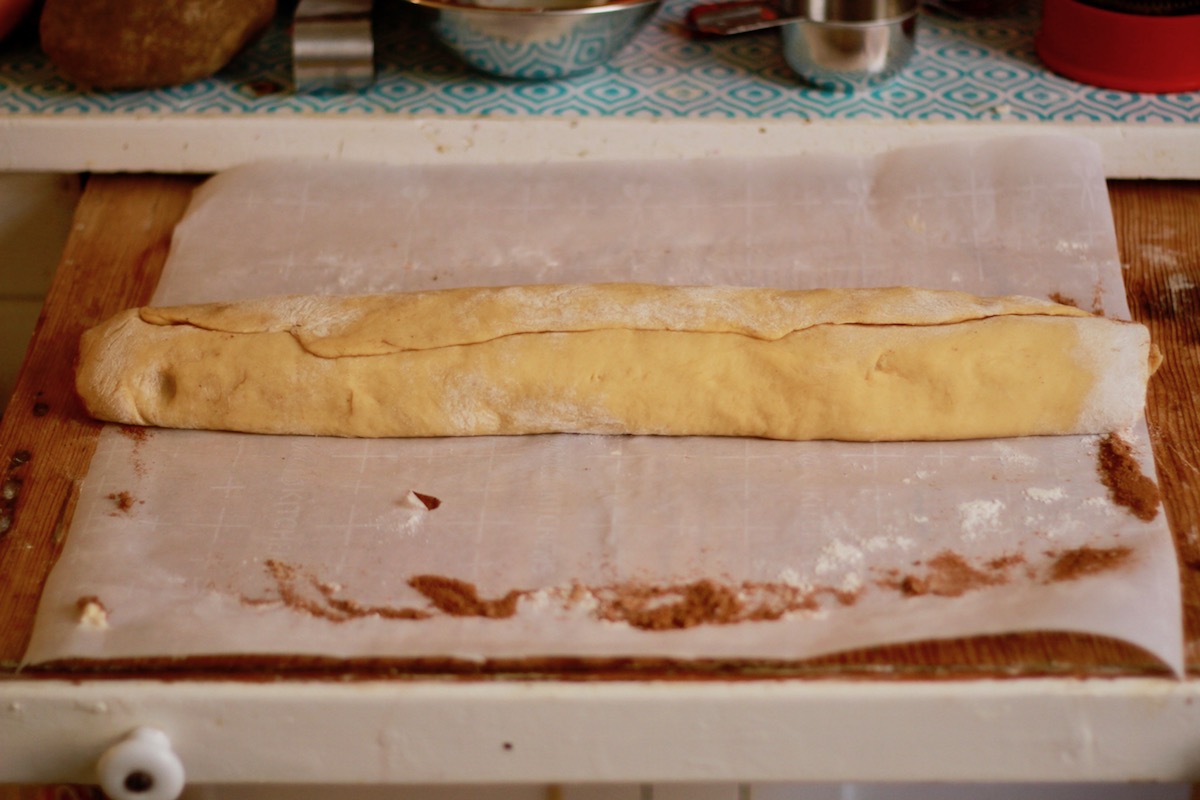
8. Use your fingers to very lightly wet the strip of dough that was left bare with water to help it stick when you roll up the dough. Now its time to roll! Start from the long edge of the dough that DOES have butter and cinnamon sugar on it, and roll the dough tightly into a log. When you get to the end, press the wet dough edge into the bottom of the roll to seal.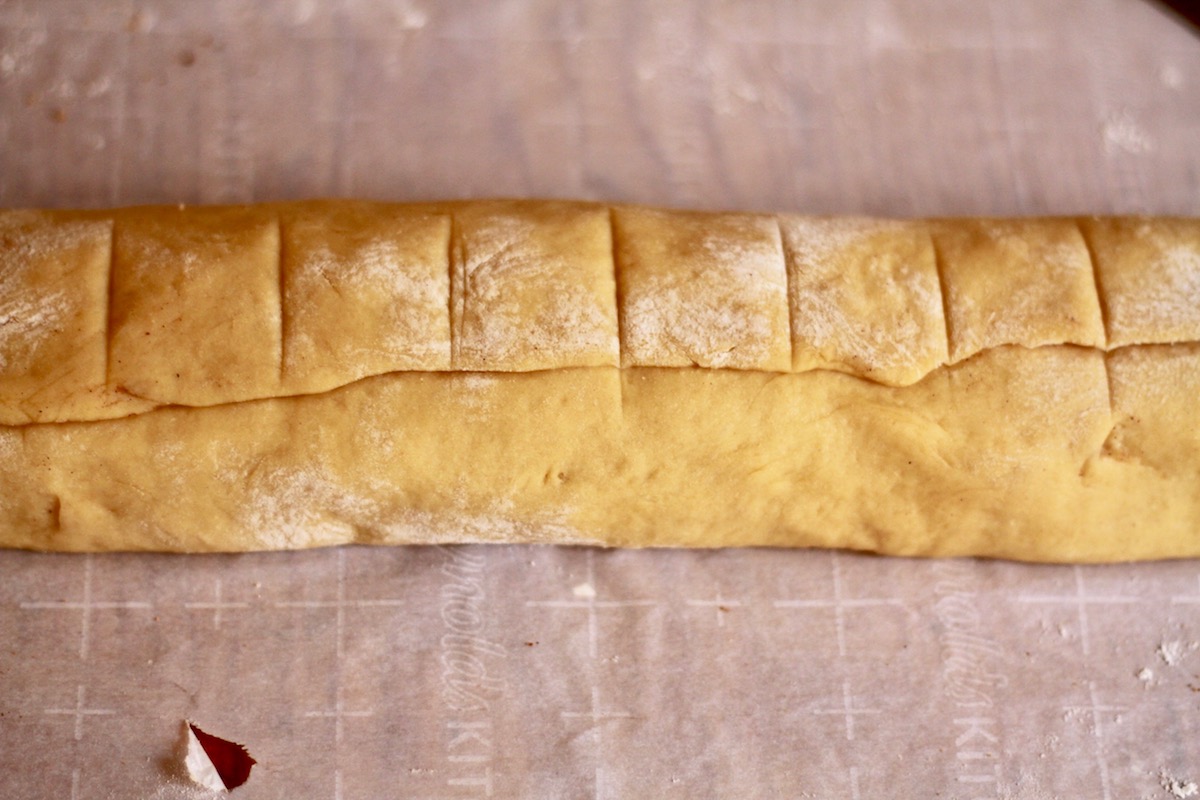
9. Cut out the rolls! It’s a very smart idea to make small indentations in the dough with your knife before cutting to ensure that you’re going to have 12 even rolls. There may be a small bit of dough left over on either end after measuring your 12. 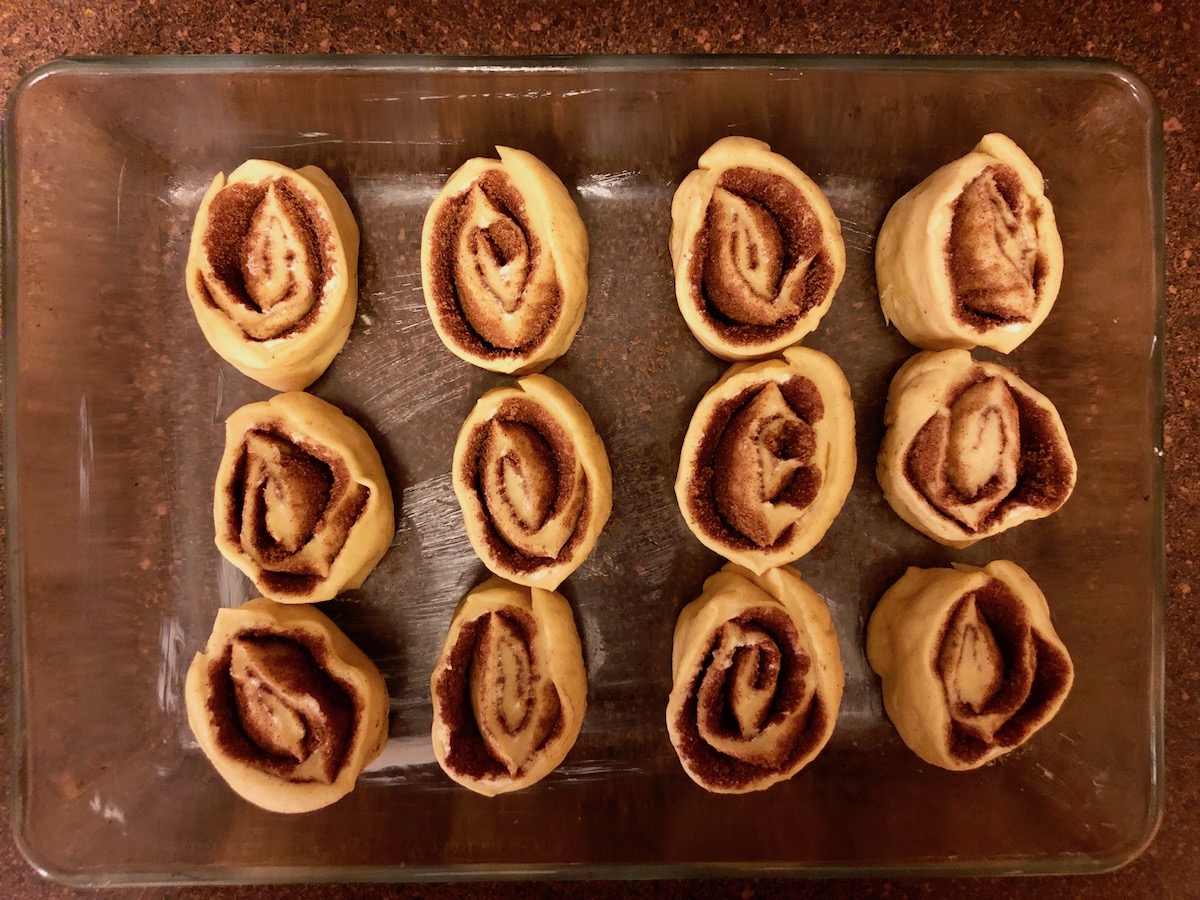
10. Now that you’ve most definitely done the smart thing and measured BEFORE cutting, go ahead and cut out your rolls! Use the sharpest non-serrated knife you have and be sure to press straight down through the dough (not sawing the knife back and forth like you would with bread) to cut out your rolls, flouring the knife as you go to prevent sticking. If you’re completely covered in flour by this point you’re doing it right. Delicious messes are the best messes!
11. Place the rolls in your buttered baking dish, cover with plastic wrap and allow to rise for 30minutes before placing in the fridge overnight or for up to two days before baking. These are so, so, so much better if you have time to let them rest so I really truly hope you’ll take the slow road, but If you’re really in a rush you can just let them rise at room temp for 30 more minutes before baking. If you do refrigerate them overnight, take them out of the fridge at least 30 minutes before you’re ready to bake them in the morning. 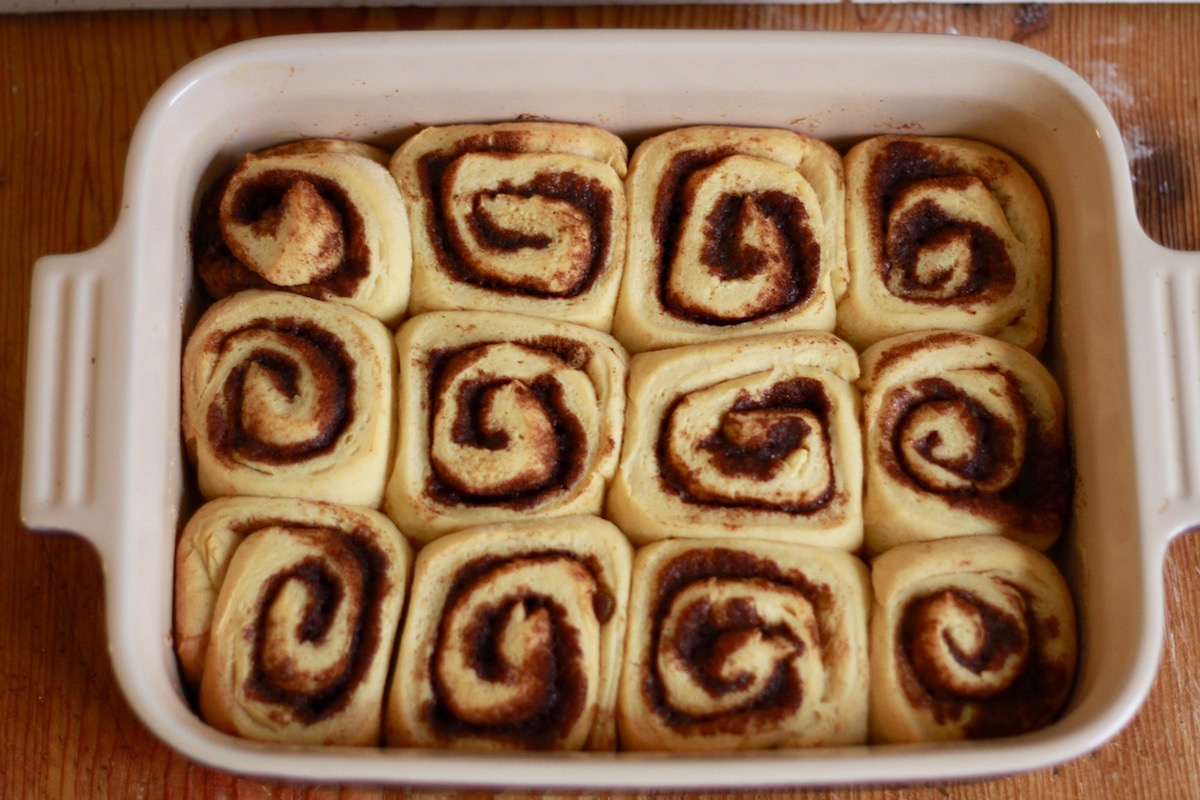
12. When you’re ready to bake, preheat the oven to 350° F and bake for 25-35 minutes. I like my rolls a little soft so I take them out at 25 but if you like them more firm and browned go for 30-35 minutes.
13. Meanwhile, make the glaze! Grab a bowl, add the eggnog and powdered sugar to it and whisk together until smooth and all the sugar is fully incorporated. 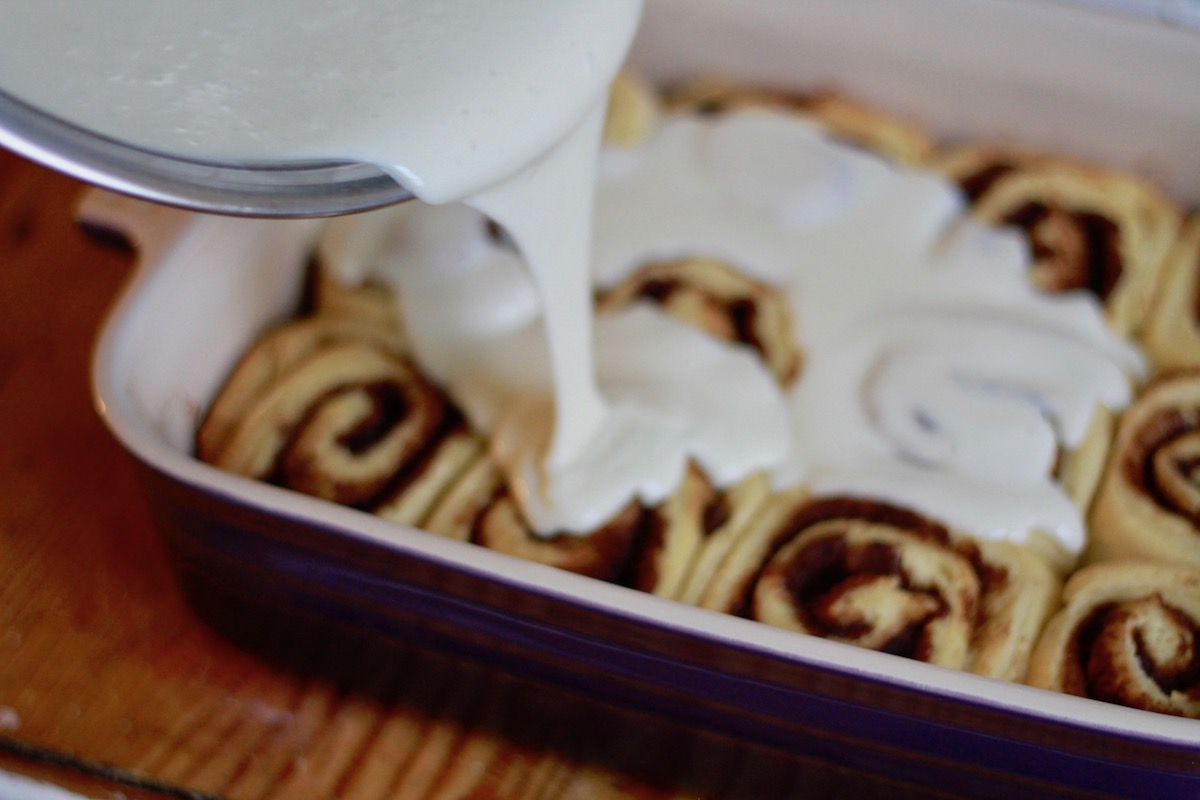
14. When the rolls are ready, take them out of the oven and place the baking dish on a cooling rack. Allow to cool for 10 minutes then pour the glaze on top while they’re still warm so it soaks in and drips deliciously into all the cracks. Hopefully you’ll be drooling by this point which is perfect cause it’s finally time to eat. 
15. Serve up those rolls while they’re still warm and shimmering with glaze, and think of how worth the wait wait they were with every bite.

I have a bottle of Evan Williams Egg Nog that I’ve been saving for this exact moment.
Reneice is the chef of my heart
I do hope you write a cookbook one day! I love your recipes and your recipe writing style and would absoloutly love to have a cookbook by you on my shelf. If that’s the direction life takes you, know you’ve got my hypothetical pre-order.
I made egg nog for the first time this year and this is such the perfect reason (not that I need a reason!) to make it again.
Reneice I don’t actually like baking I just like luxurating in these posts :)
How could you betray your origins that way
comment award to @chandra, @queergirl
I solemnly swear I will buy at least 3 copies of your cookbook! I have at least 3 ppl I love who like to bake!!
This column will be the death of me. But at least it will be the sweetest death
Reneice you have outdone yourself with your sensual, evocative prose.
I feel like these cinnamon rolls have achieved consciousness and are so glad to be alive, knowing that to be devoured by their creator is to enter everlasting bliss.
Can I take a whole cookbook like this ? YES, please.
Now I want to make Eggnog Cinnamon Rolls even though it’s summer here and we’re suffering through a heatwave!
The day before you posted this I made cinnamon rolls for the first time. My recipe told me roll the dough out to 15×12, I had to get a tape measure xD
A pre-marked sheet of parchment paper seems like a MUCH better idea and especially for people reading this column who haven’t worked with a yeasted dough before.
I made these this weekend (Friday night: homemade eggnog, Saturday: rolls, Sunday morning: baking + icing) and they are delicious! My boyfriend and I ate like six of them in one day (in our defense, they make a great snack post-cross country skiing). The eggnog flavor is pretty subtle in mine, tbh, which is okay because they taste like cinnamon rolls (which I love!) with some extra nutmeg flavor.
One of my unofficial goals of 2019 is to get more comfortable with yeasted breads (I love to bake but bread makes me nervous!), and this plus the chocolate cinnamon pecan babka recipe on The Toast plus the pizza recipe in Ruby Tandoh’s cookbook have all raised my confidence immensely.