Ever since I was little I’ve loved making “lotion potions.” My cousin and I would hunt through my grandma’s drawers, pulling out every hotel-sized lotion, soap and shampoo we could find. We’d grate the soap, mix up the lotions and sometimes even add a spritz of my grandma’s perfume – Eternity, which my grandpa still buys for her every year on her birthday – to make our creations smell good. Now that I’m all grown up (and have my own drawers full of stuff), I still love mixing up potions. There’s just something magic about taking whatever I can find and turning it into something that can clean, heal or beautify.
Soap is no exception. I started making my own soap last year for Christmas. It seemed easy enough and I wanted to give my brothers shaving brushes and soap. I ended up with 15 extra bars that I gave to my grandmas. They loved how soft it made their hands and so I, being the queen of dry skin all winter long, started making it for myself. Since I started making soap for myself, I’ve been learning a whole lot about the science and history of soap. On that note, let’s take a minute or ten to nerd out together.
For the sciency folk…
Soap is the metallic salt of a fatty acid. What in the world does that mean? Well, in chemistry, salt isn’t just the white stuff that always hangs with the pepper, it’s any product that comes from neutralizing an acid and a base. Let’s take kitchen salt (sodium chloride) as an example. When you combine hydrochloric acid (HCl) with sodium hydroxide (NaOH), you get sodium chloride (NaCl) and water.
HCl + NaOH –> NaCl + H2O
This is particularly cool because hydrochloric acid is crazy acidic (it’s the stuff that your stomach uses to break down food) and sodium hydroxide is suuuuper alkaline (remember the scene in Fight Club when Brad Pitt burns that ugly hole in Edward Norton’s hand? That’s lye AKA sodium hydroxide) which means achtung, baby! Put them together, though, and you get two completely safe and consumable substances.
Making soap – or saponification, if you’re savvy – is pretty much the same thing. Add lye to an oil and you get a salt that we call soap! More specifically, you combine a trigylceride with lye and end up with soap and gylcerine.
C3H5 COOR COOR COOR + 3 NaOH + (H2O) –> 3NaCOOR + C3H3 OH OH OH
You already know what lye is, but what about triglycerides? As it turns out, all the oils we’re familiar with are different types of triglycerides. If you look at the formula for triglyceride, you’ll notice there are some R’s up in there. Those R’s stand for fatty acid radicals, three of which are combined to create a single type of oil. Olive oil, for example, is made up of two oleic acid radicals and one palmitic acid radical. Because of their chemical makeup, different oils and fats have specific properties that can be helpful or harmful in soap making. We’ll talk more about this when we get to the recipe.
The glycerin that’s a byproduct of the reaction is one of the best reasons to make your own soap. Glycerin is a humectant (a thing that keeps moist things moist) and makes your skin soft and moisturized. Often, store-bought soaps have been stripped of most of their glycerin, which is then sold to be used in more expensive bath products.
Now that you know how soap is made, let’s take a closer look at how it gets you clean. Here’s a soap molecule:
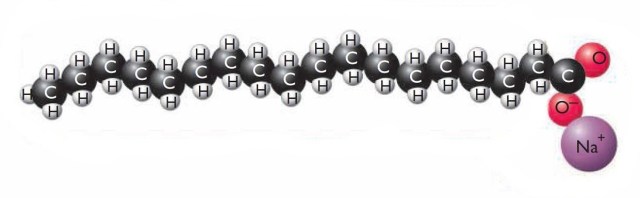
lalalalalalalala I’m a triglyceride molecule!
Can you figure out why it works? Hop in the high school time machine with me and think back to chemistry. Remember this?
m-i-c-k-e-y-m-o-u-s-e
It’s a water molecule and it’s polar because it looks like Mickey Mouse. The big oxygen atom hangs on to the electrons more often than the tiny little hydrogen atoms, making the O part of the molecule partially negatively charged and the H parts partially positively charged.
Let’s stay in Chem for a little longer; remember “likes dissolve likes”? As it turns out, this rule is the reason that we can get clean. That big long tail on the soap molecule is definitely not polar. It’s a fat and it just wants to chill with all the other non-polar fats. Luckily, non-polar fats are exactly what the gunk on your skin is made out of! When it finds one, it grabs on for dear life. Actually, all the fatty tails of the soap molecules grab on because they love non-polar stuff, forming a ball called a micelle. This particular micelle (my belle, these are words that go together well) has a non-charged inside and a polar surface made up of the polar heads of the molecules. The outside of micelle latches onto water and carries the dirt down the drain.
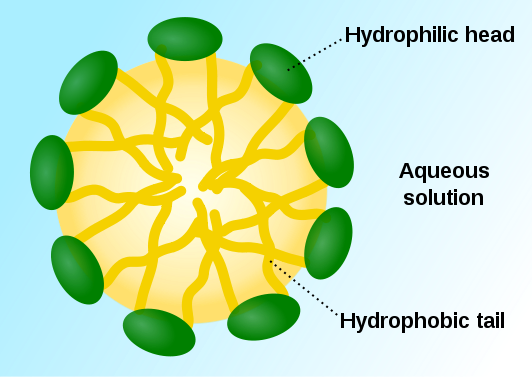
Here’s a micelle
For more reading on saponification, check out what happens in fire extinguishers, oil paintings and corpses.
If you’re inclined to literature and history…
Many many years ago, there was a mountain near Rome called Mount Sapo. In honor of the goddess Athena, the people from neighboring towns would carry goats and sheep to the top of the hill and burn them atop a sacrificial fire. As the animal fat melted and mixed with the alkaline ash, soap formed and was later carried to the stream below by rain. The women in the towns did their laundry in this stream, finding that their clothes got cleaner at Mount Sapo than anywhere else.
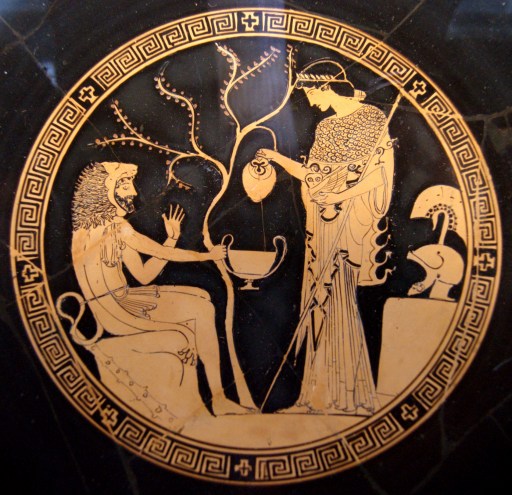
Athena and Heracles
Okay, so that’s probably not true, but it’s a good story, isn’t it? For one, Romans didn’t leave the fatty parts behind during burnt offerings; they took that with them to eat. Besides, the story doesn’t show up anywhere in mythology and no one can remember a Mount Sapo ever existing in the city of seven hills.
The real etymology of soap is still pretty fascinating if language is your cup of tea. The English word “soap” comes from Old English “sape” which comes from West Germanic “*siapo” (meaning dripping thing or resin) which comes from the Proto-Indo-European root “*seib” (meaning to pour out, drip, or trickle). These roots – all the way back to the Proto-Indo-Europeans – refer to soap’s creation using fats and oils.
The (pre-)history of soap makes it all the more bizarre that Europe was plagued with unclean habits for most of the last two centuries. Soap making guilds didn’t arise until the 7th century in Naples. Around the same time, chemists in the Arab world were making soaps with vegetable oils. Soap making really took off in France and Italy in 1200, but it wasn’t until 1600 that vegetable oil soaps started showing up on the continent.
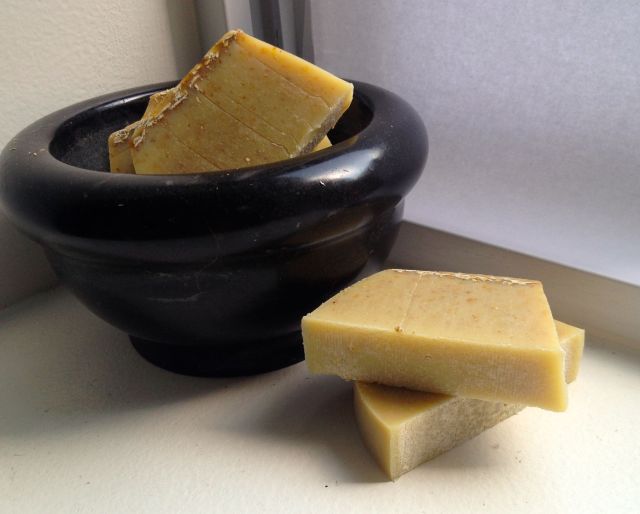
Oatmeal and Lavender Soap
Recipe inspired by The Nerdy Farm Wife and Small Notebook.
Ingredients
5.5 oz of coconut oil – Coconut oil gives your soap moisture, big bubbles and a harder bar. I buy mine at Trader Joe’s or Costco, but it’s pretty trendy right now so you can find it just about anywhere.
8 oz of olive oil – Olive oil gives a dense creamy lather and a soft bar.
4 oz of water – Water is used to dissolve the lye. It will evaporate as the bar sets.
1.97 oz of lye – You already know what lye does, but you might not know where to buy it. Check the drain-unclogging chemicals sold at at Lowe’s or Home Depot. As long as it’s 100% sodium hydroxide, you’re good to go.
1/4 t of honey – Honey is a natural humectant and will keep your skin soft. It won’t dissolve into your soap, so don’t add too much or you’ll end up with honey bubbles and oozy soap.
5 drops of lavender essential oil – Lavender oil is calming and helps keep itching from dry skin at a minimum.
1 t of shea butter – Shea butter is incredibly moisturizing. If you don’t want to buy any, you can add a teaspoon of any oil or butter.
1 T of oats – Oatmeal soothes dry skin and scrubs off dead skin. Grind it up fine (I used my magic bullet because I’m fancy) so that it doesn’t clog your drains.
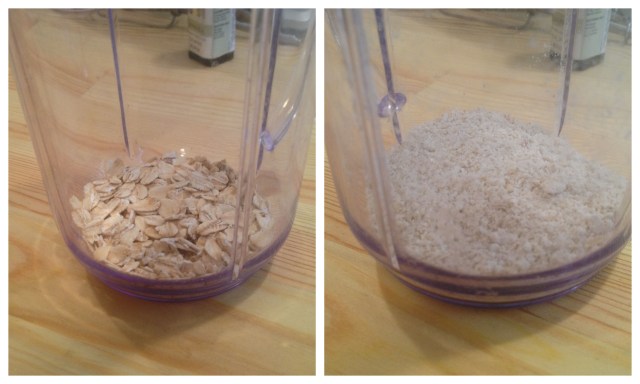
Pulverizing the oats to tiny bits
Other Equipment
An apron or old clothes
Non-latex gloves
Protective eyewear
Kitchen thermometer
Disposable container
Kitchen scale
Stick or hand-held mixer
Two stainless steel bowls
Mold for soap
Instructions
Let’s be real: soap making can be dangerous. You’re messing with a highly-corrosive substance and should avoid coming into contact with it. As long as you take normal precautions, though, it’s nothing to be afraid of. Open the windows while you mix the lye water. Don’t make soap while kids (or adults) or pets are running around and might bump something. Wear gloves and glasses and old clothes just so nothing accidentally touches you. Clean up with vinegar to neutralize any bits of lye afterwards. As long as you follow the instructions, there’s nothing to worry about and the world is your homemade soap oyster.
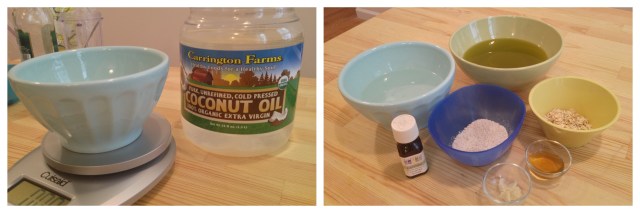
don’t forget to tare!
1. Soap making is all about the mise en place. Get all your materials out and measured before you even think about combining stuff. We measure everything by weight and not volume so that we’re sure we’ve got enough fat to react with the lye we’re adding in. First run your recipe through a lye calculator just to make sure you’ve got everything right. My favorite calculator is from The Sage and lets you easily make adjustments to recipes you find depending on what you’ve got in your cabinet. For example, most recipes call for palm oil (something I never have); I just substitute coconut oil for palm oil and plug in my values to a calculator and I’m good to go. I go for 5-6% excess fat so that my resulting bars are nice and moisturizing without being too oily. Pick whatever value you’d like as long as you stay within the green range on the chart.
When you measure the lye, make sure you’re using either a disposable container or a container that you only every plan to use for lye.
If you’re using a mold that isn’t easily removable, you’ll want to prepare it by lining it with saran wrap or parchment paper. I like to use silicon baking molds because they peel off, but you can use anything from capped PVC pipe to cake pans to cardboard boxes.
2. If your oils are solid, melt them in the big stainless steel bowl. When the oils reach 110°F, take them off the stove.
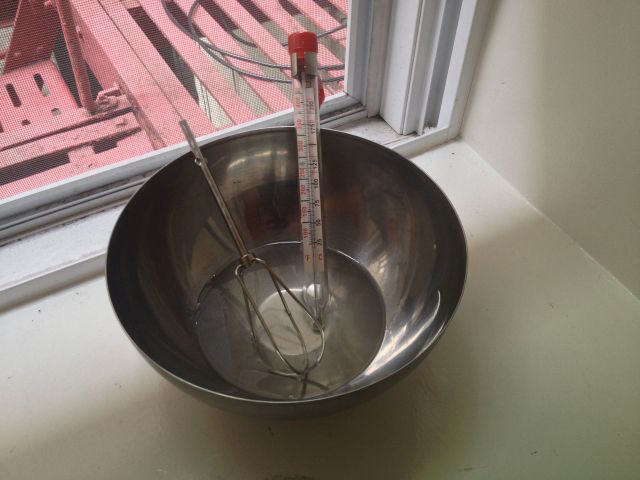
waiting for 110, the magic number
3. Pour your water into a stainless steel bowl. Pour the lye into the water. You always want to pour lye into other substances – and not the other way around – to avoid a “lye volcano.” The solution will heat up and give off fumes; try not to breath them in too much and wait until the solution cools down to 110°F.
4. Pour the lye water into the oils. Now it’s time to stir. You want to stir stir stir stir until the mixture reaches this mysterious and elusive phase called “trace.” Actually, it’s not that mysterious or elusive and it’s not a hard as people make it out to be. All trace means is that the lye water and the oils aren’t going to separate after they’re sitting for some time. With a stick or handheld blender, this usually takes about 10 minutes. You know you’re there when there’s a thin coating on the sides of the bowl and the blender. Trace will vary with different oils, but when you’re making a soap with a high olive-oil content, trace it going to look a lot thinner than cake batter.
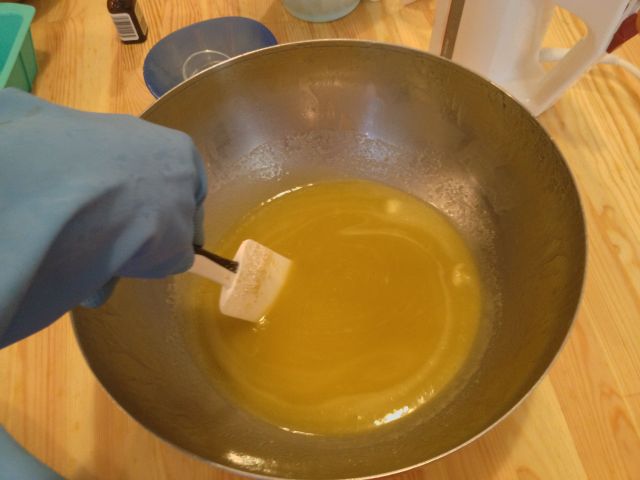
not quite to trace…
5. When the soap has reached trace, you want to add your shea butter, honey, lavender oil and oatmeal. Stir it all in and then pour it into your mold. Go ahead, sprinkle some whole oatmeal on top if you want.
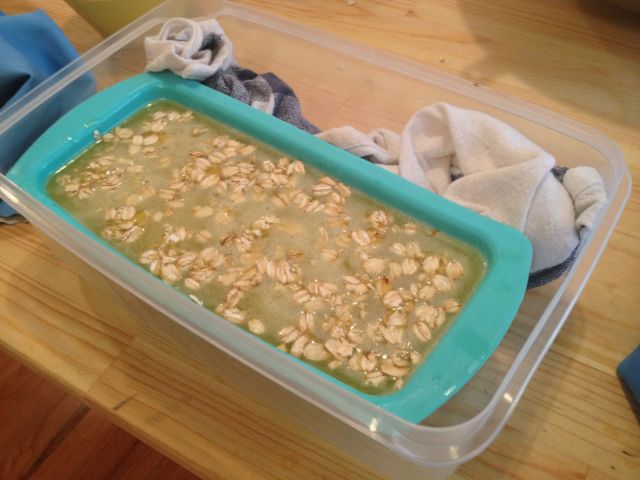
if you’re using a silicone mold, you can support it with an extra towel
6. Place the mold in a box (cardboard or otherwise) and wrap it in a towel to set overnight. Don’t seal the lid if it’s plastic! The box and towel insulate the soap à la mother hen while it’s curing. If you get cold, put the whole fandango on your lap; it’ll keep you warm!
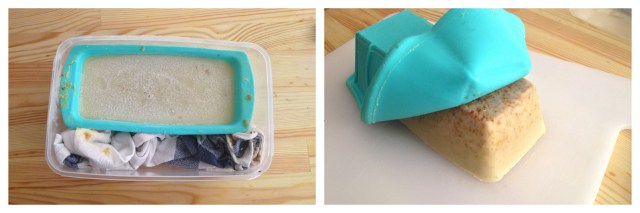
the next morning!
7. The next day, remove the soap from the mold. It should be set but still soft, so now’s the time to slice!
8. Place the bars back in the box (again, not sealing it if it’s plastic!) and let it sit for a whole month. I know, the wait’s hard. I write the date I made the soap and the date it’ll be ready on a label so that I’m not tempted to use it too early. During this time, the water we used to dissolve the lye will evaporate so the bar gets harder and any leftover lye will saponify so that the soap is safe to use.
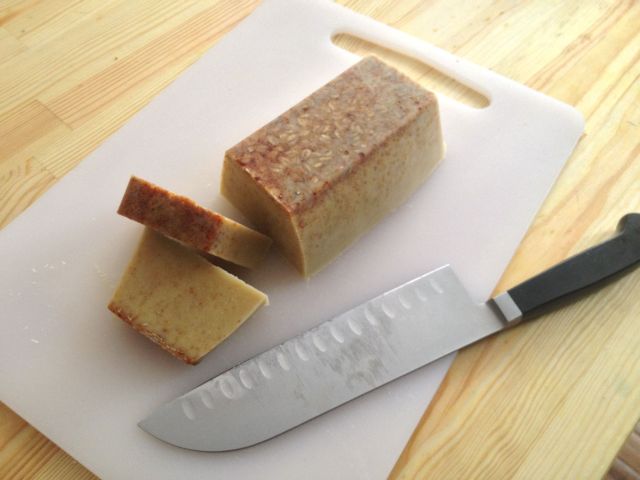
smooth like butta
Before using your soap, you should test to make sure it’s safe to use. Many soap-makers recommend the tongue test (stick your tongue on the soap and see if it zaps you). Considering that most of y’all probably consider your tongue one of your primary sex organs, I do not. You can buy phenolphthalein indicator solution for about $3 at a pool store or a winemaker’s store and it’ll do the same thing.
Once you’ve mixed, waited and tested, you’re ready to go! Happy showers.

I love making my own soaps and shampoos! They are so much better than the chemical-laden detergents you get commercially. They are much better for your skin and hair, too. Mougasoap.etsy.com
this makes me so excited! i love everything about handmade bar soap. i just wish i went through more soap so i could use different soaps! could we please have a shampoo bar version?
I’ve never made my own shampoo bar, but if I do I’ll definitely put it up here. I’m thinking about making them for christmas for my little brothers in college, so keep your eyes open.
I am new to soap making but I am hooked and have already made several batches for myself, friends and family. I am allergic to just about everything (I take allergy shots twice a week) and I wanted a soap that could deal with sensitive skin that didn’t cost a kidney to purchase. I started researching online for products and came across a blog about making your own soap. Since I love making things I said why not – and boy was I surprised at how easy it was to make a bar of soap specifically designed for me. I am still learning, but I suggest everyone try this. Awesome!!
This is awesome and I would love to give it a try, but I have two questions. I’m allergic to coconut oil, is there an alternative that I can use? I exfoliate every now and then with a sea salt scrub and I use lemon and vanilla essential oils can i use this instead of lavender?
Yes! Palm oil is similar to coconut oil in that it’s also very cleansing and creates bubbles. Give it a shot! And any essential oils are fine. The only thing I’d let you know is that citrus essential oils are phototoxic which means if you leave them on your skin, they’ll make you burn in the sun. As long as you wash the soap off well, you’ll be fine!
I would make sure to use only distilled water in homemade soap/lotion/what have you. Tap water can cause mold to grow if you’re not careful.
Thanks for this recipe, I’m adding it to the list of things I want to make for Christmas presents.
Definitely! Thanks for the reminder.
eee I’ve always wanted to make soap, but I think the process will be imbued with too much delayed gratification for me to deal with.
I feel you. I make soap on the same day that I’m making chapstick so that I have something to use right away.
Autostraddle! How did you know I’m too poor to buy all of my loved ones Christmas/ Hanukkah gifts! Soap for everyone!
My skin is picky, making my own soap has just become a reality because of your article. Thanks for the science behind it that most soap recipes do not include. It is the last puzzle piece I needed. Super excited!
Yay! If you want more information, I’ve started a little soap oil journal (on a website that’s totally under construction) so that I know what I’m using. http://lavenderforluck.wordpress.com/soap-making-lipids/
This is fabulous!
i am so in love with how science-y this was.
nerds unite!
this is AWESOME. now i’m gonna make soaps for everyone for winter celebrations. and maybe start a soap business and sell it at the farmers market next summer if i end up being really good at it :)
You’re going to be the best at it, Petra!
It is a testament to how much I love soap & Laura that I read through all the chemistry of soap-making. I have chemistry PTSD, what can I say? Maybe one day I can get over it to MAKE ALL THE SOAPS.
I love you, Dena.
here’s my overdue thanks: because of this article, i’ve really gotten into soapmaking and i haven’t had to buy any soap since october. it’s become a regular part of my kitchen witchin’, and added bonus, i can sell some dope soap to my friends
*unbuttons trenchcoat* “psst hey buddy…wanna buy a bar?”
This is so cool! I’ve been selling it to my friends too! What types have you made so far?